MCP Server
Airtable MCP Server
Connect your Airtable data using Model Context Protocol.
Get Connected In Minutes
Bring Airtable into your automations with three quick steps.
Install the Airtable Integration
- Review the Airtable MCP documentation.
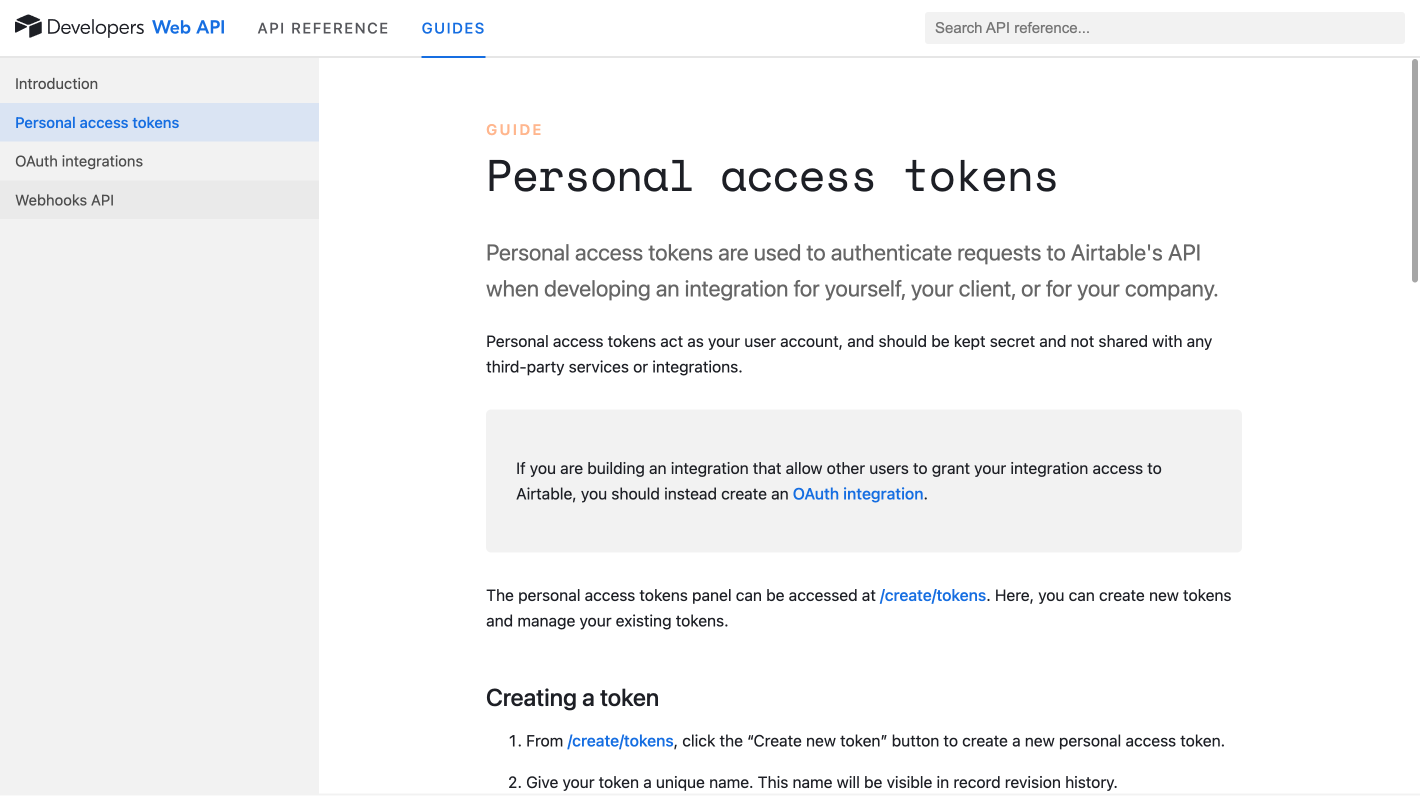
- Visit the Airtable Developer Hub and sign in to your account.
- Open Account Settings from the profile menu.
- In the Developer tab choose Personal access tokens.
- Create a new token, scope it for the bases you need, then copy it somewhere safe.
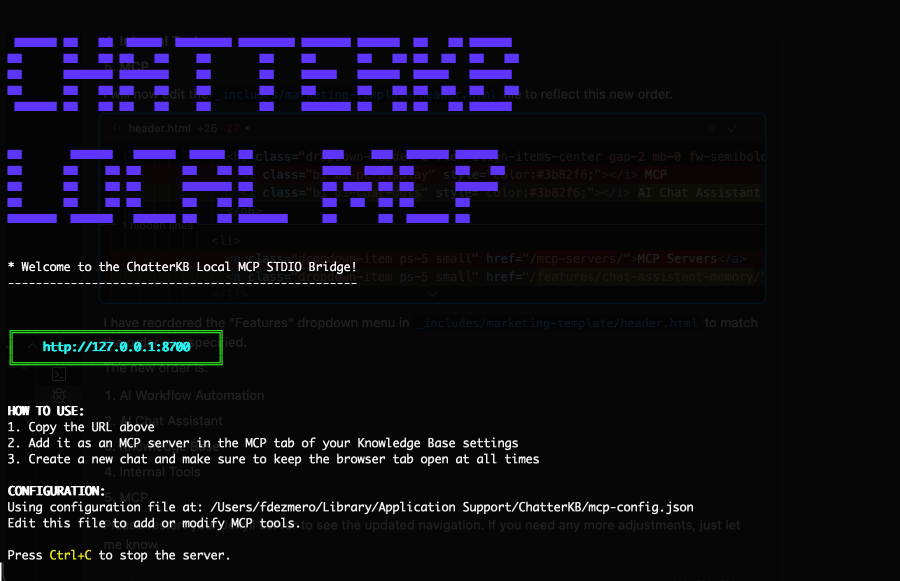
Update Your Local MCP Bridge
- Launch the Local MCP Bridge after installing it.
- Open
mcp-config.jsonin your editor of choice. - Add the Airtable server entry shown here.
- Replace
your_airtable_tokenwith the personal access token from step one. - Save the file and relaunch the bridge.
{
  "mcpServers": {
    "airtable": {
      "command": "npx",
      "args": ["-y", "airtable-mcp-server"],
      "env": {
        "AIRTABLE_API_KEY": "your_airtable_token"
      }
    }
  }
}Confirm the Connection
- Watch the Local MCP Bridge console to confirm Airtable loads successfully.
- Add the bridge inside ChatterKB so your workspace can reach it.
- Start querying tables, syncing data, or triggering automations with Airtable.
Connect Using MCP Today
Unlock powerful database insights through Airtable MCP integration.