Google Workspace
Connect your Google Drive, Docs, Sheets, Slides, Gmail, and Calendar using Model Context Protocol.
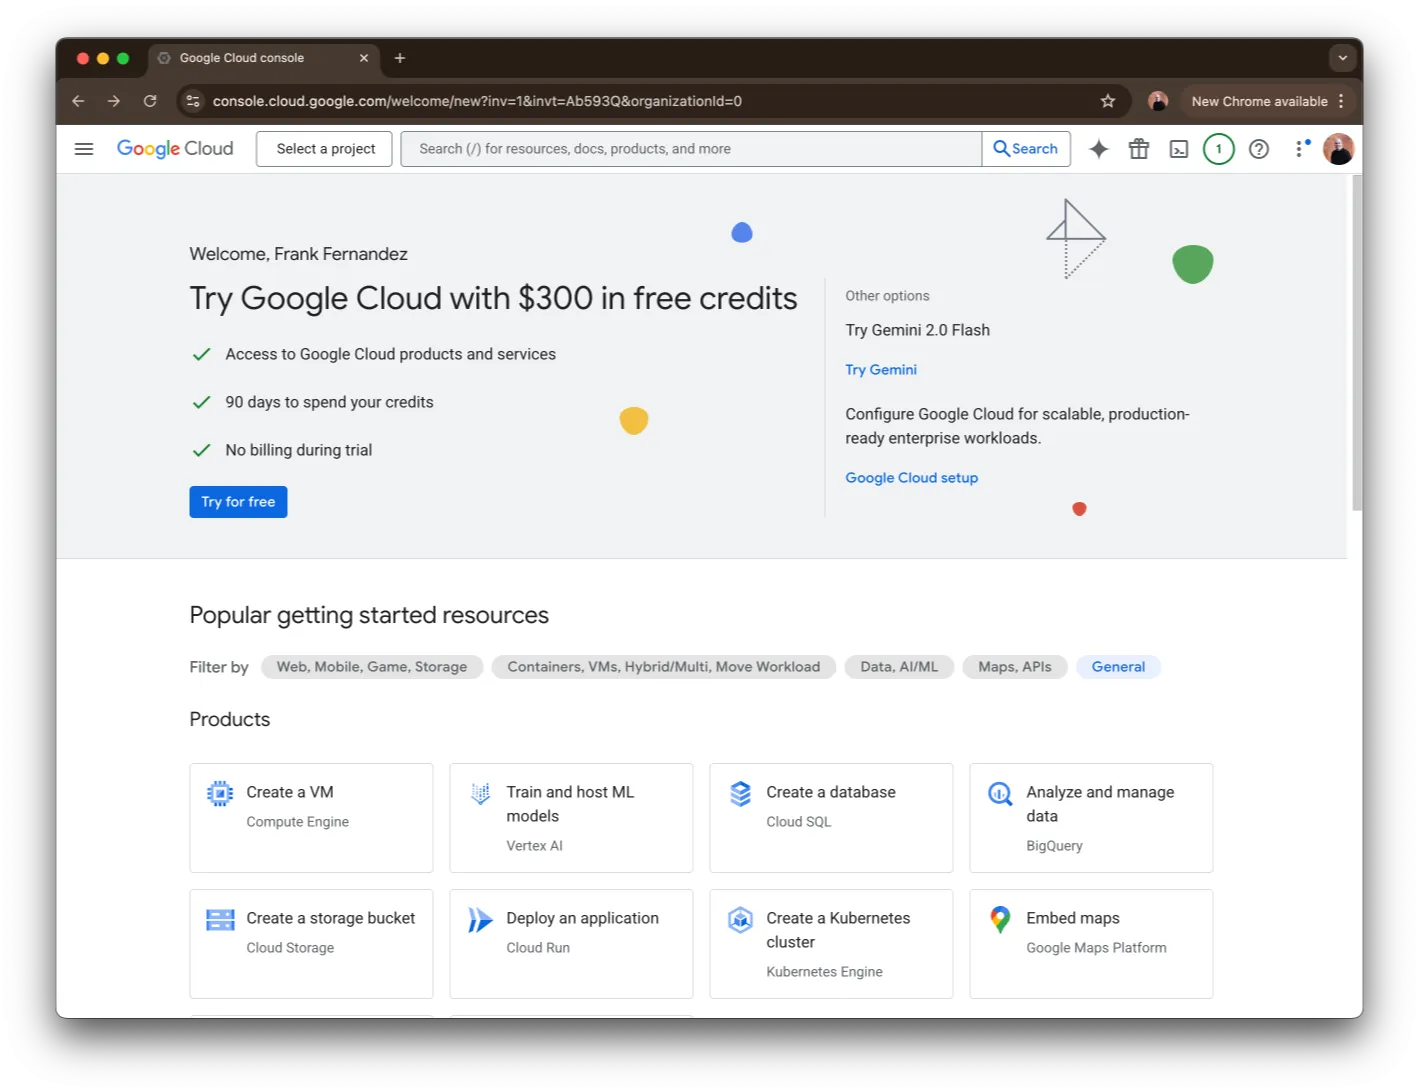
Step 2: Create a Project
Next, you’ll need to create a project in order to enable the APIs and create the credentials so that apps like ChatterKB can log in.
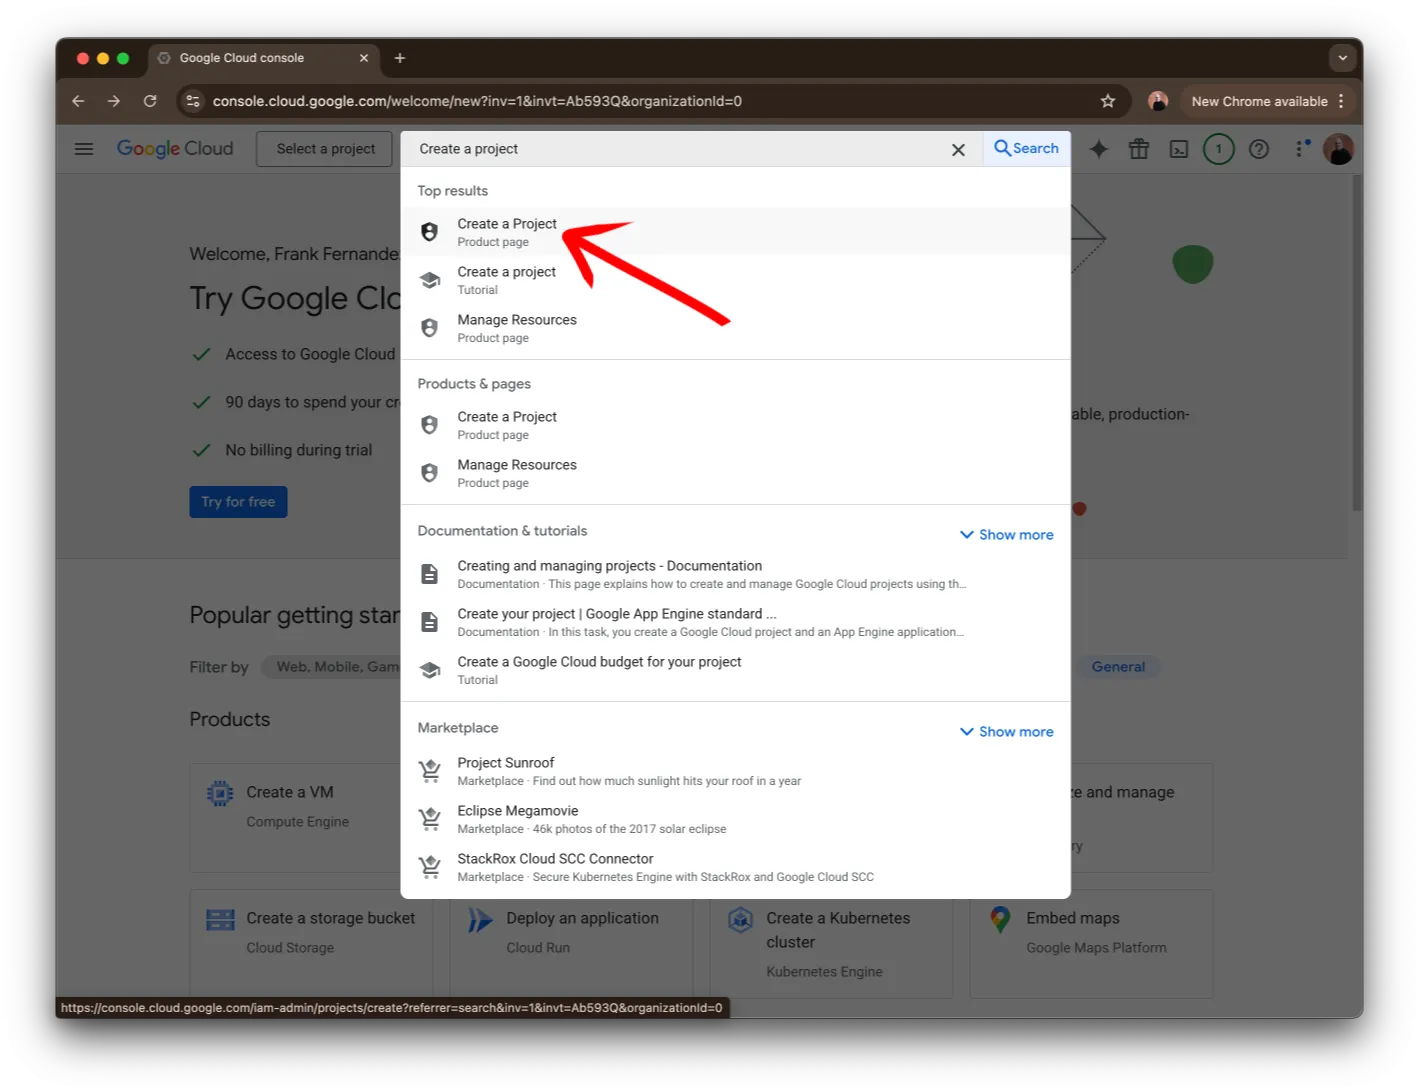
Type Create a project in the search bar at the top of the page. Click on the Create a project item in the list.
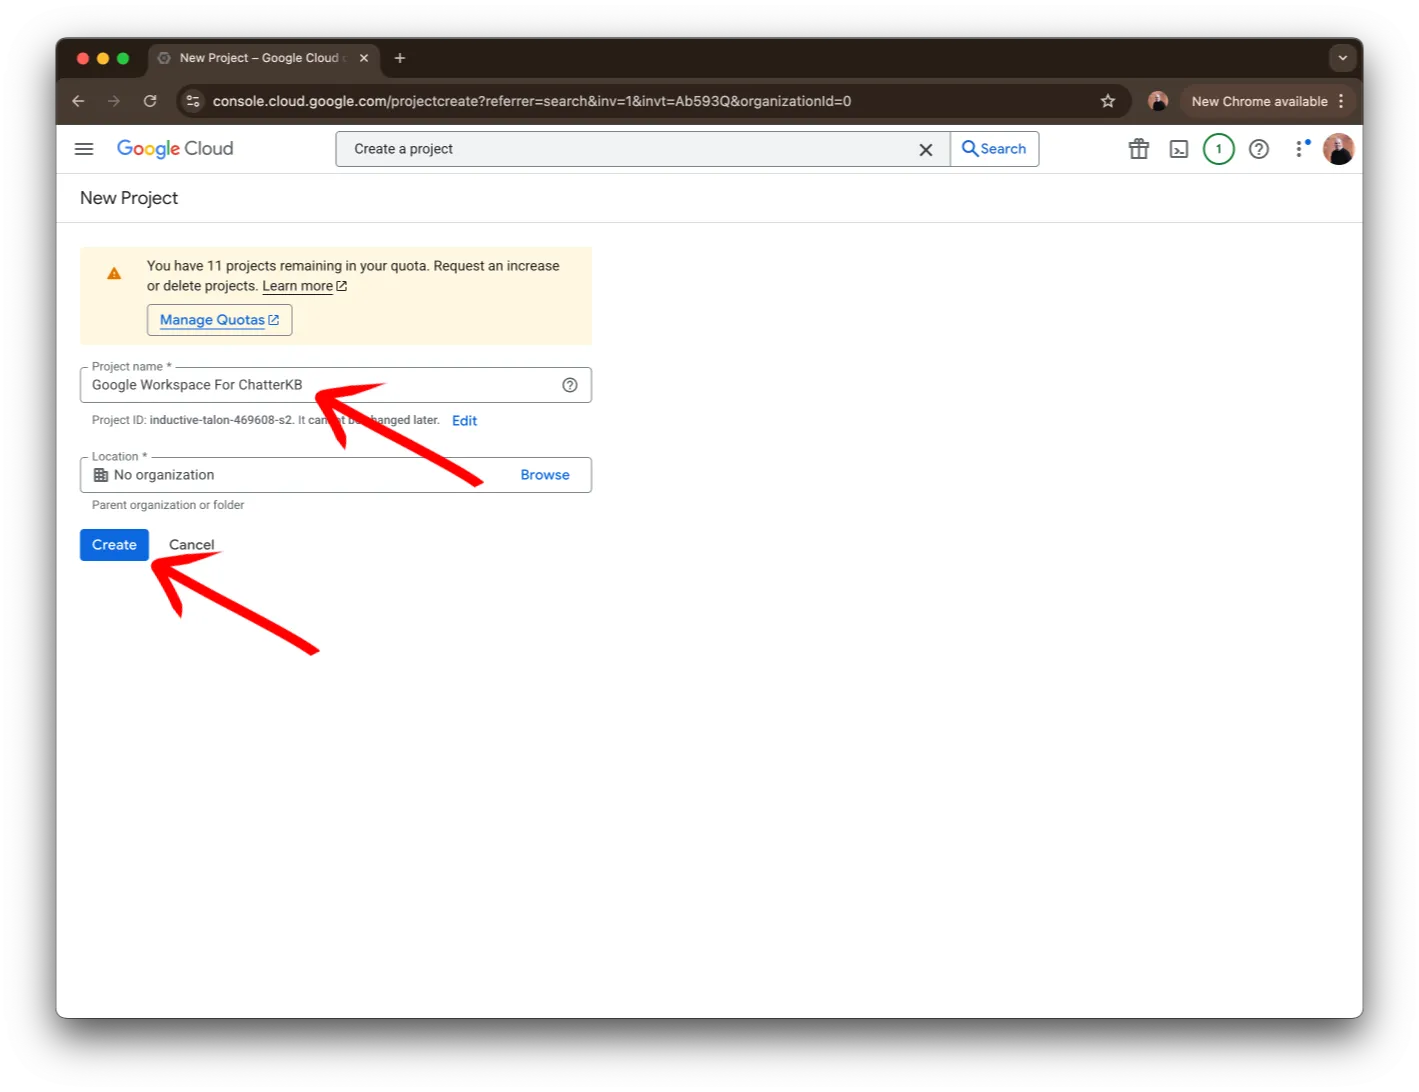
Choose a name and click on the Create button.
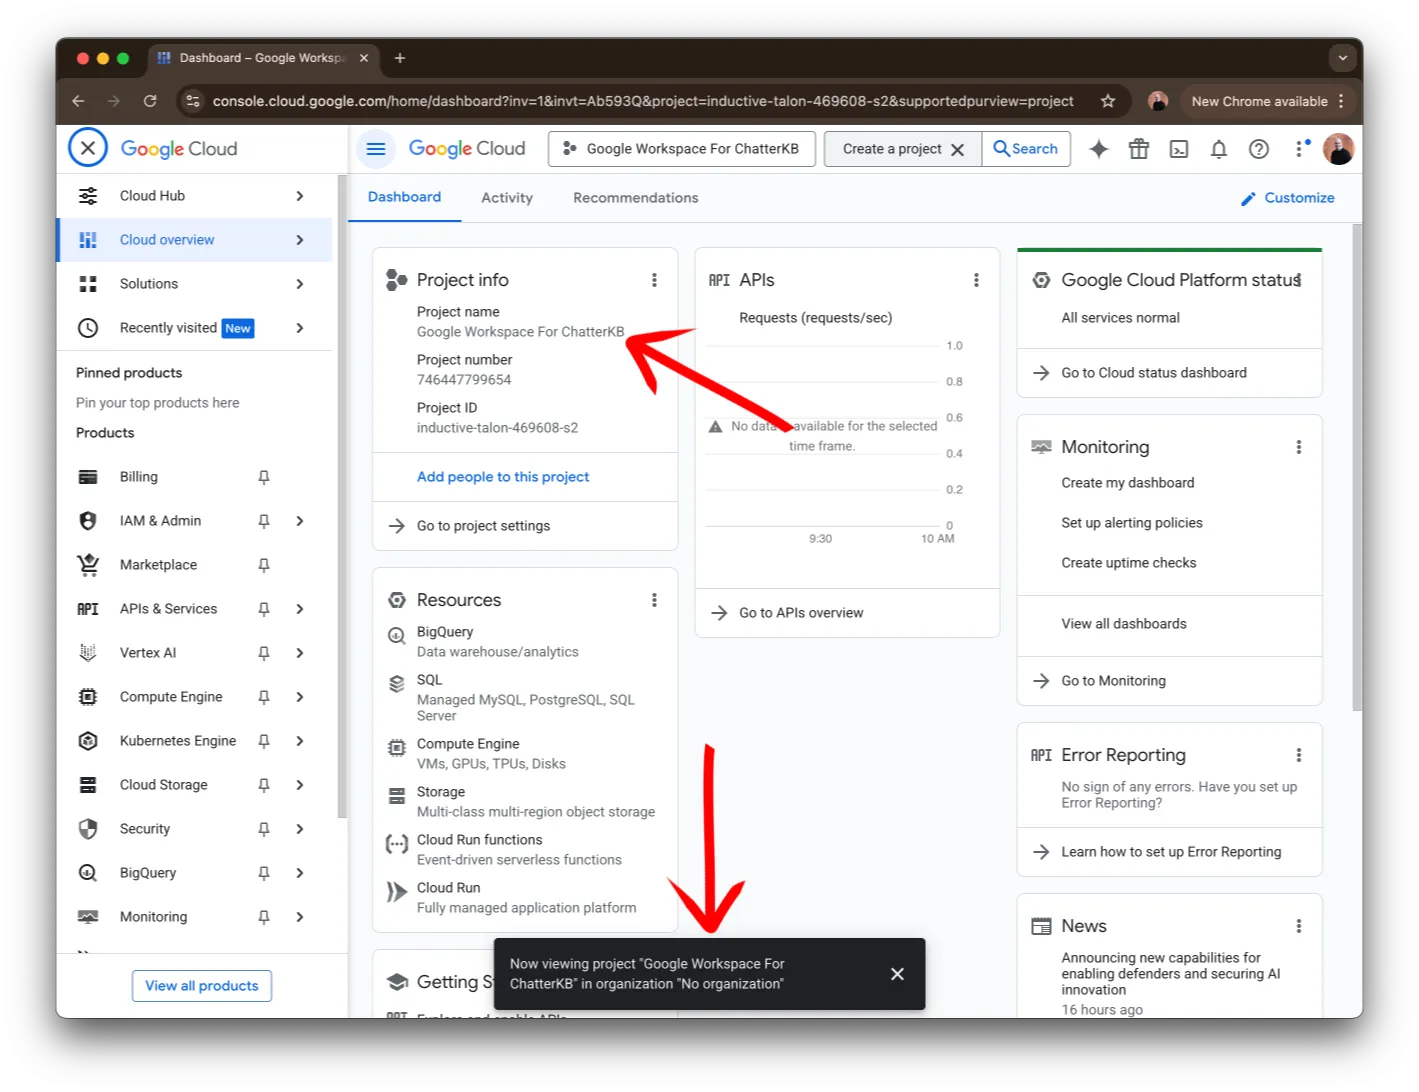
Once you see your project name in the Dashboard (as seen in this image) you’re ready to go!
Step 3: Enable the APIs
Next, let’s enable all of the APIs you would like to make available. Just follow the guide below, clicking the Next button to help you on your way.
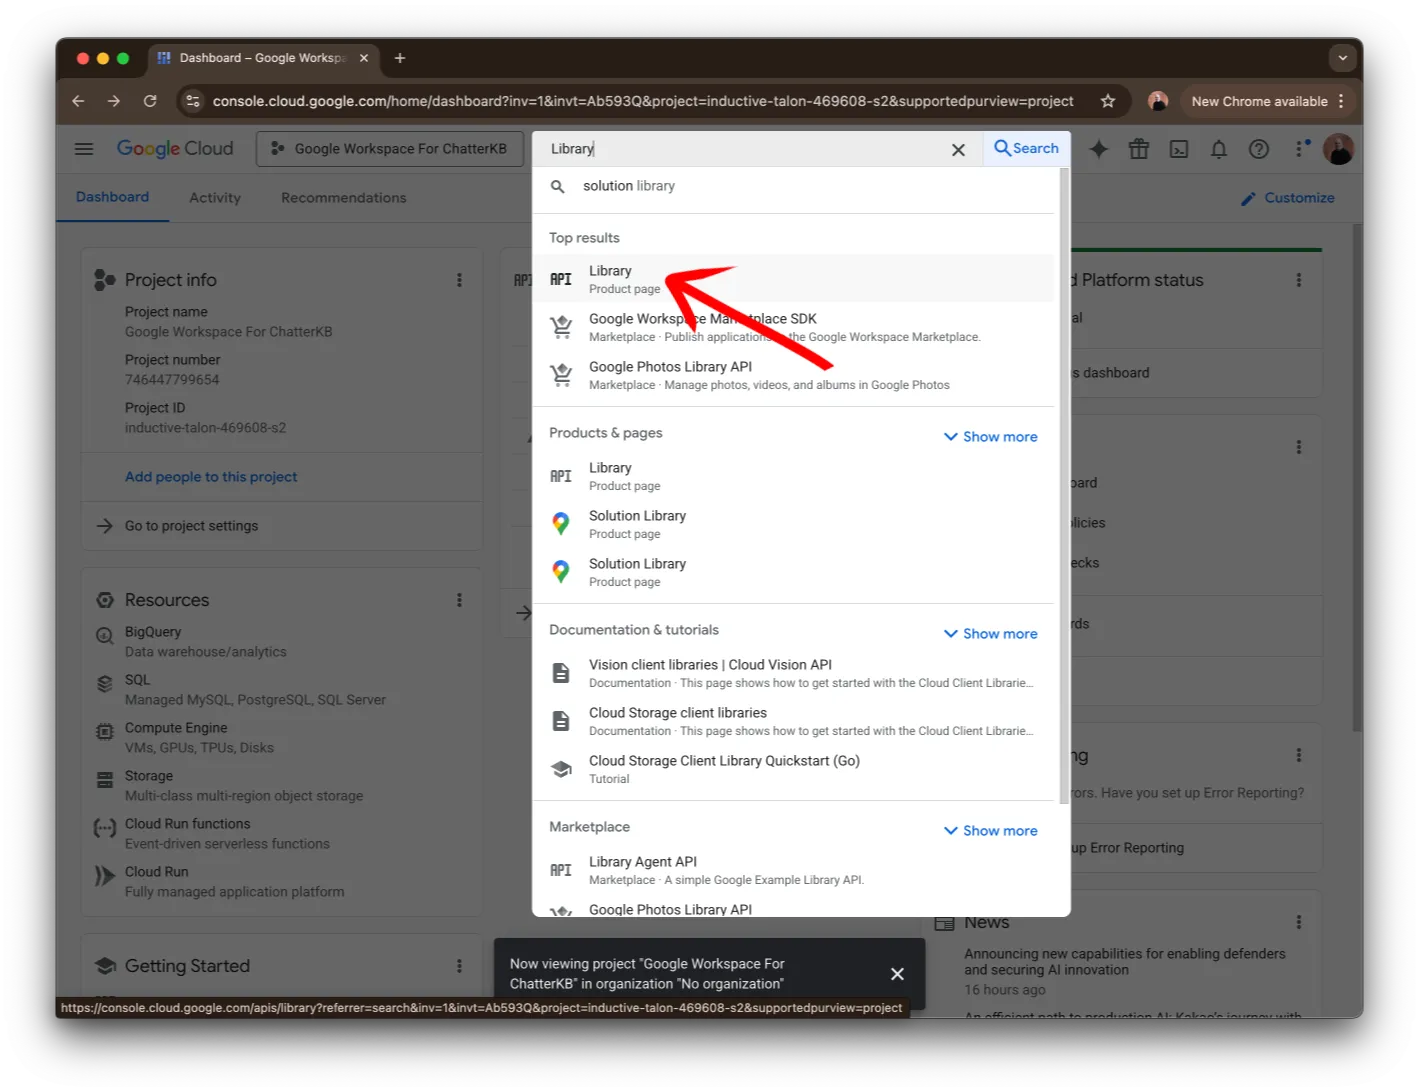
Type the word Library in the search bar at the top of the page. Click on the Library Product Page item in the list.

Next, search for Google Drive. You should see google drive api in the list below the search bar. Click on it to continue.
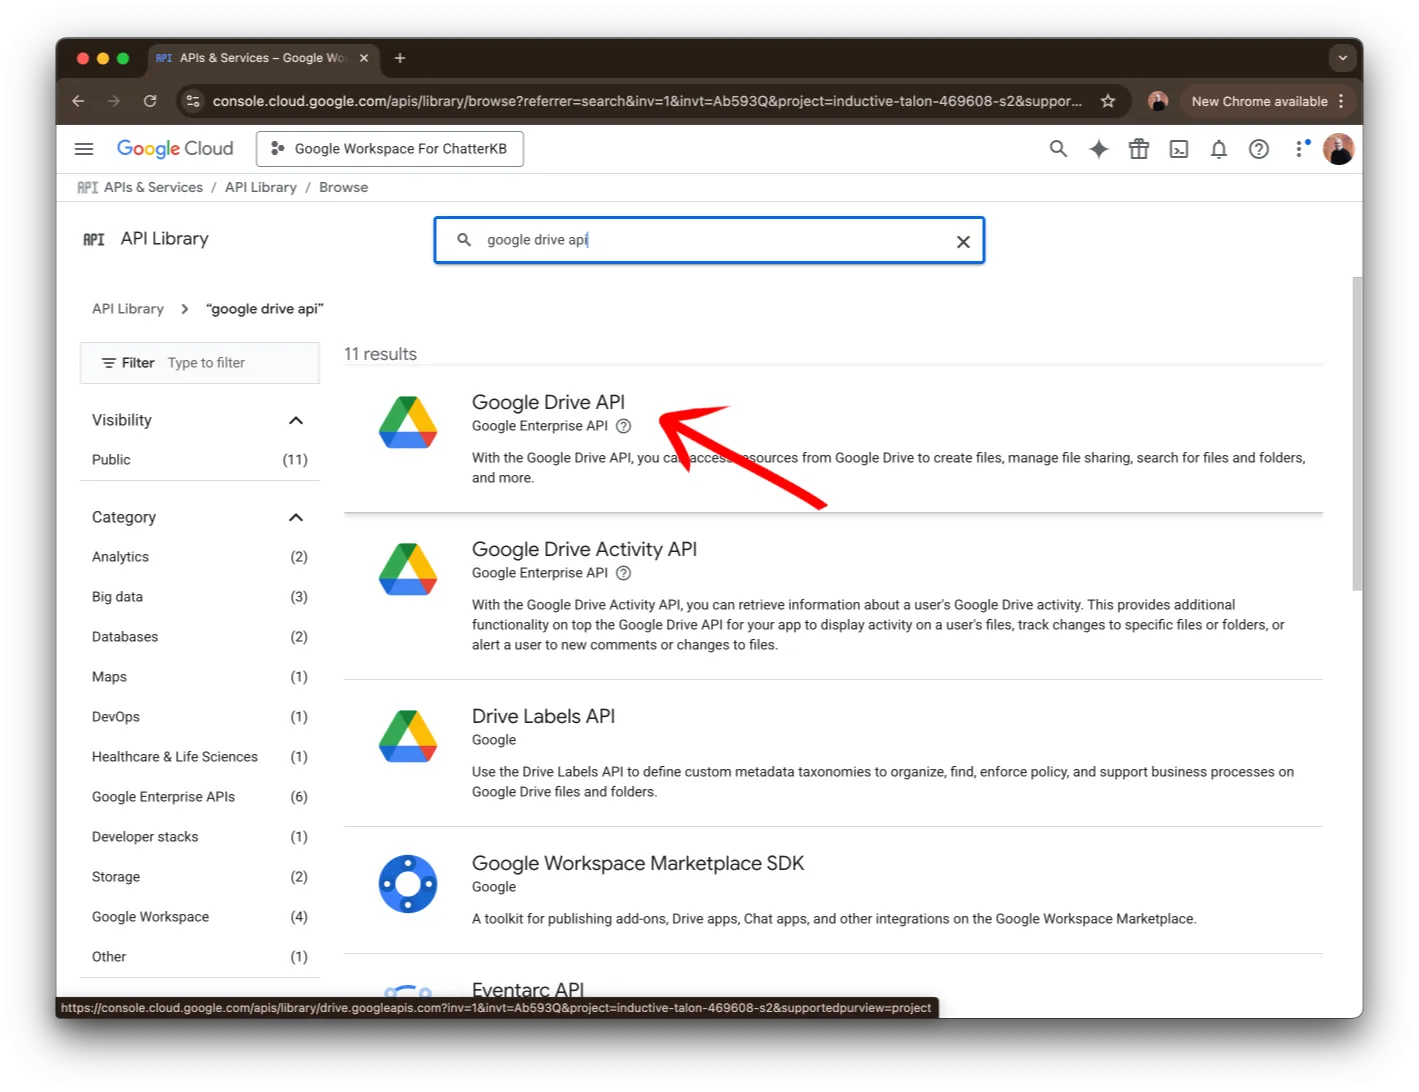
Then, click on the API shown in the image.
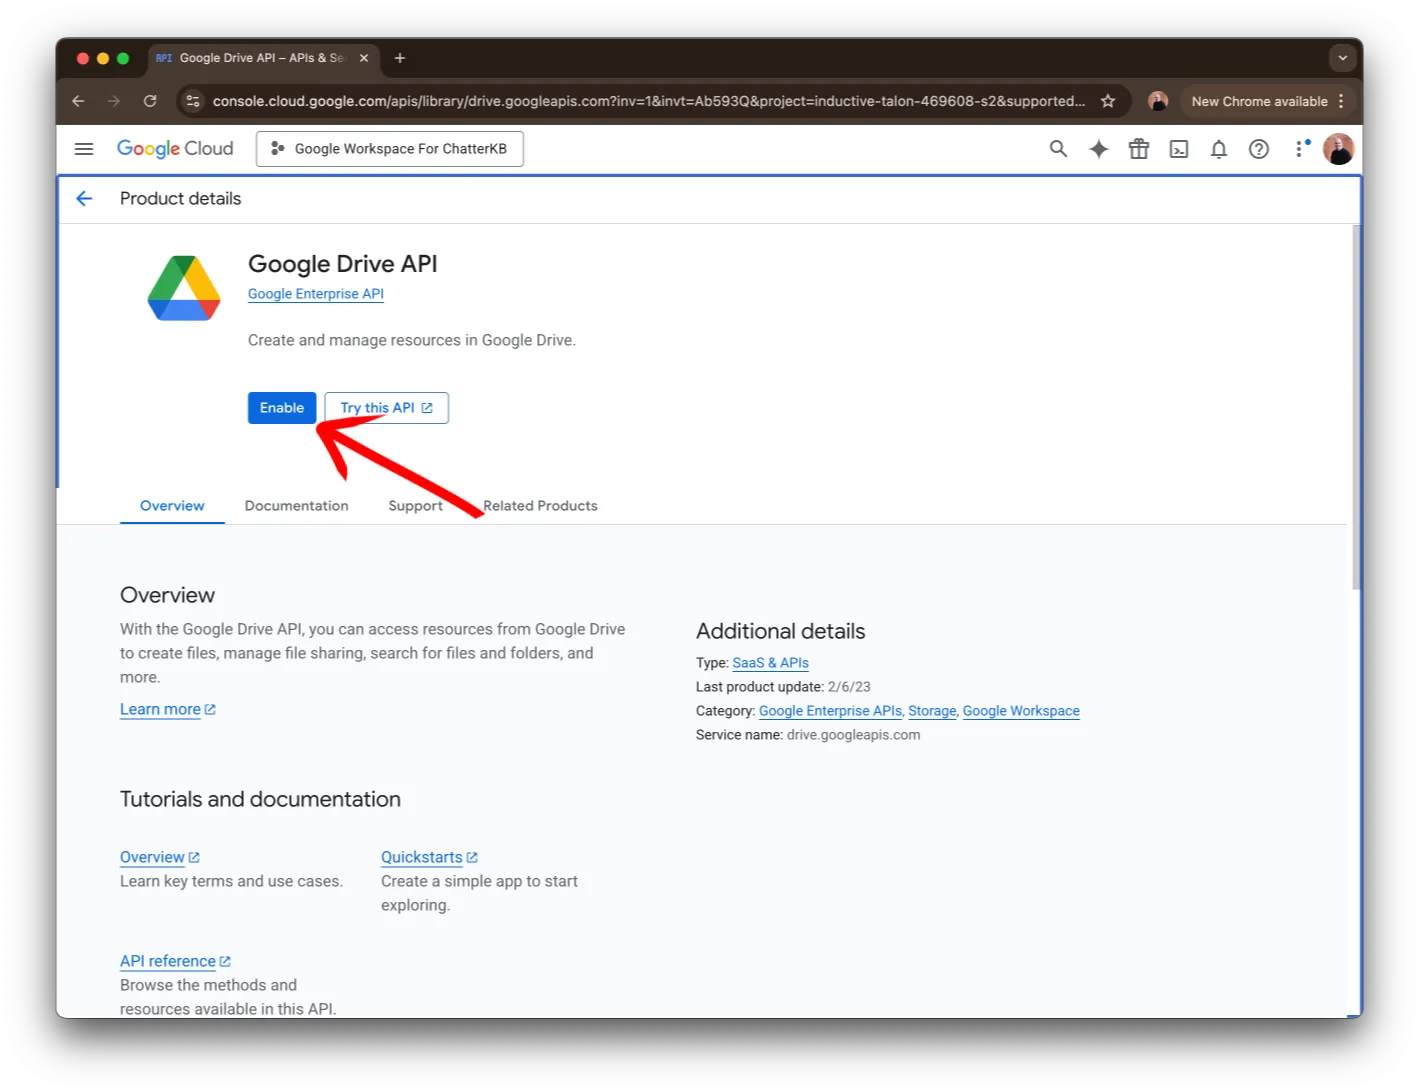
Finally, enable the API by clicking on the Enable button.
Type the word Library in the search bar at the top of the page. Click on the Library Product Page item in the list.

Next, search for Google Docs. You should see google docs api in the list below the search bar. Click on it to continue.
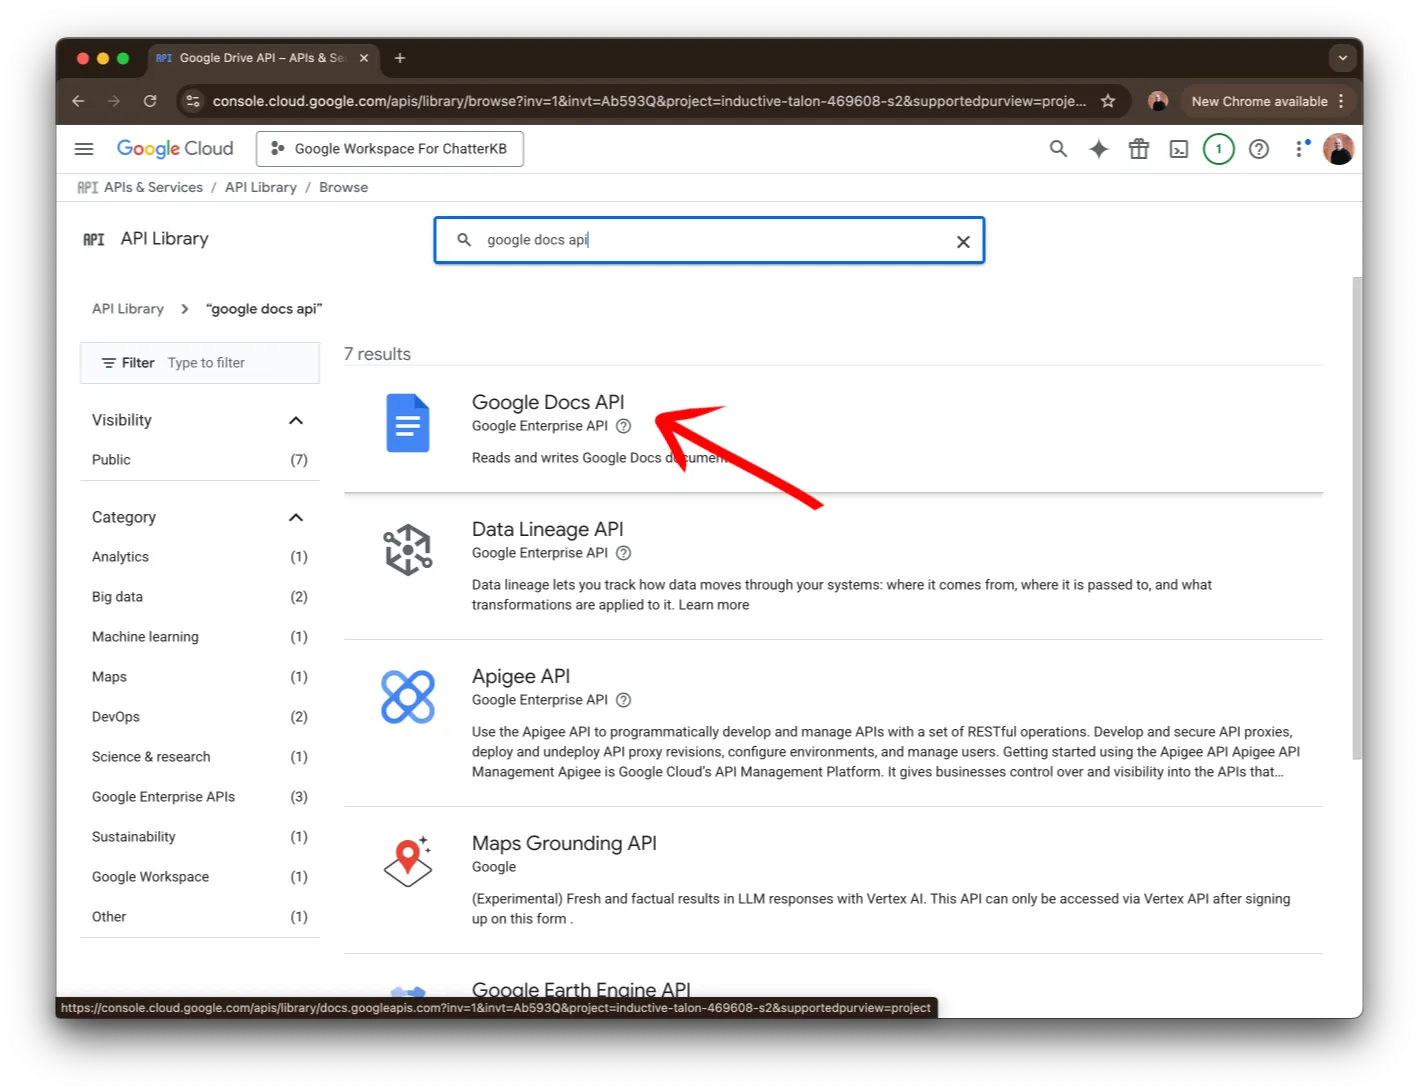
Then, click on the API shown in the image.
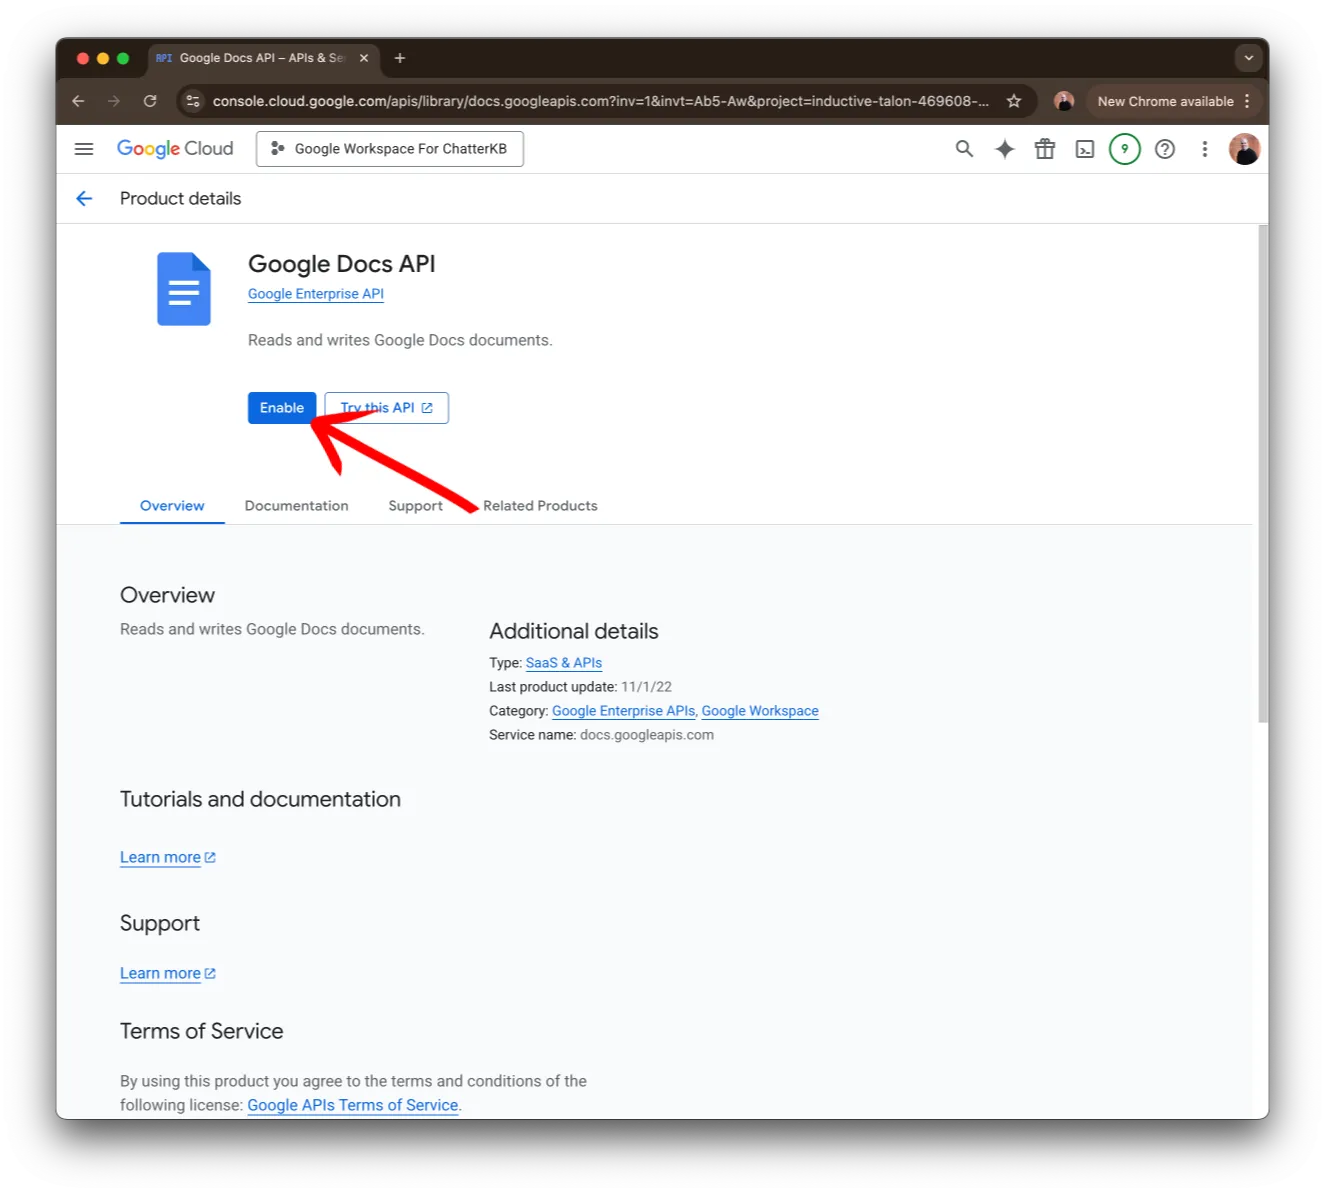
Finally, enable the API by clicking on the Enable button.
Type the word Library in the search bar at the top of the page. Click on the Library Product Page item in the list.
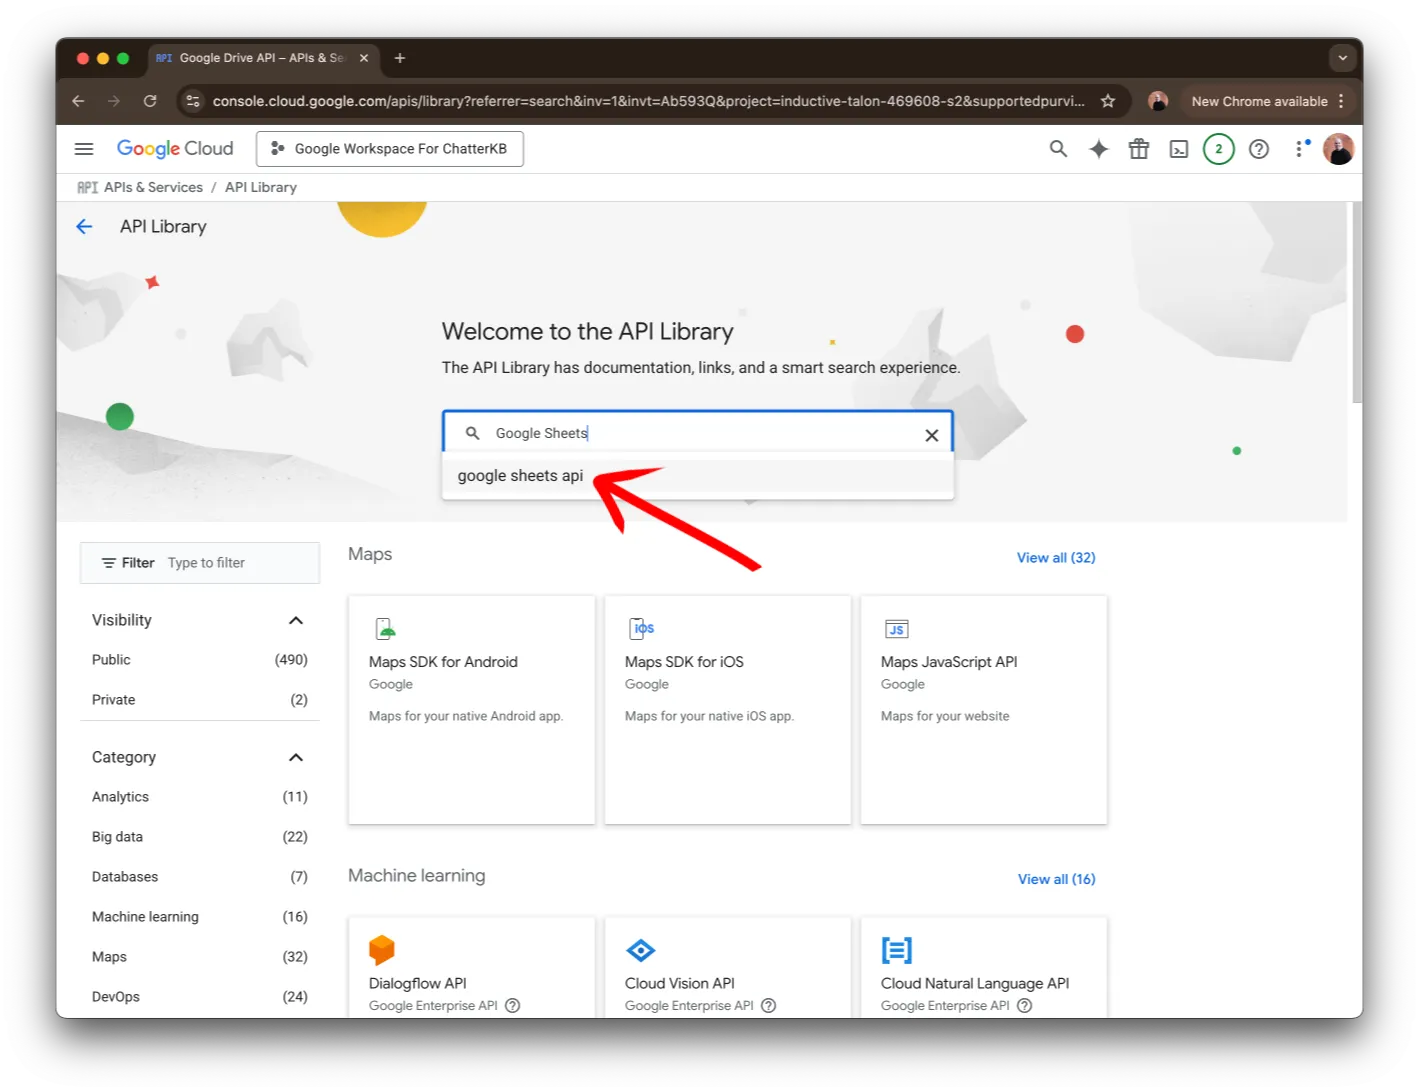
Next, search for Google Sheets. You should see google sheets api in the list below the search bar. Click on it to continue.
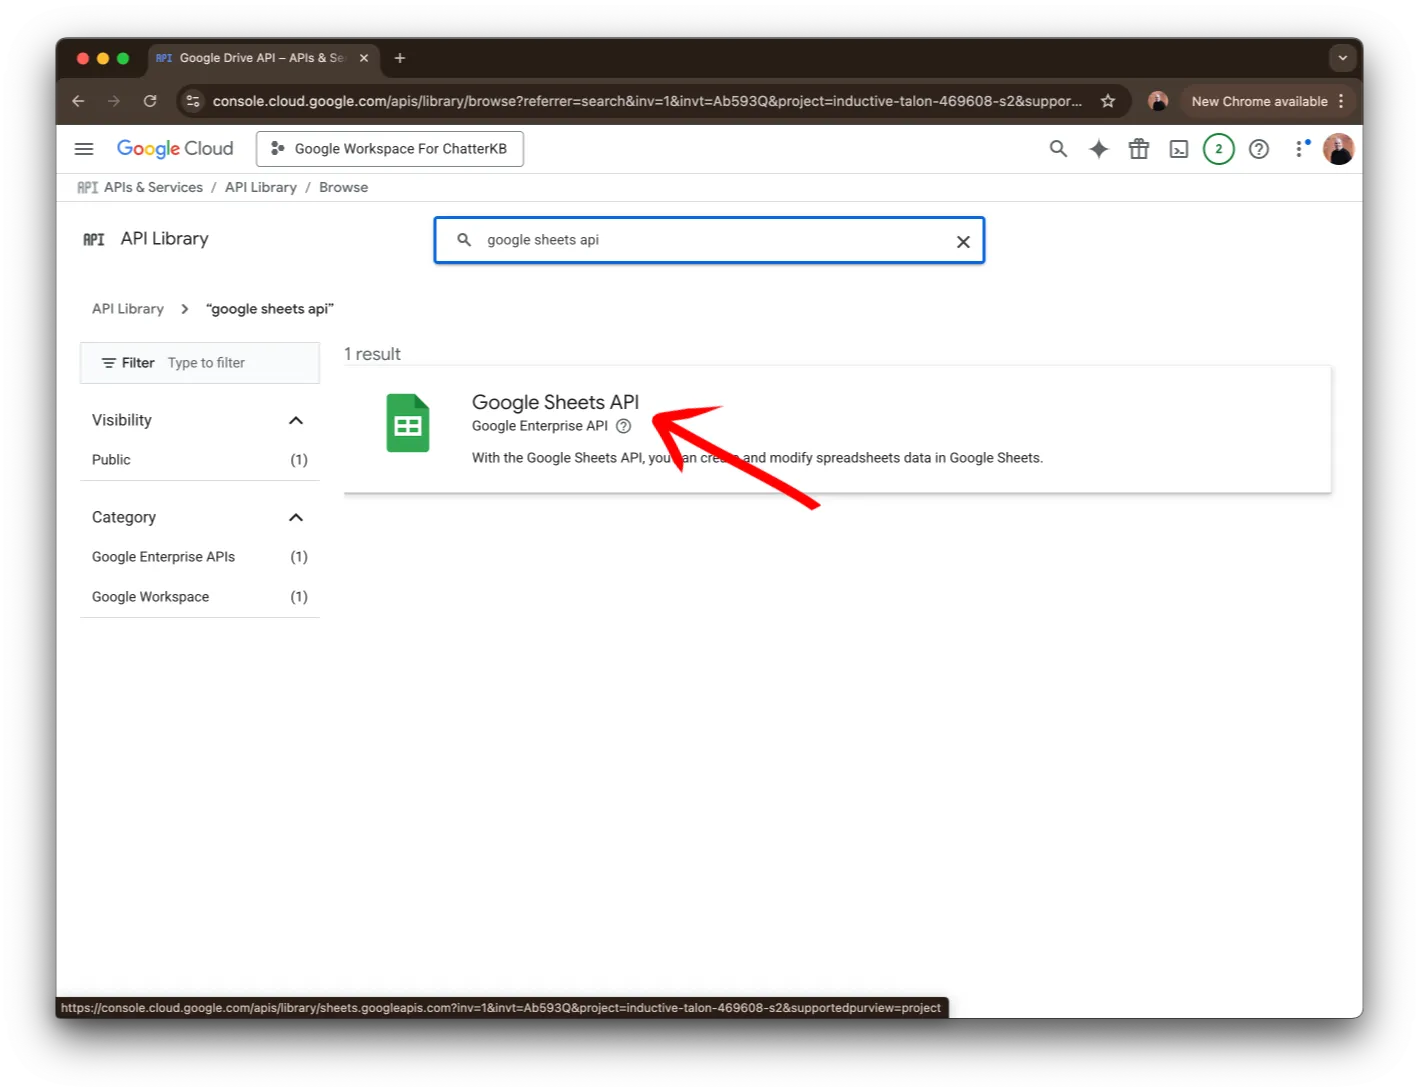
Then, click on the API shown in the image.
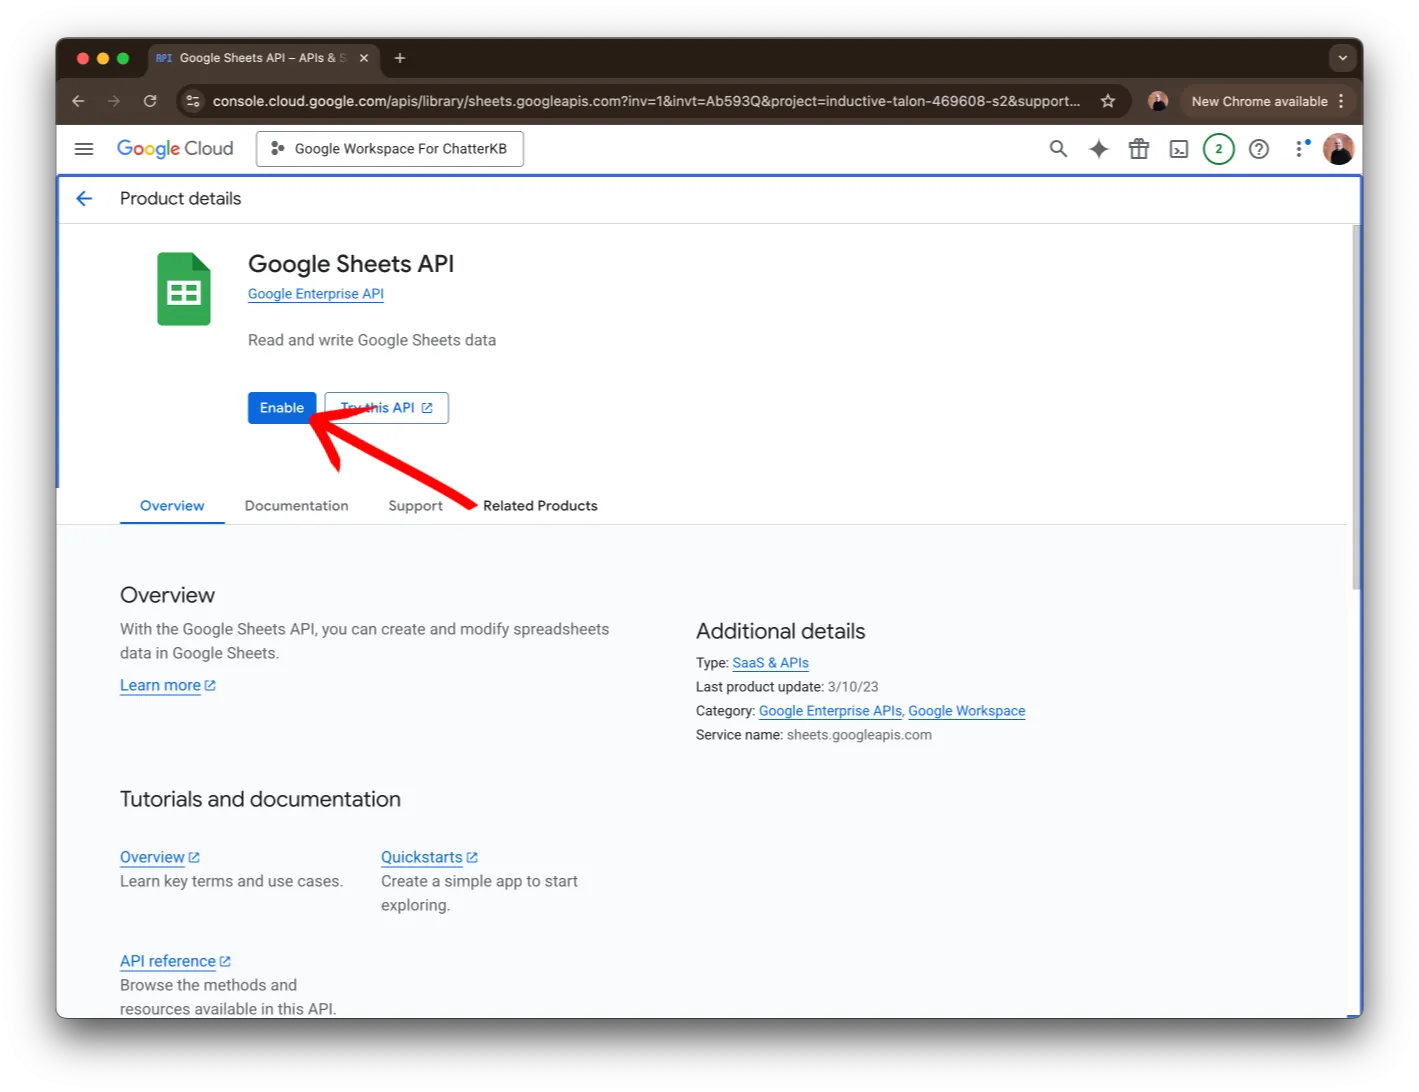
Finally, enable the API by clicking on the Enable button.
Type the word Library in the search bar at the top of the page. Click on the Library Product Page item in the list.
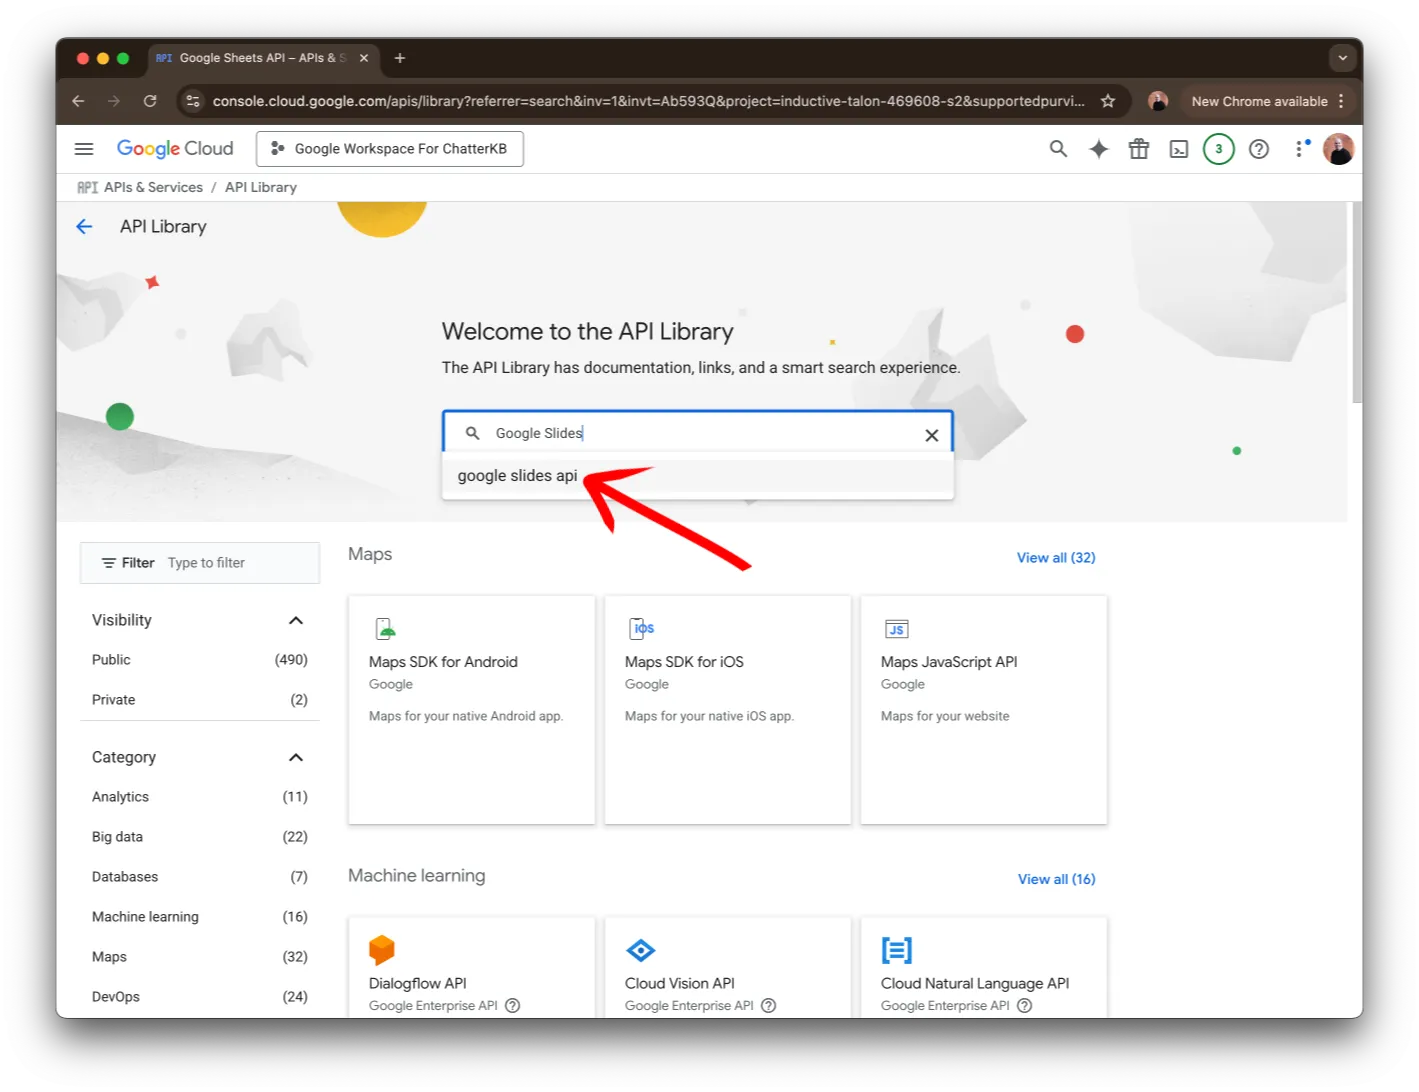
Next, search for Google Slides. You should see google slides api in the list below the search bar. Click on it to continue.
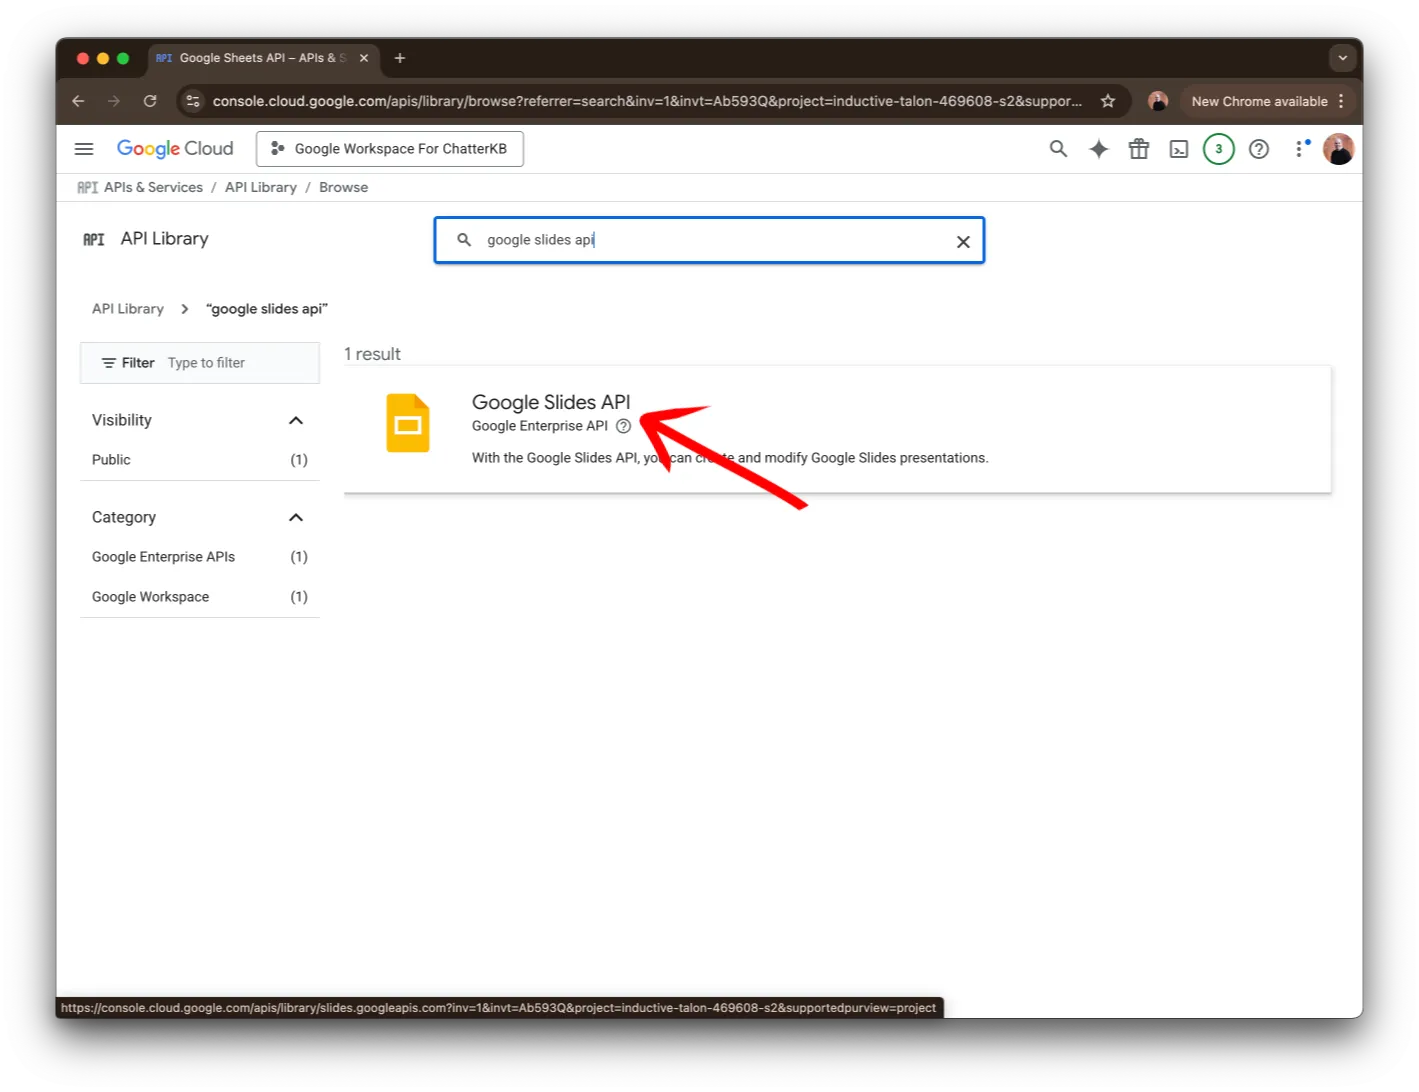
Then, click on the API shown in the image.
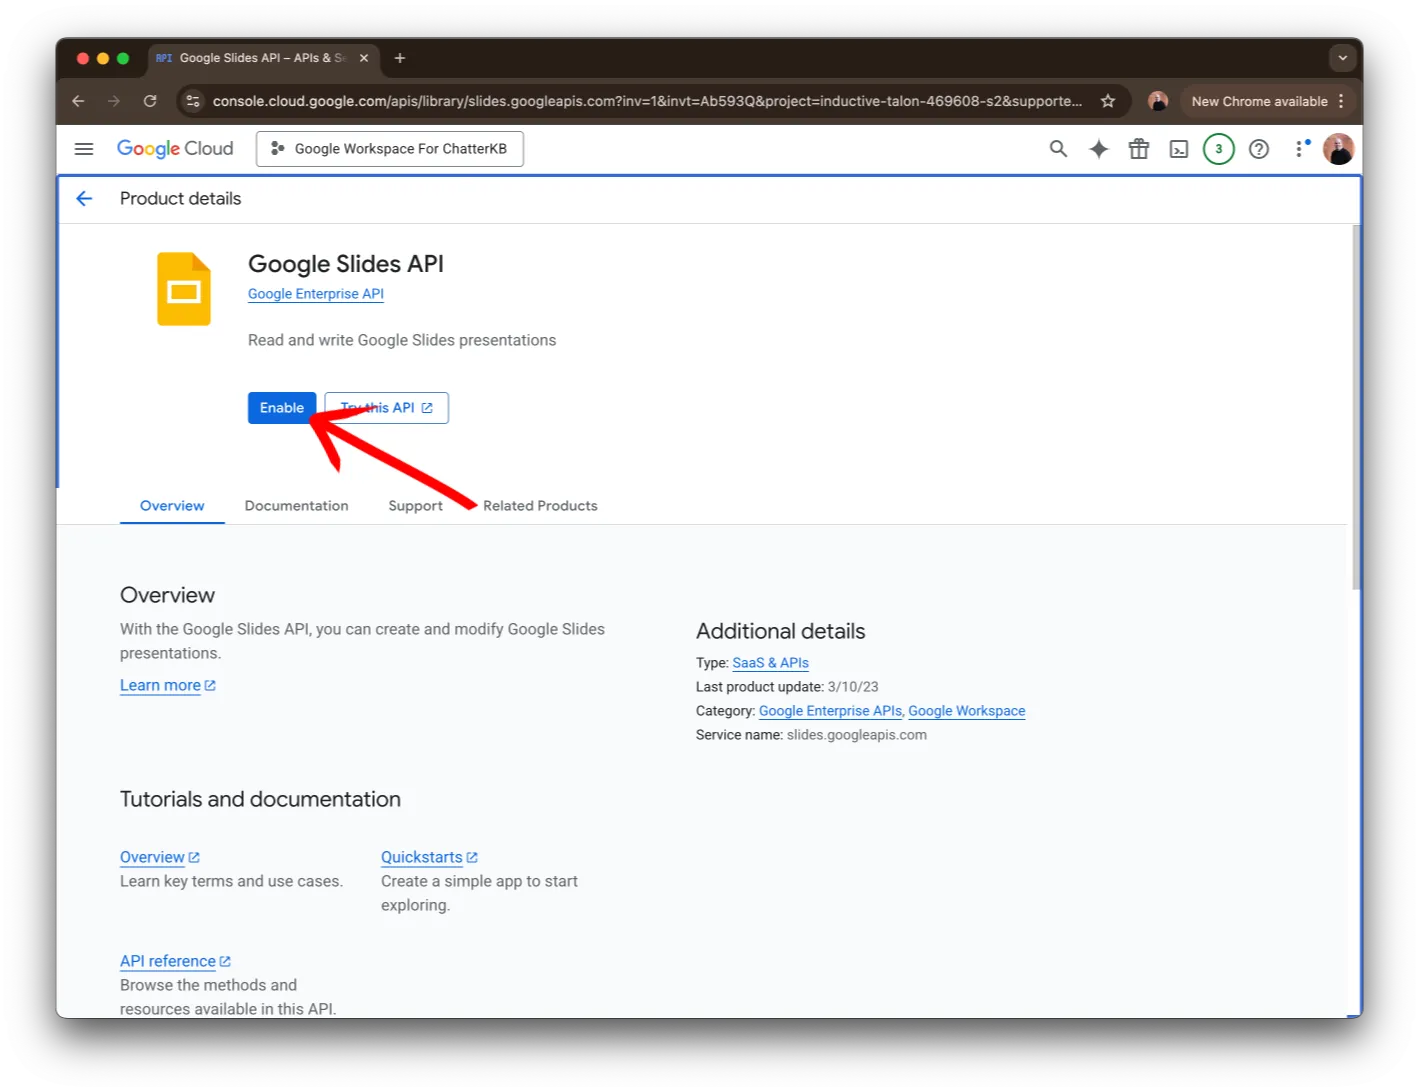
Finally, enable the API by clicking on the Enable button.
Type the word Library in the search bar at the top of the page. Click on the Library Product Page item in the list.
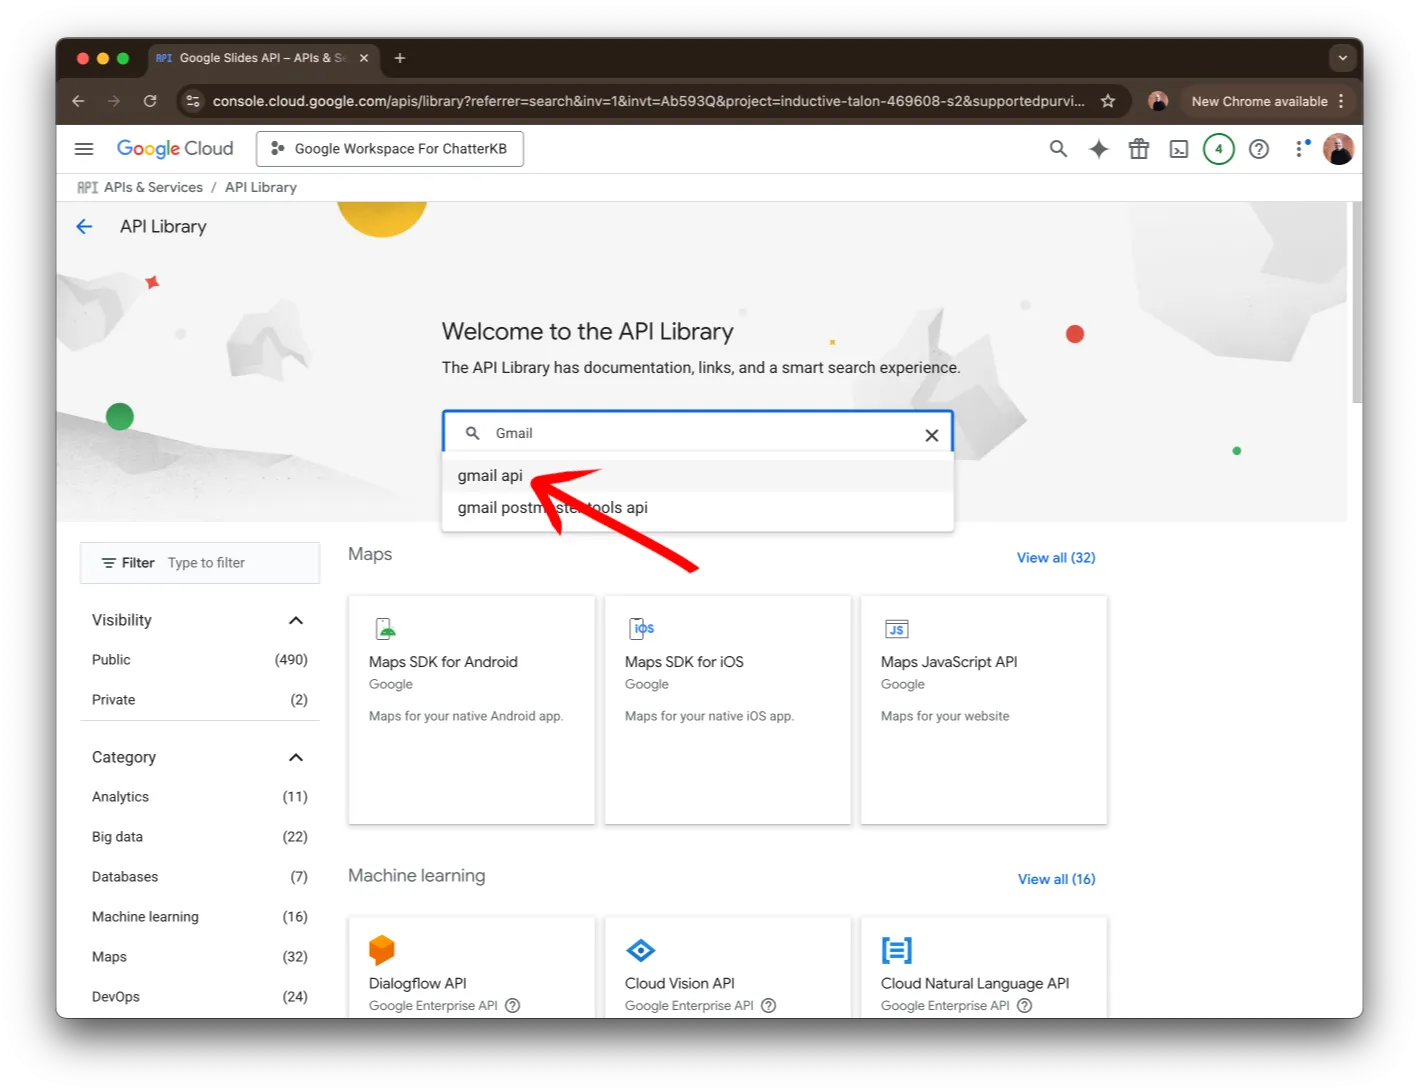
Next, search for Gmail. You should see gmail api in the list below the search bar. Click on it to continue.
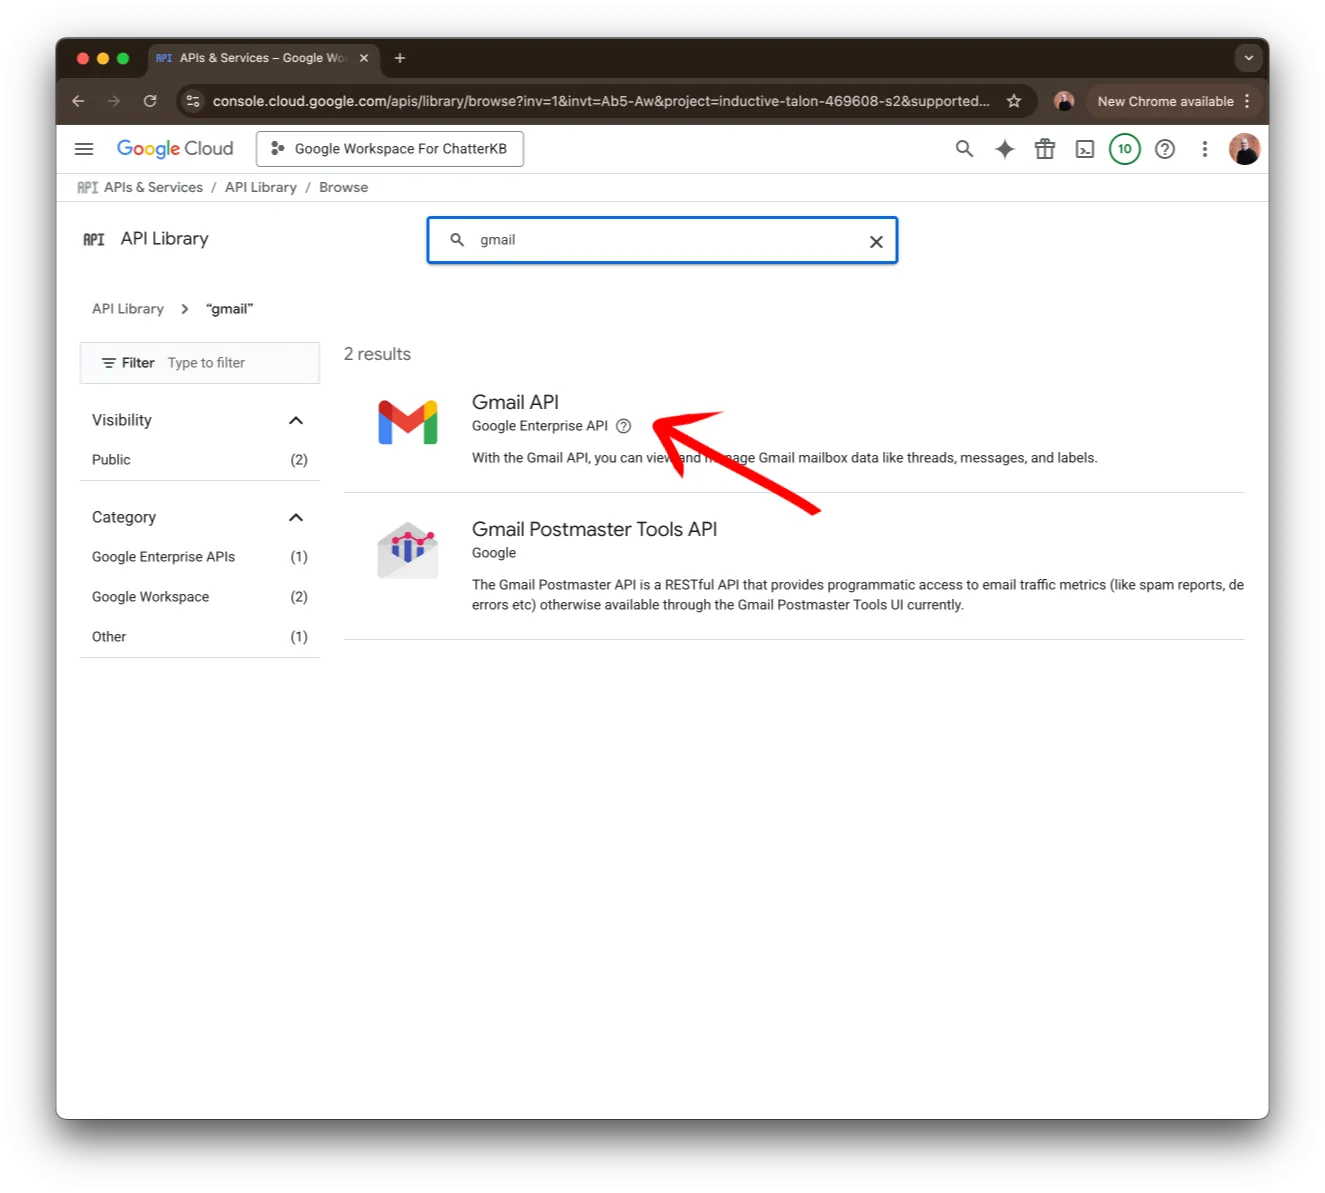
Then, click on the API shown in the image.
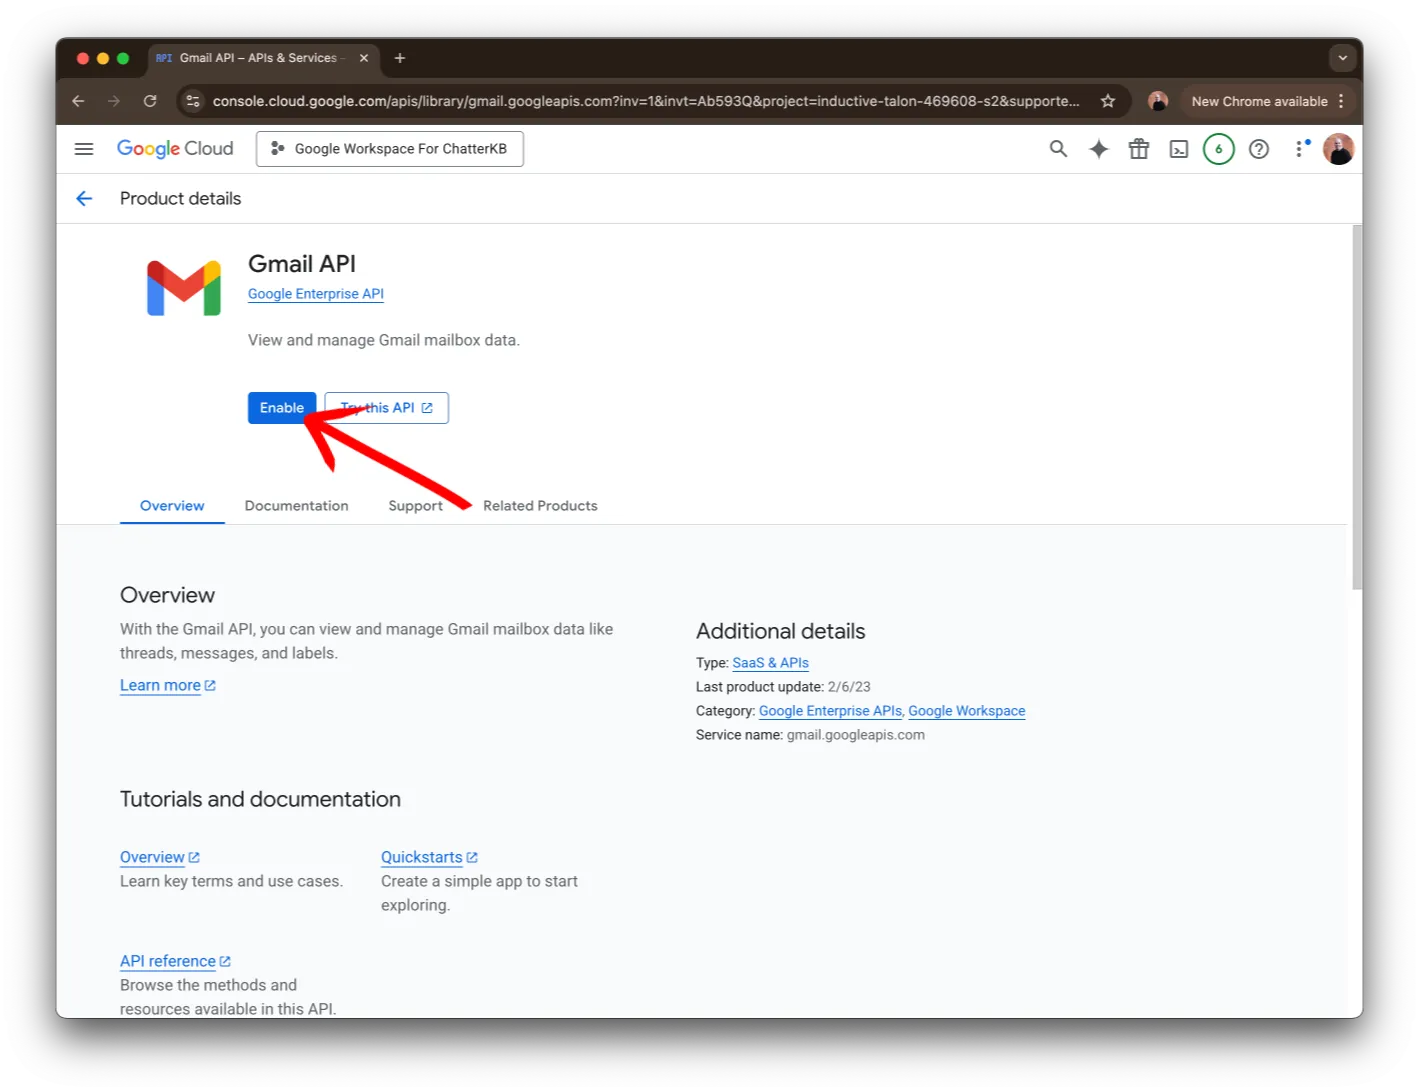
Finally, enable the API by clicking on the Enable button.
Type the word Library in the search bar at the top of the page. Click on the Library Product Page item in the list.
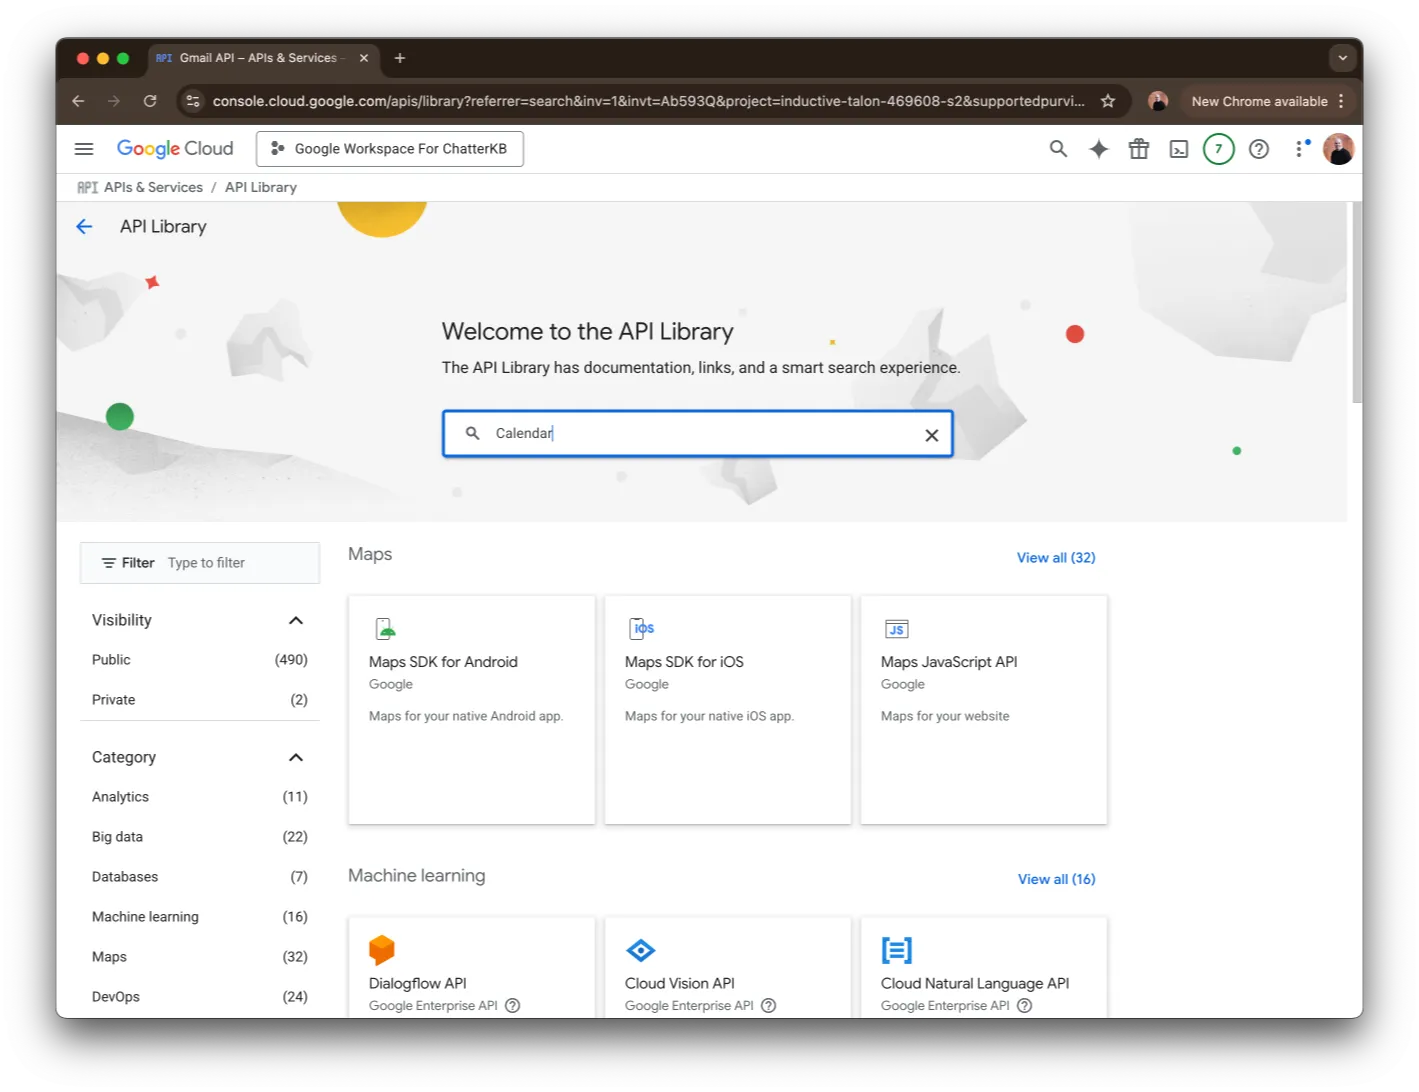
Next, search for Calendar. You should see calendar api in the list below the search bar and press Enter.
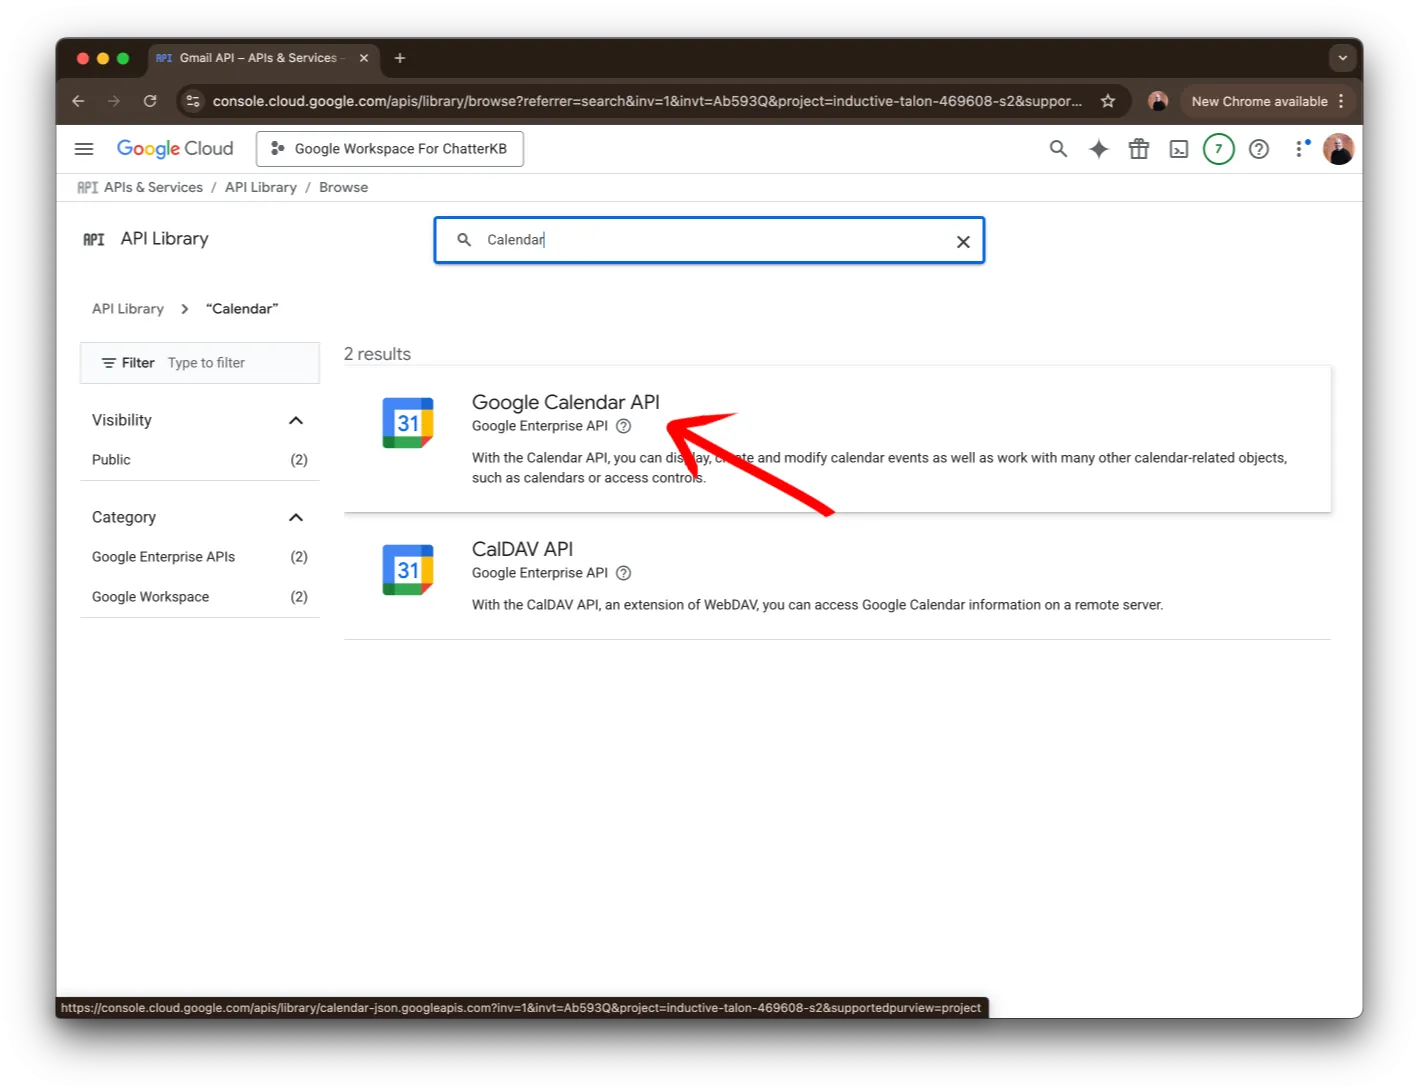
Then, click on the API shown in the image.
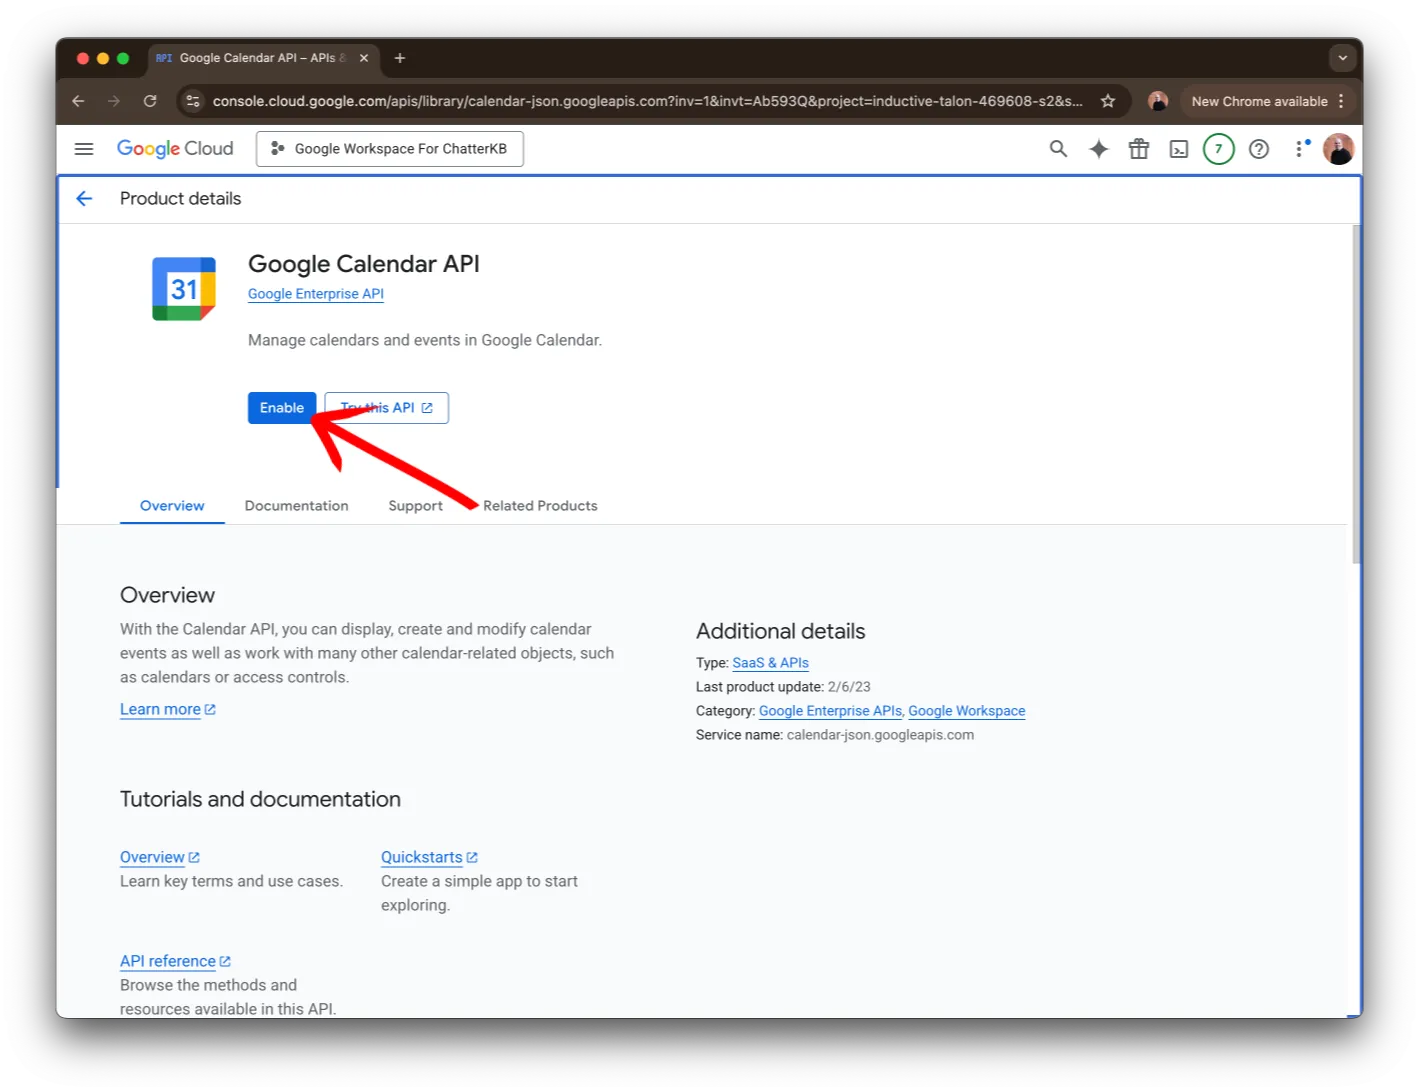
Finally, enable the API by clicking on the Enable button.
Step 4: Branding
Next, we’ll start setting up the credentials Google needs to connect with. Find the search bar and type Credentials and click on the Credentials Product Page. The first step is to set up your Consent and App.
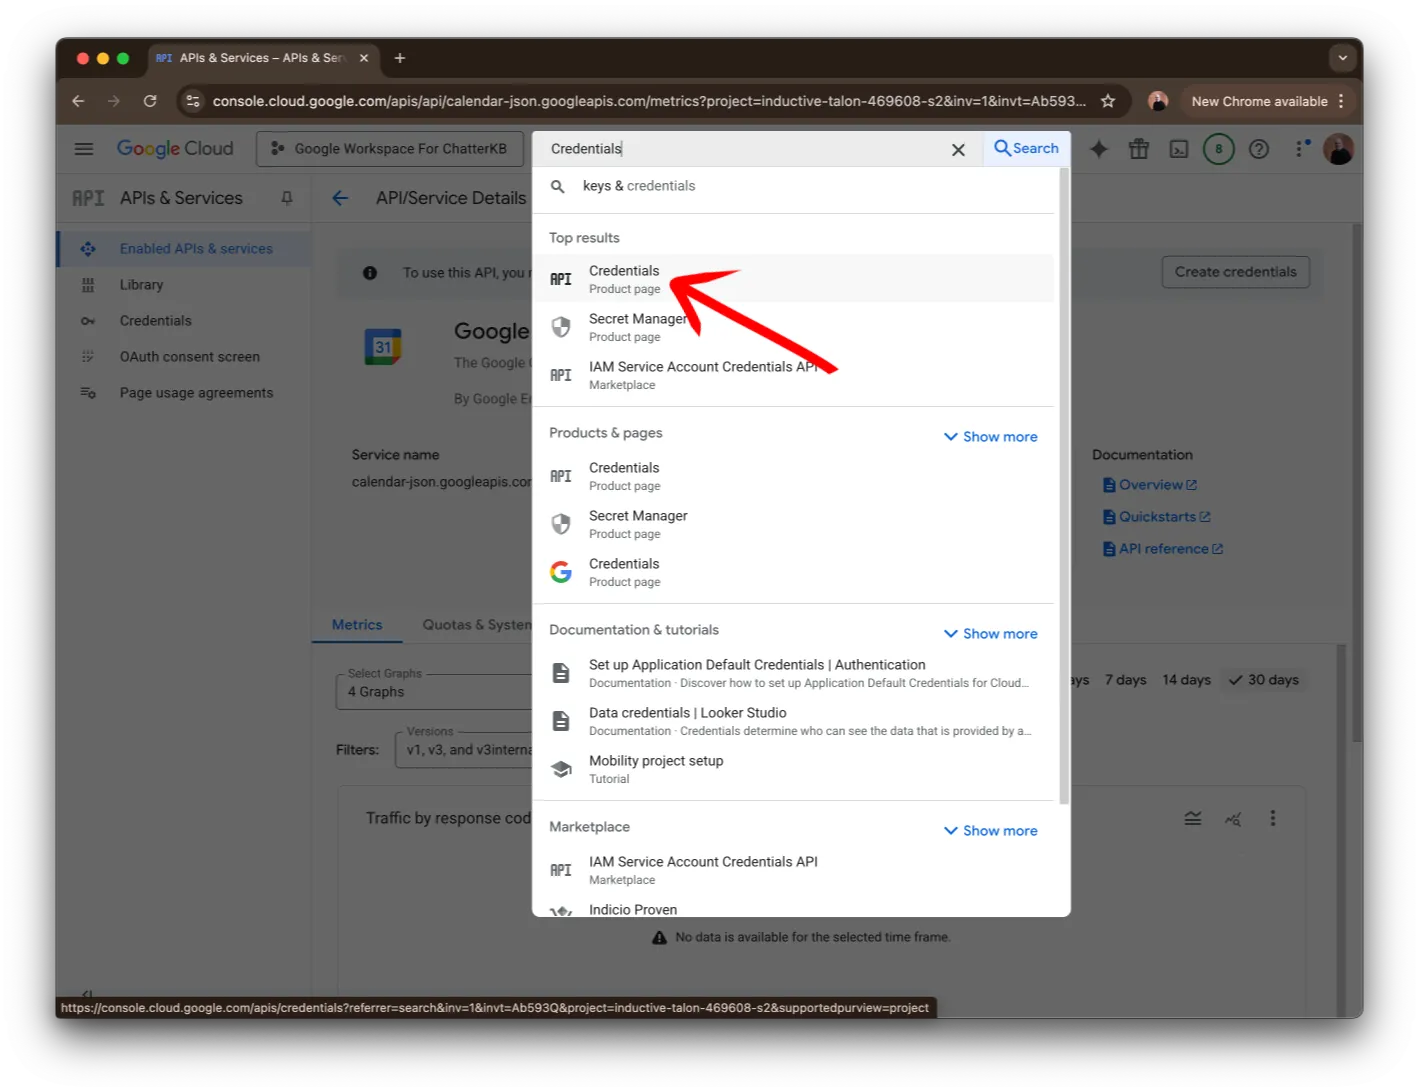
Find the search bar and type Credentials and click on the Credentials Product Page.
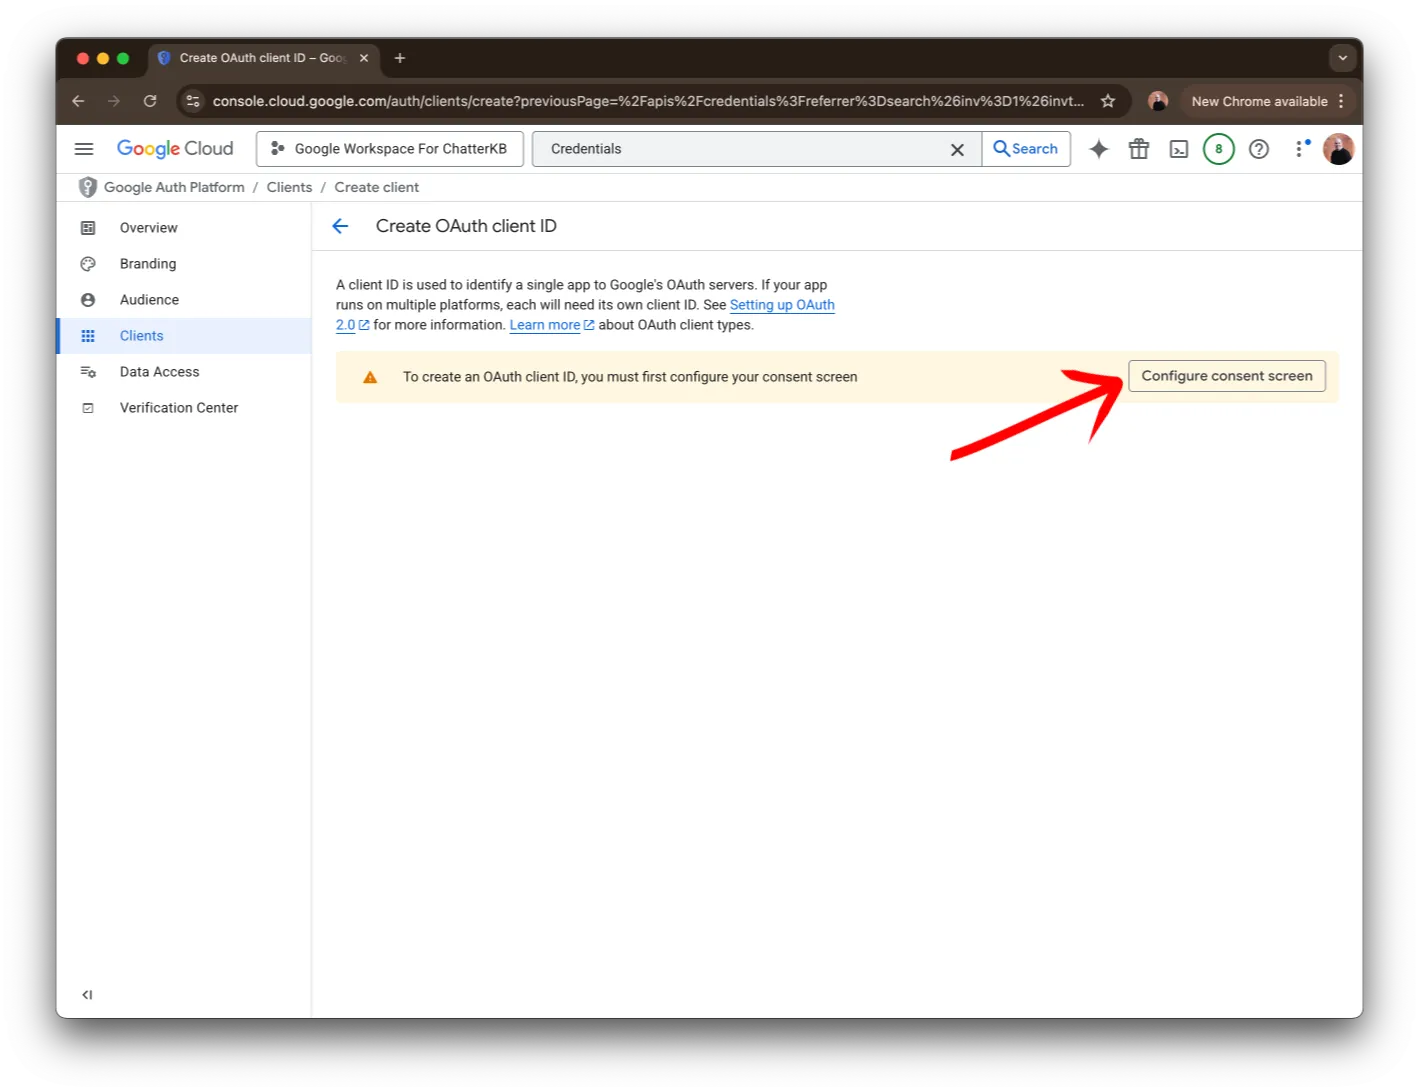
Next, click on the Configure consent screen. It should look like a yellow button.
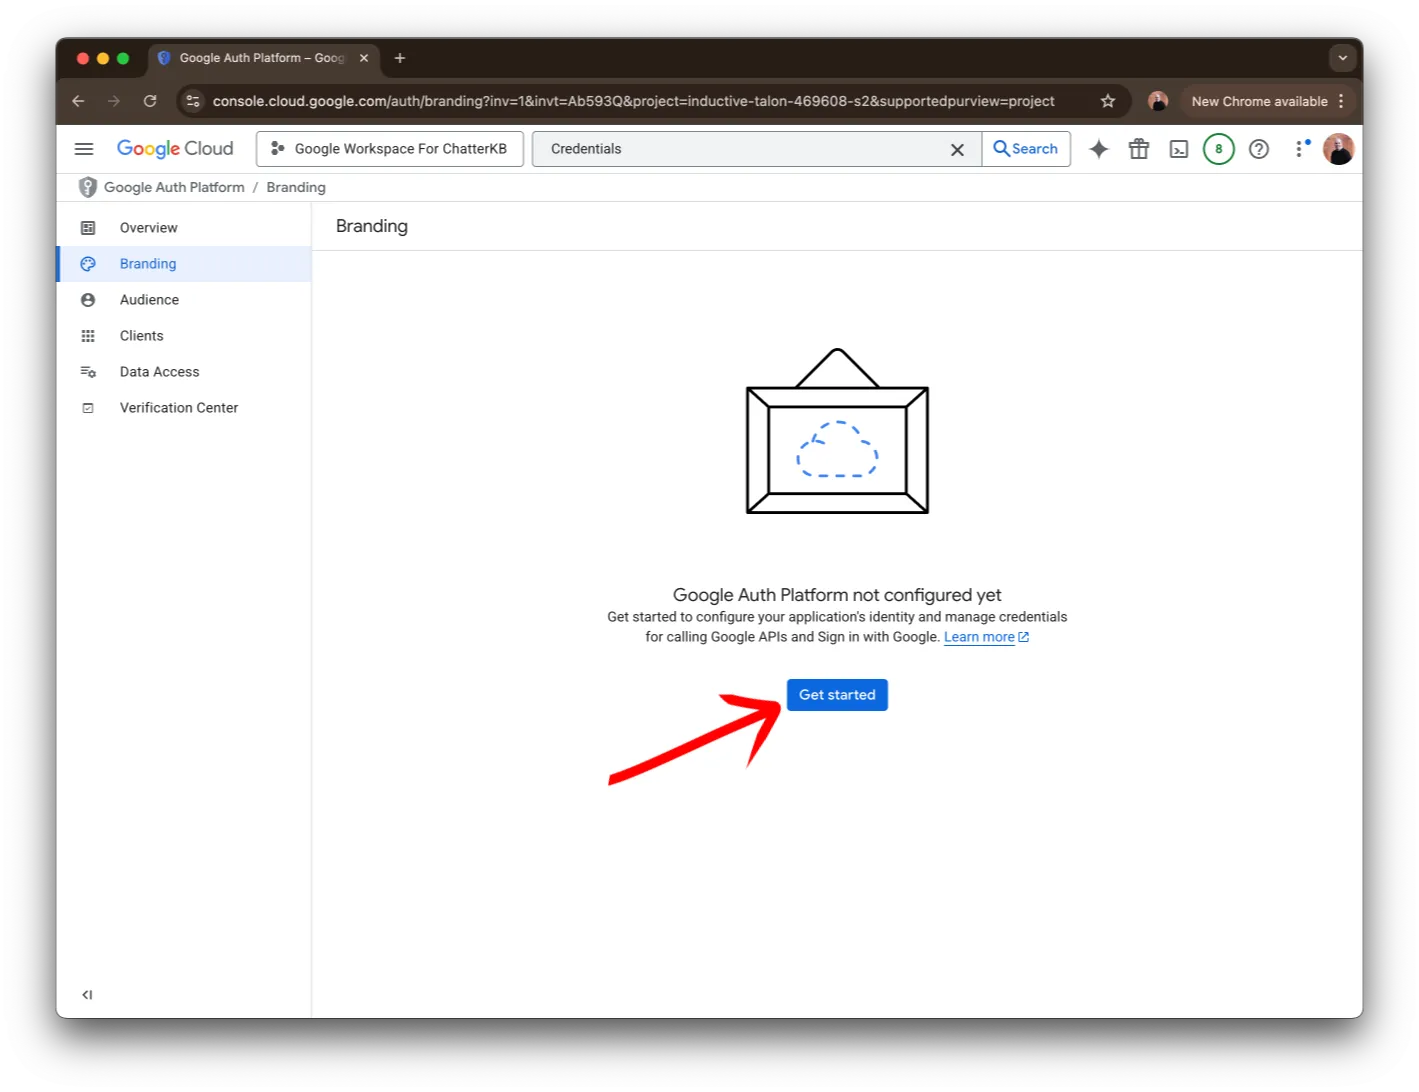
Then, you’ll arrive at the Branding page. Click on the Get started button.
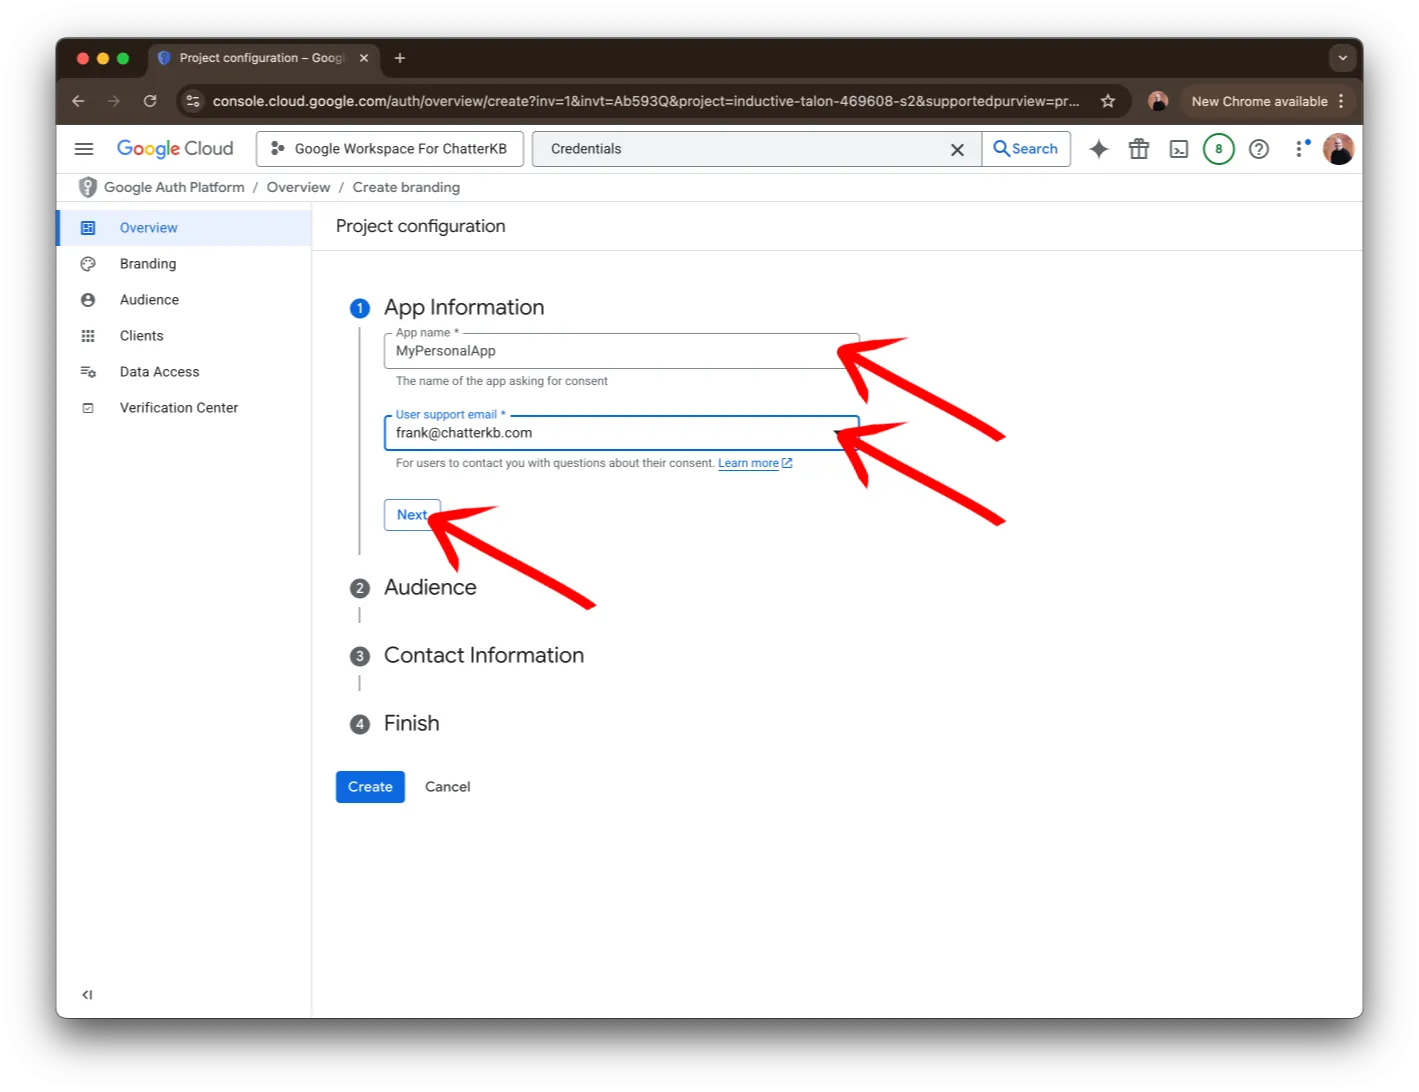
Next, you’ll need to create an App. You can provide a name and email. It might say user support, but this app is only for you!
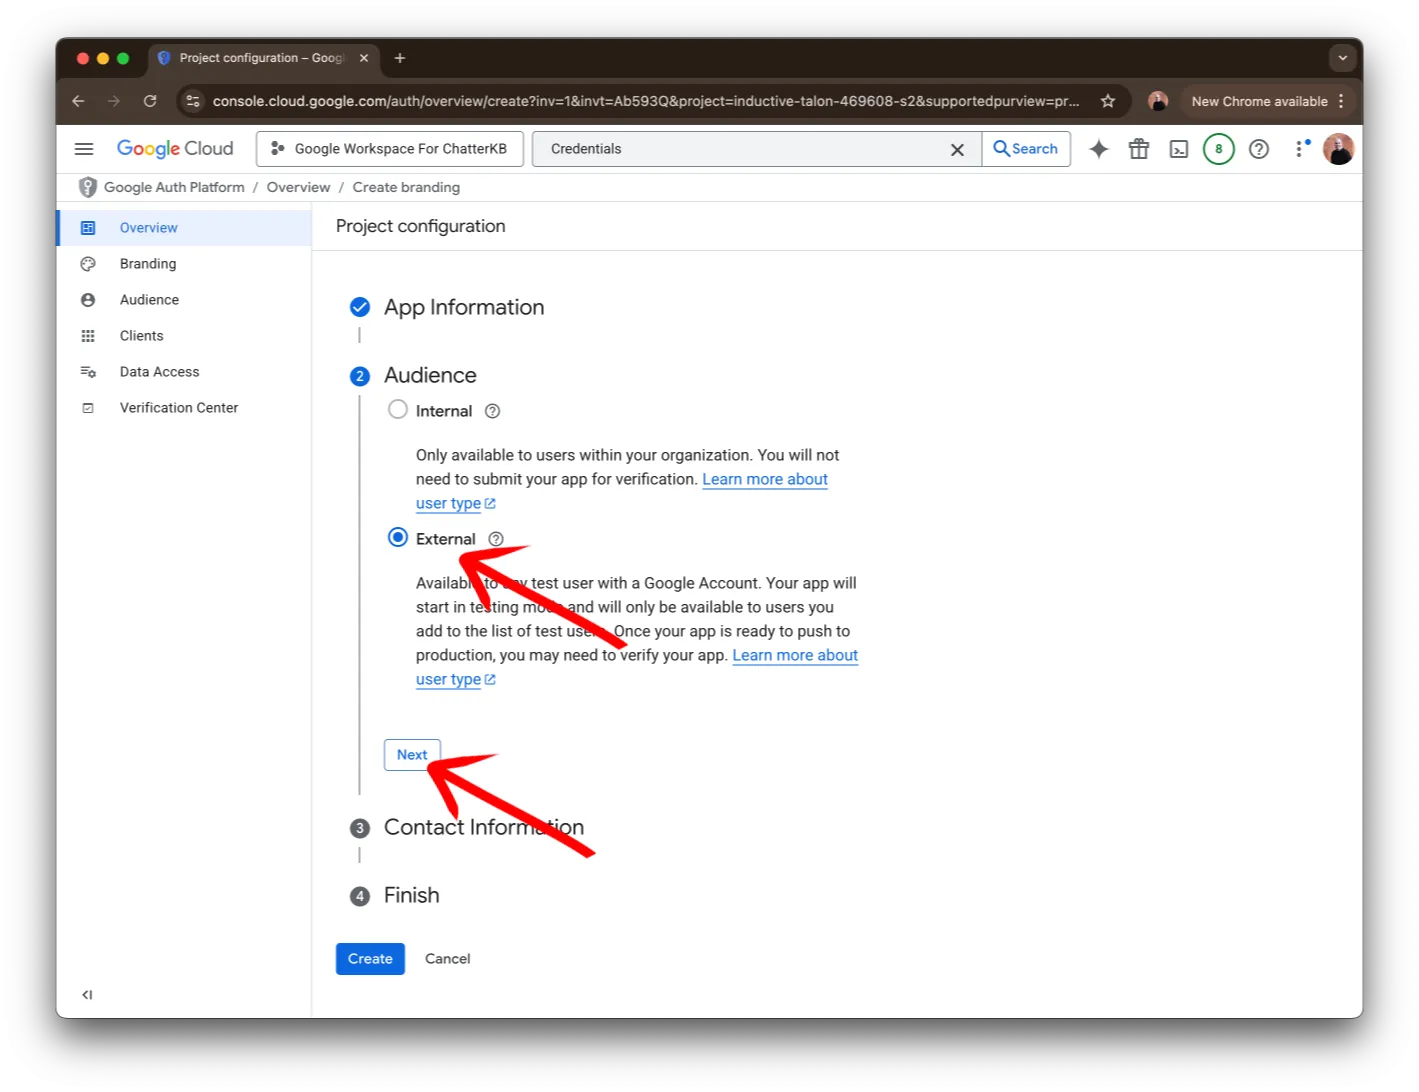
Then, you’ll need to select External. Though this might just be for you, this is the only option available (Internal will be disabled).
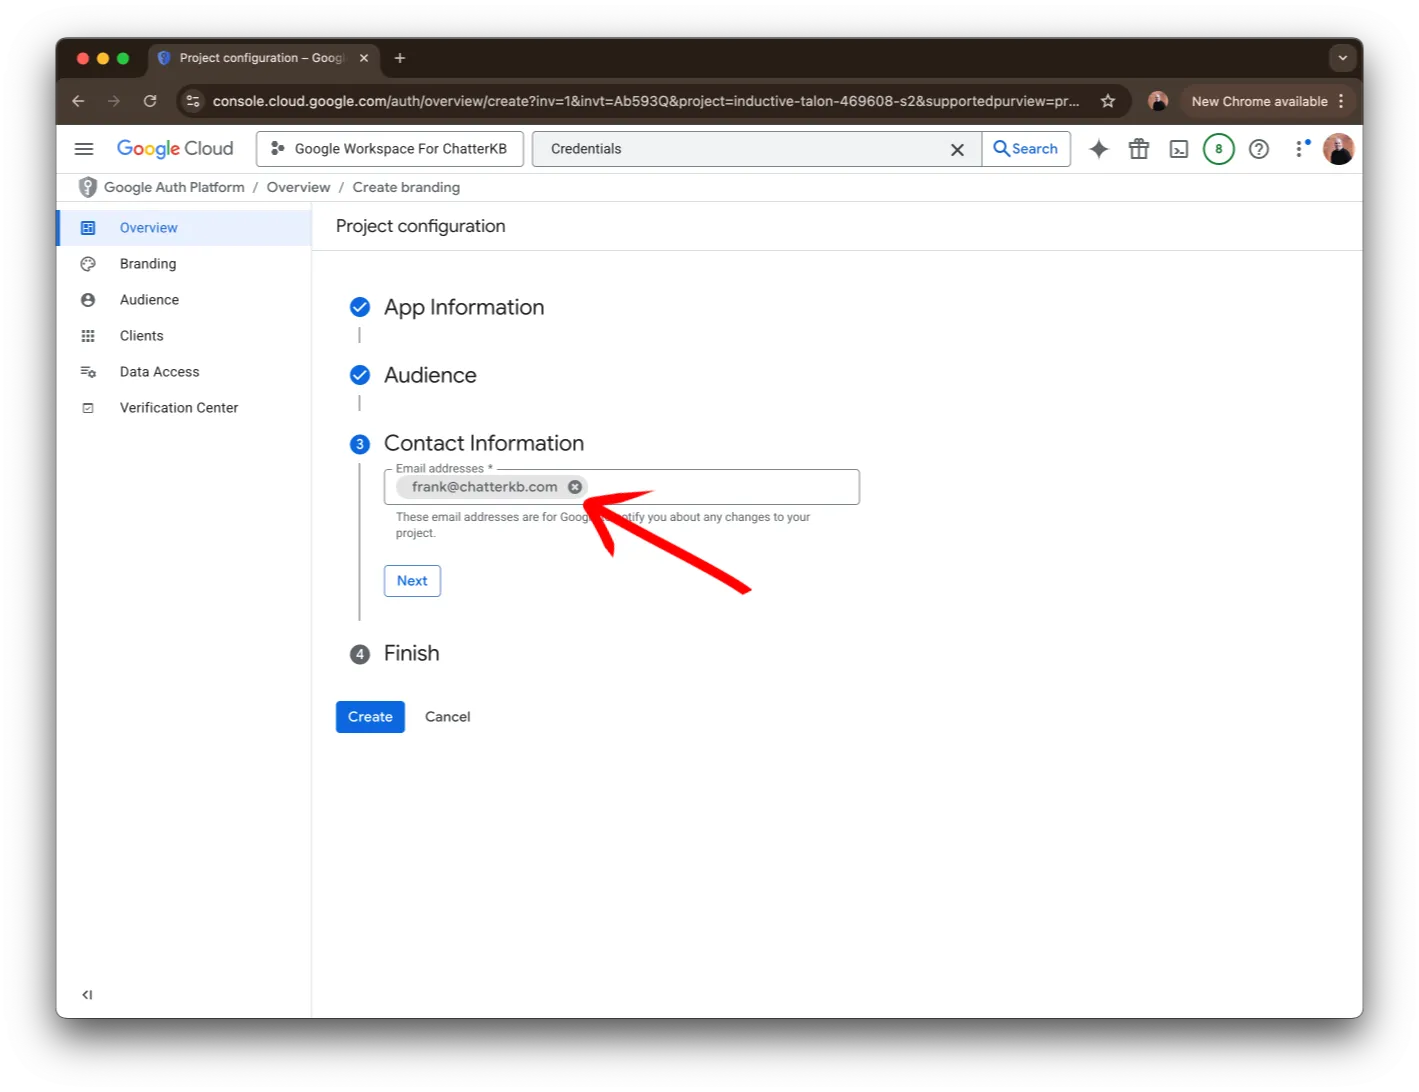
Next, you’ll need to specify an email so that Google can notify you of any changes.
Then, agree to the Google Data Policy.
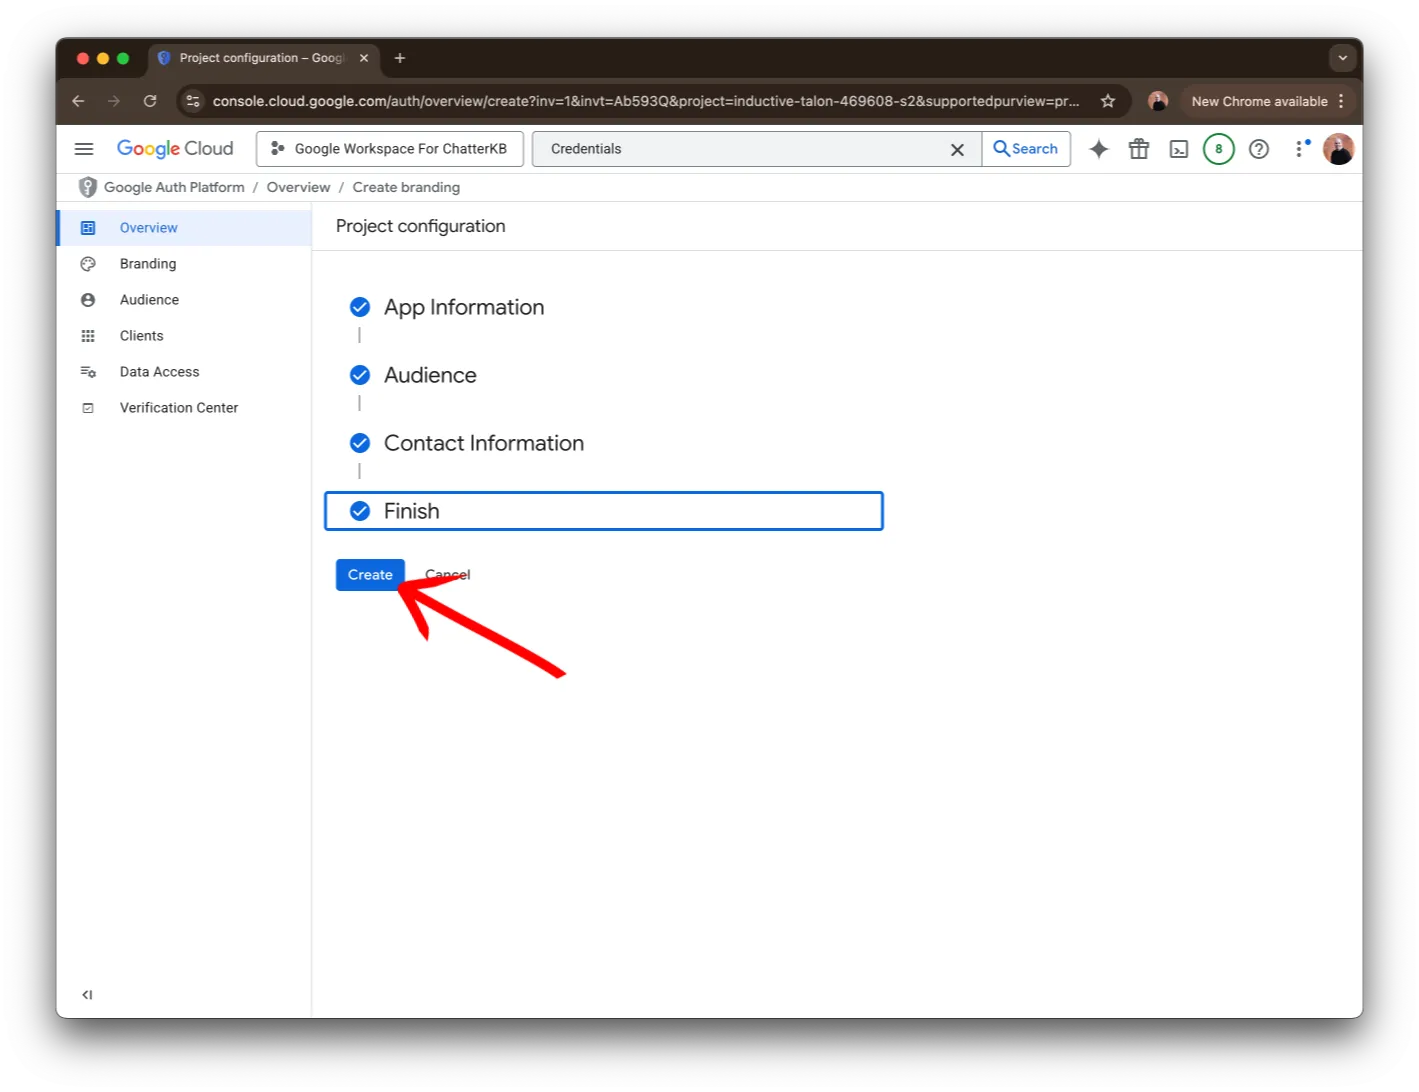
Finally, click on the Create button to finish.
Step 5: Credentials
Next, we’ll create a OAuth client which will provide the client id and client secret you’ll need to connect to the APIs.
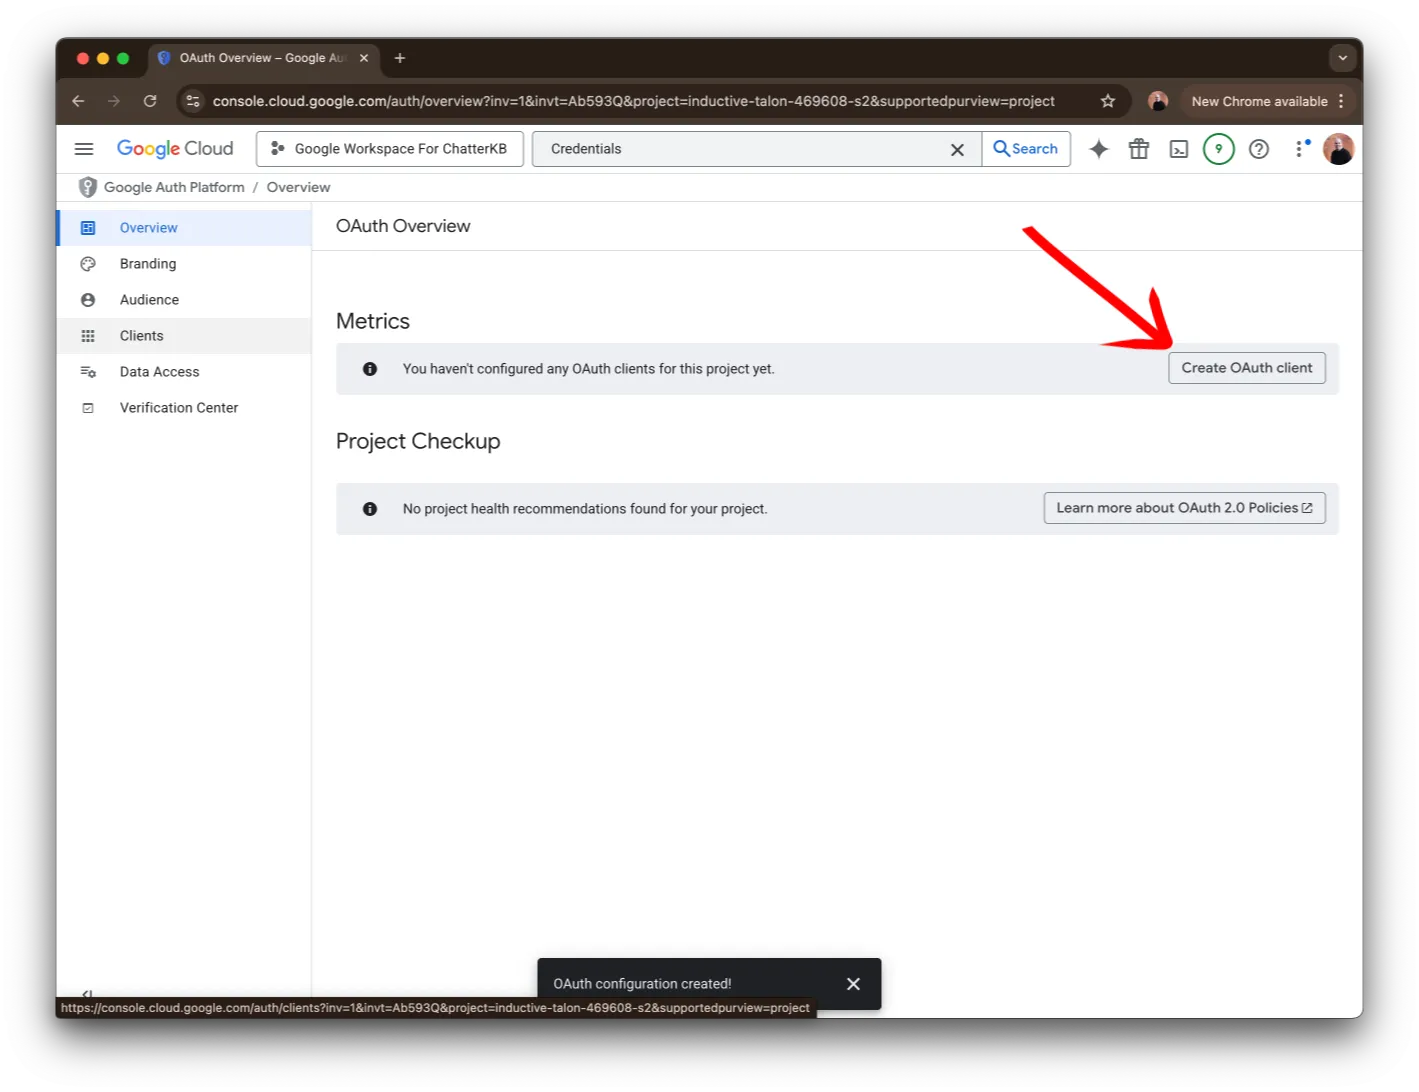
Click on the button called Create OAuth client or click on the list on the left side where it says Clients and find Create client.
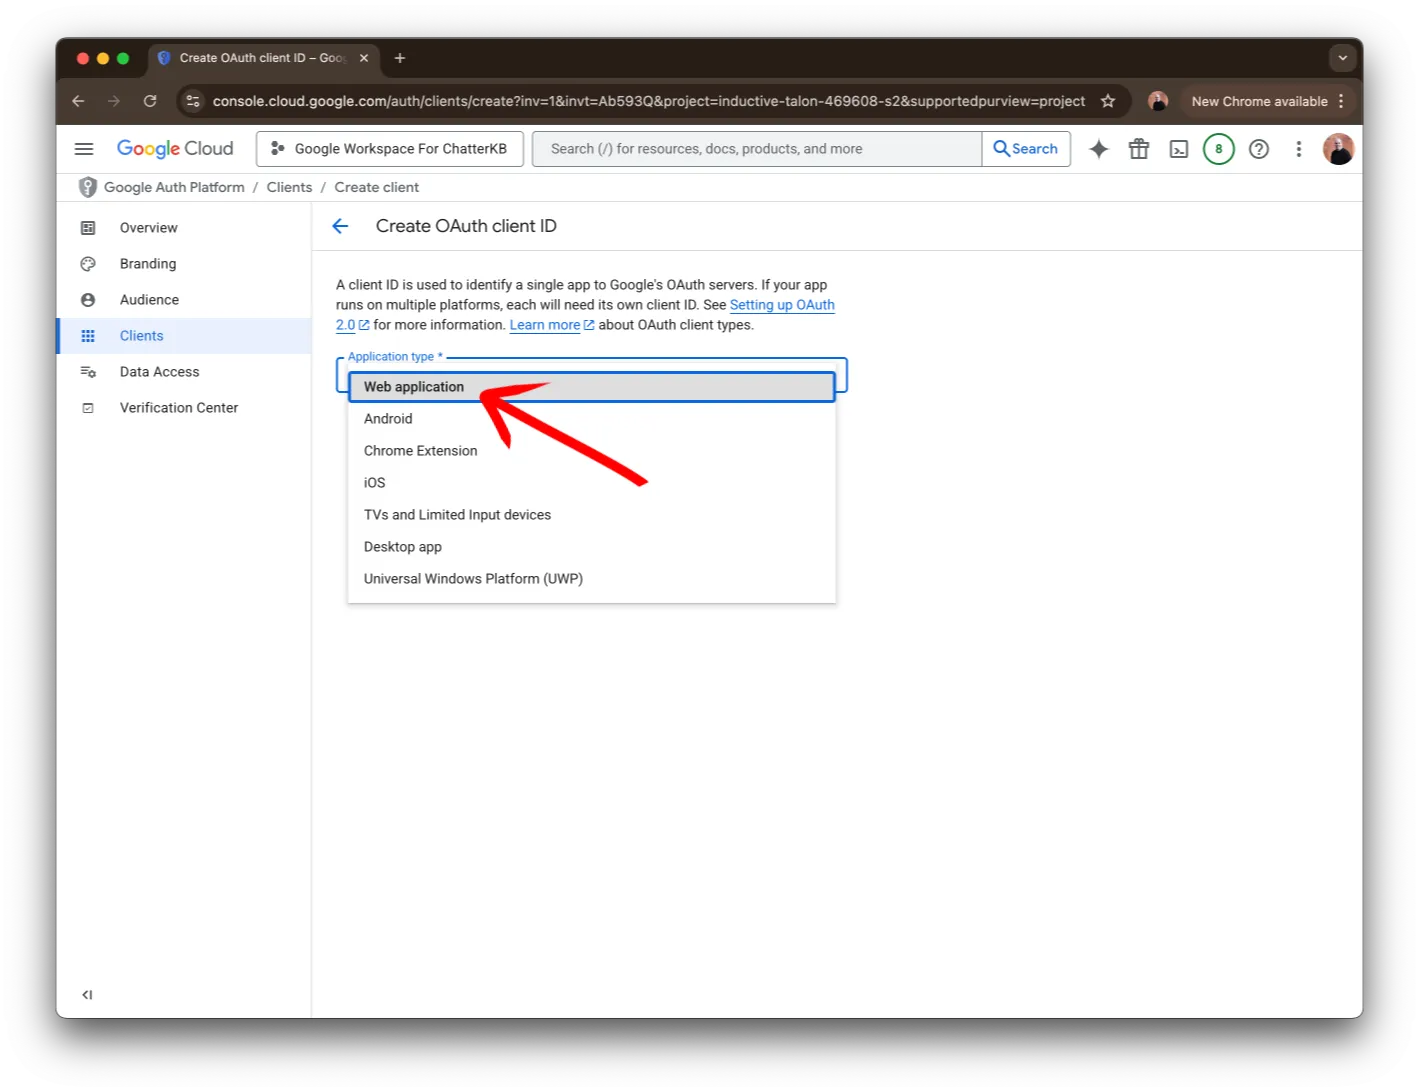
Next, select Web application from the dropdown.
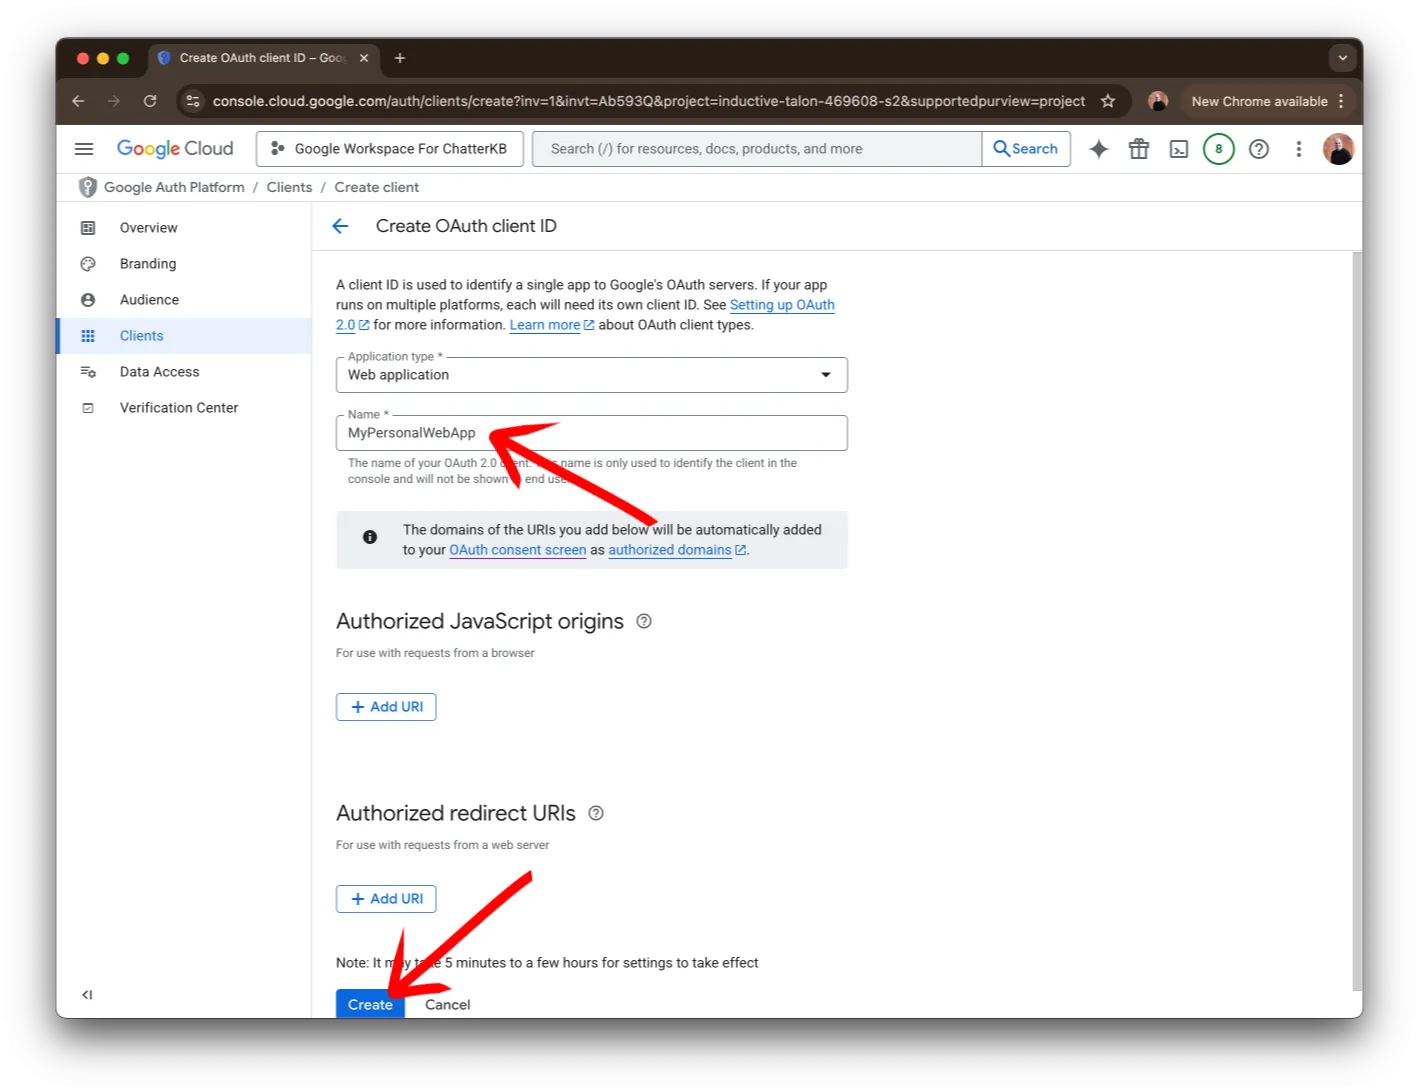
Then, give it a name and click on the Create button.
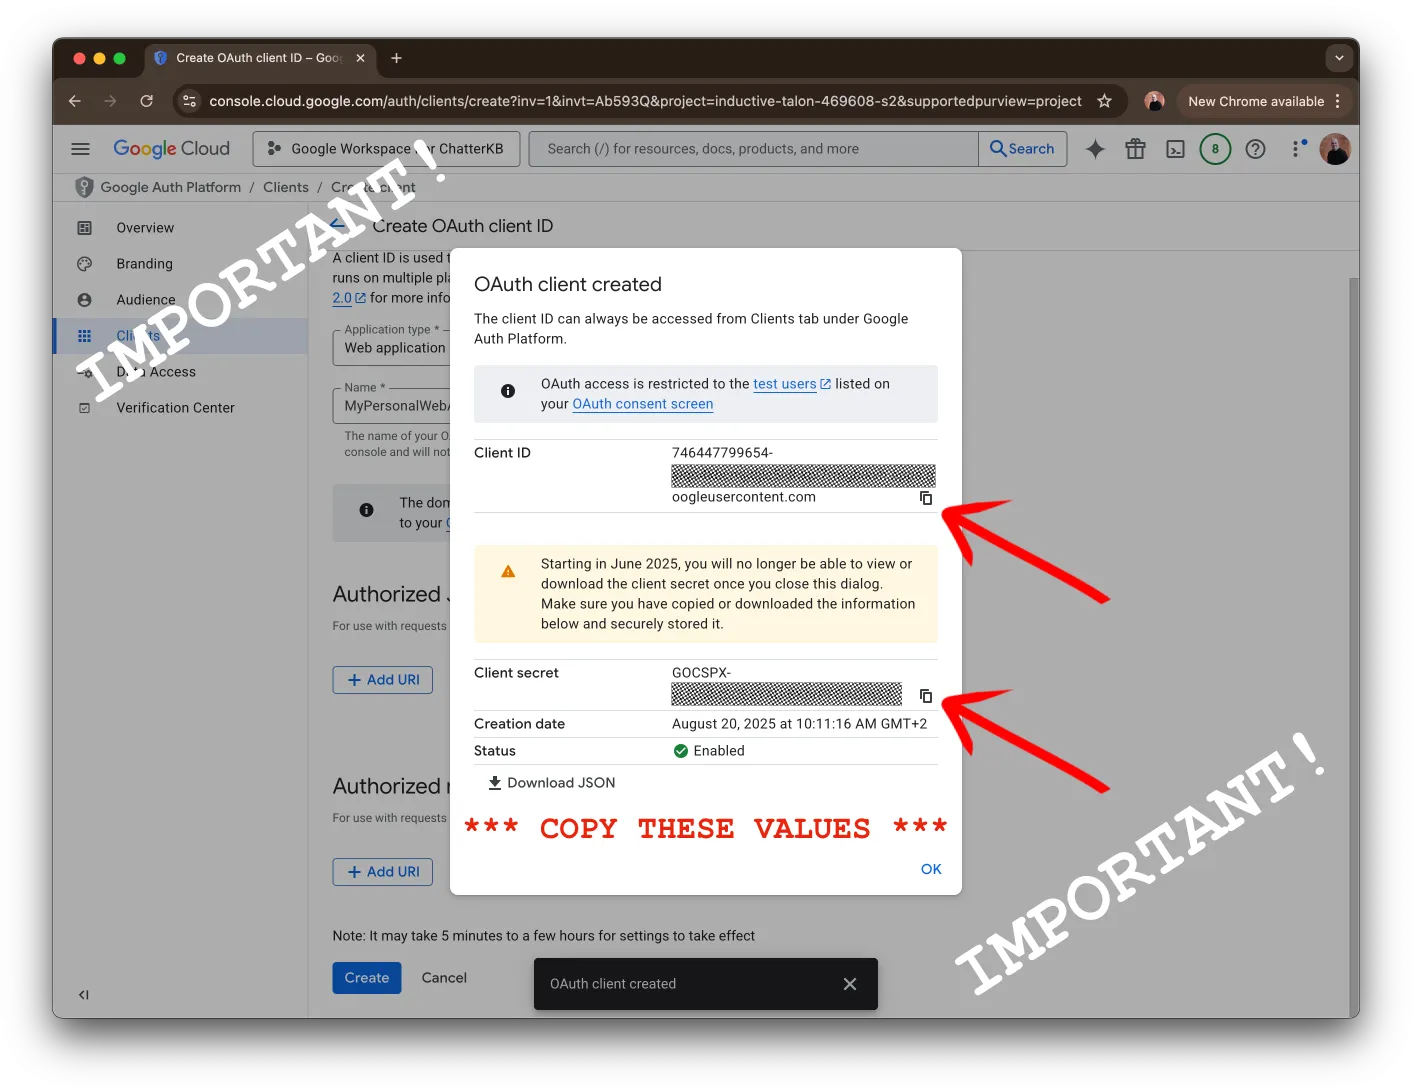
Finally, and this is VERY IMPORTANT, copy the Client ID and Client secret and save them. You can get back to these values later, but it will save you time if you copy them now. Then, click on OK.
Step 6: Audience
Now, we need to add you to the app’s audience. This gives you access without having to go through a verification process.

Click on the Audience item on the far left side of the window.
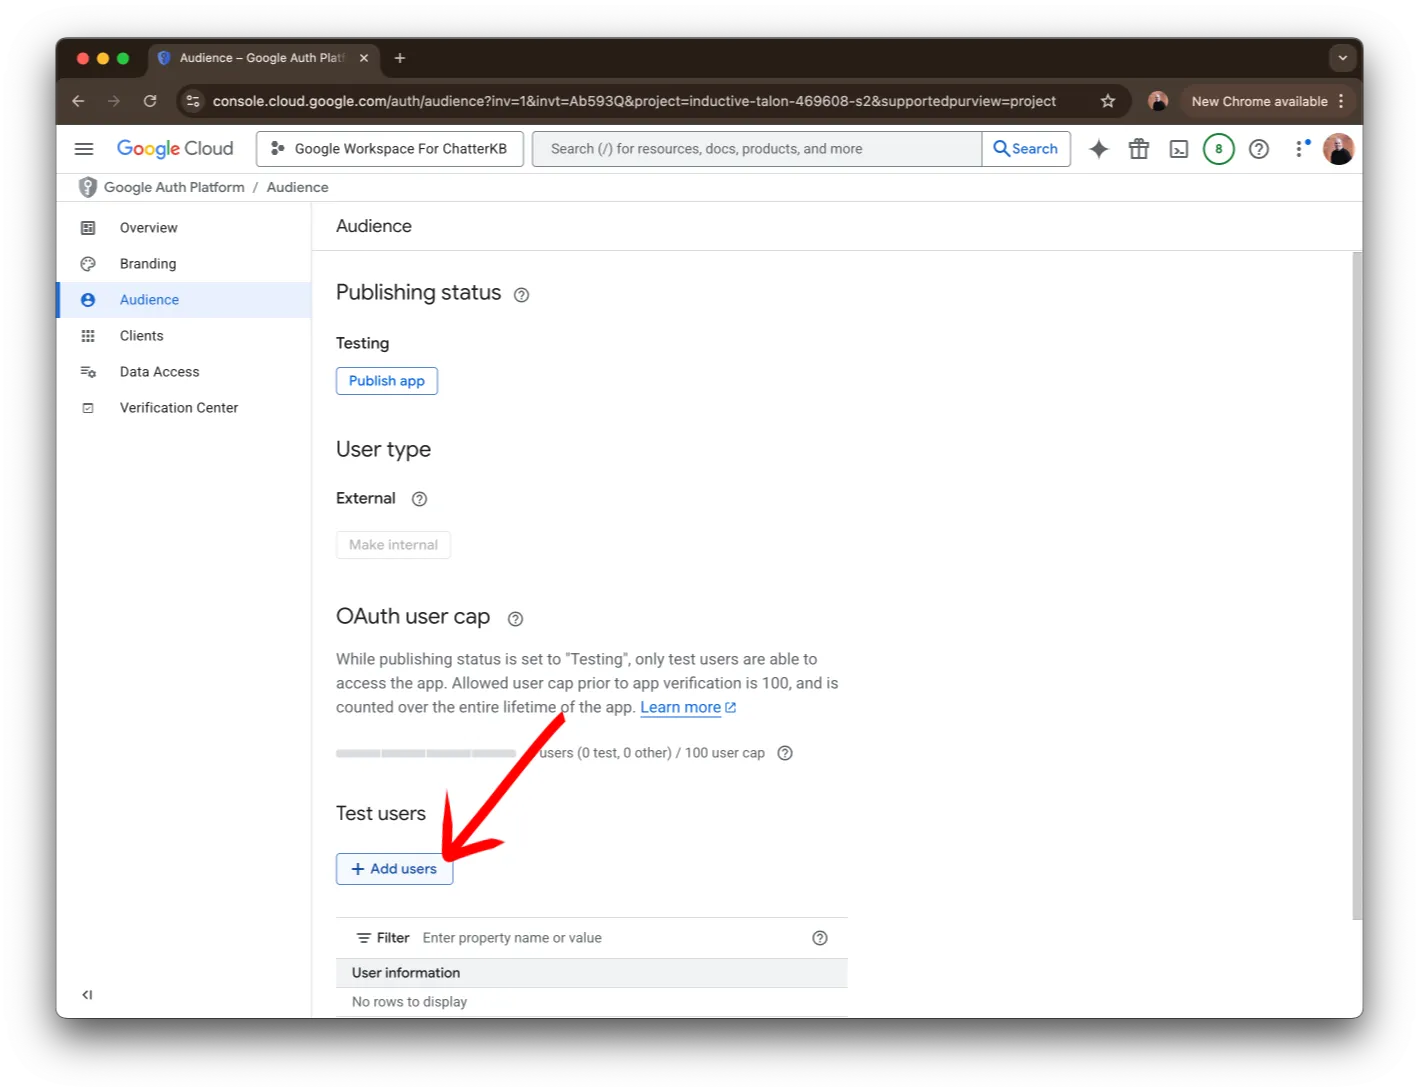
Next, click on the Add users button.
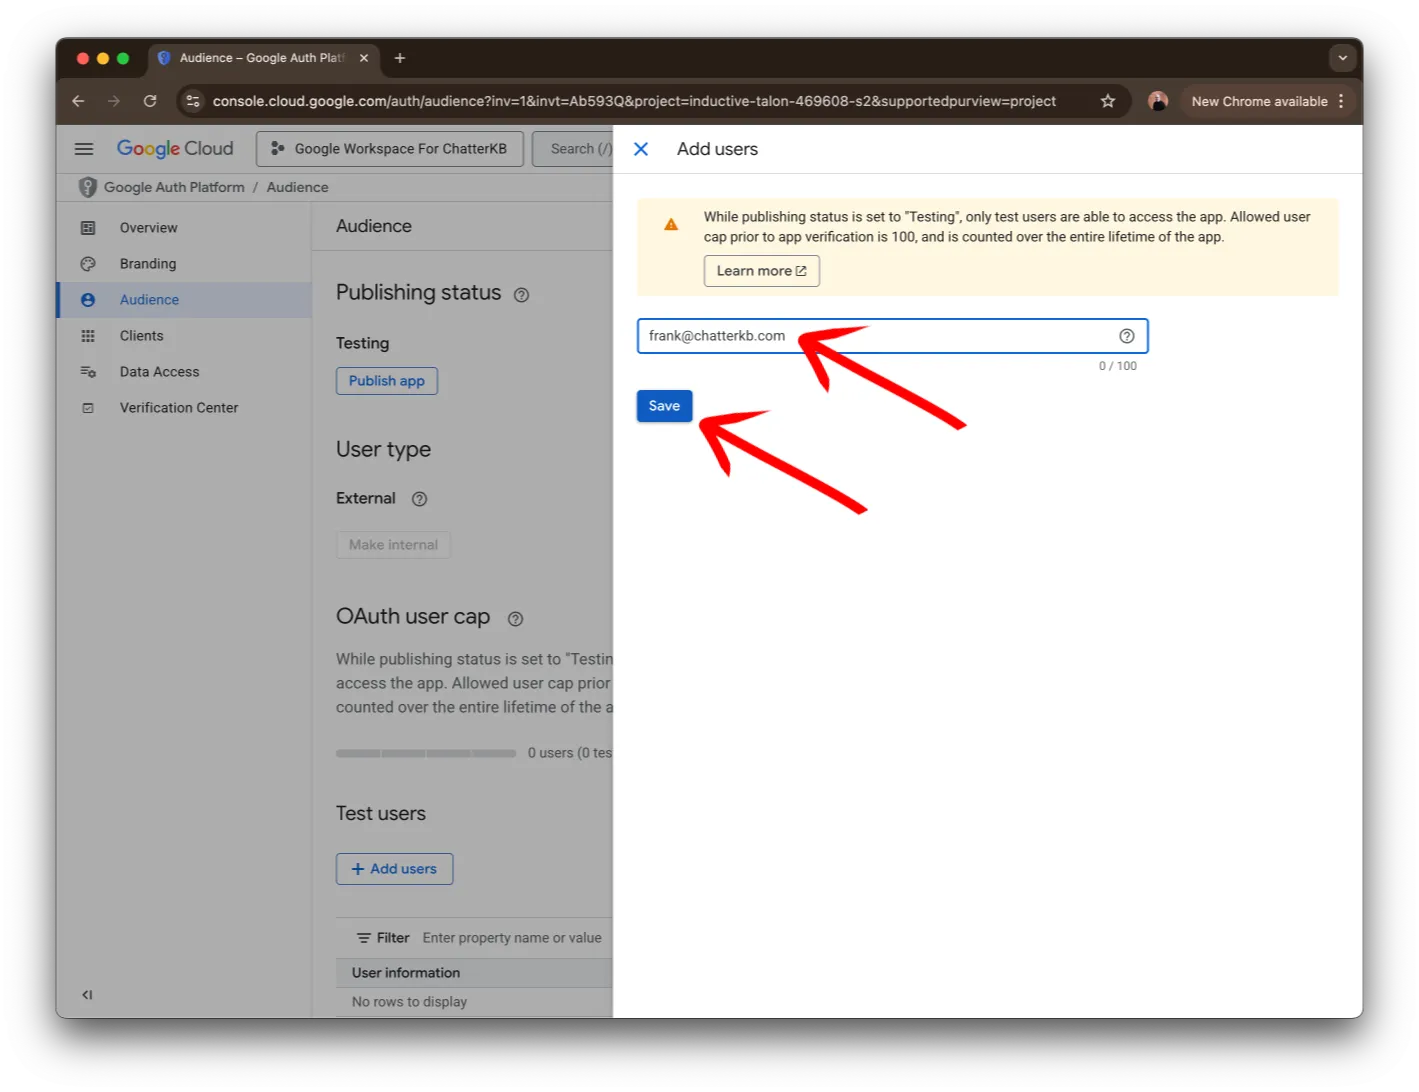
Then, add your email and click on Save
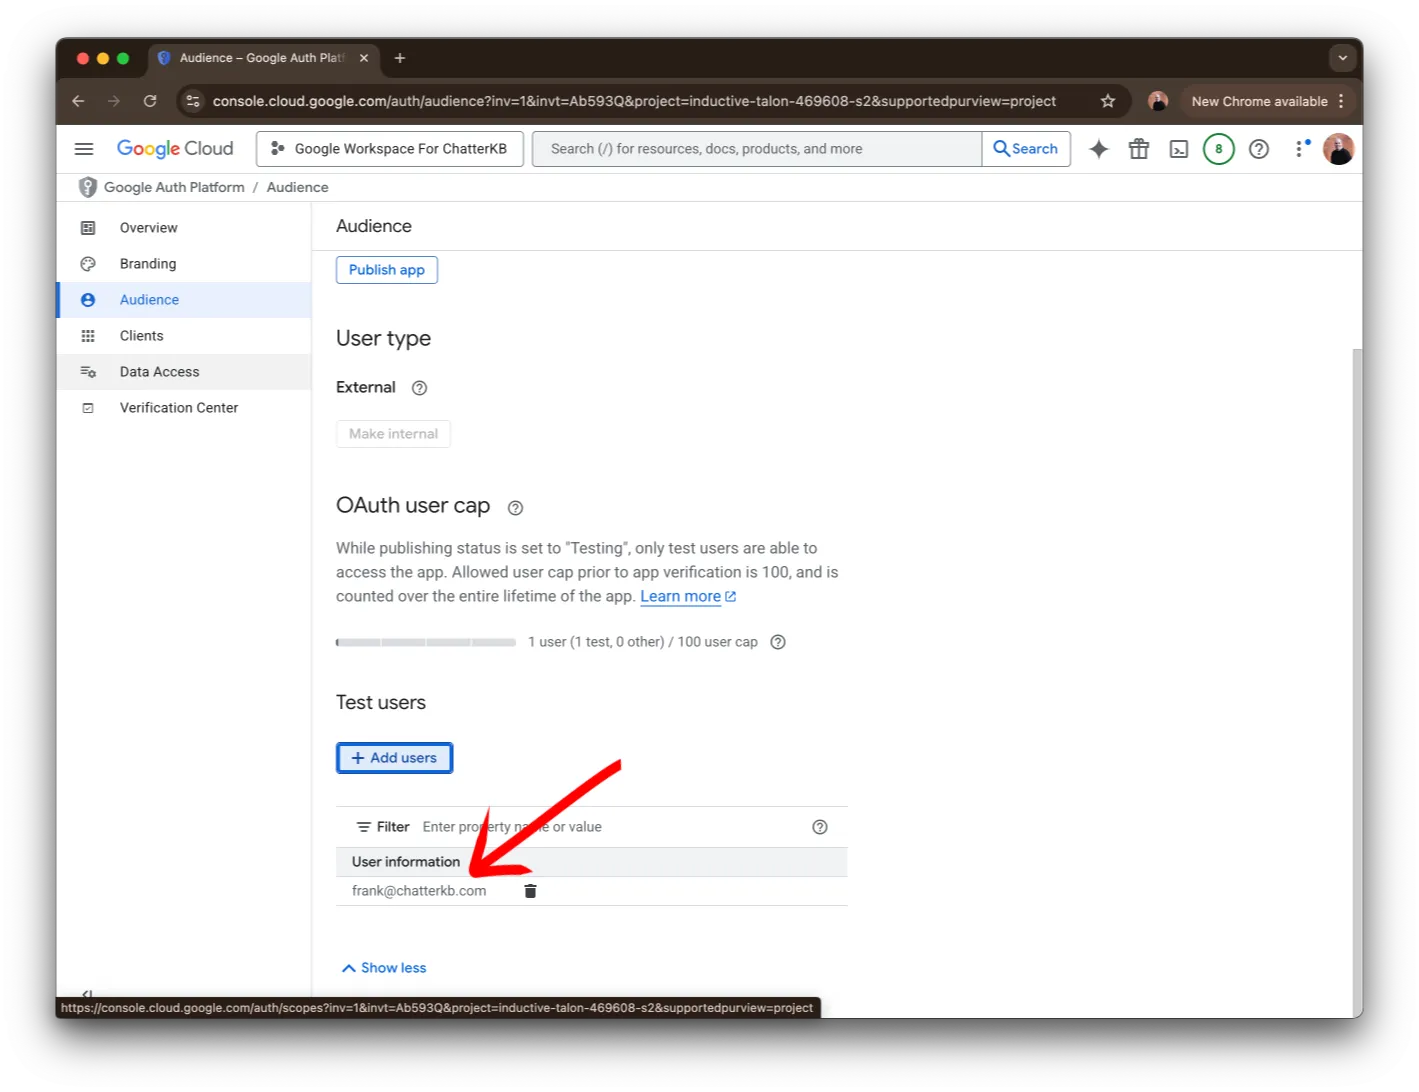
Finally, make sure that your email address is shown in the Test users section in the Audience page.
Step 7: Data Access
Next, we need to tell Google what data you want to share through this app.
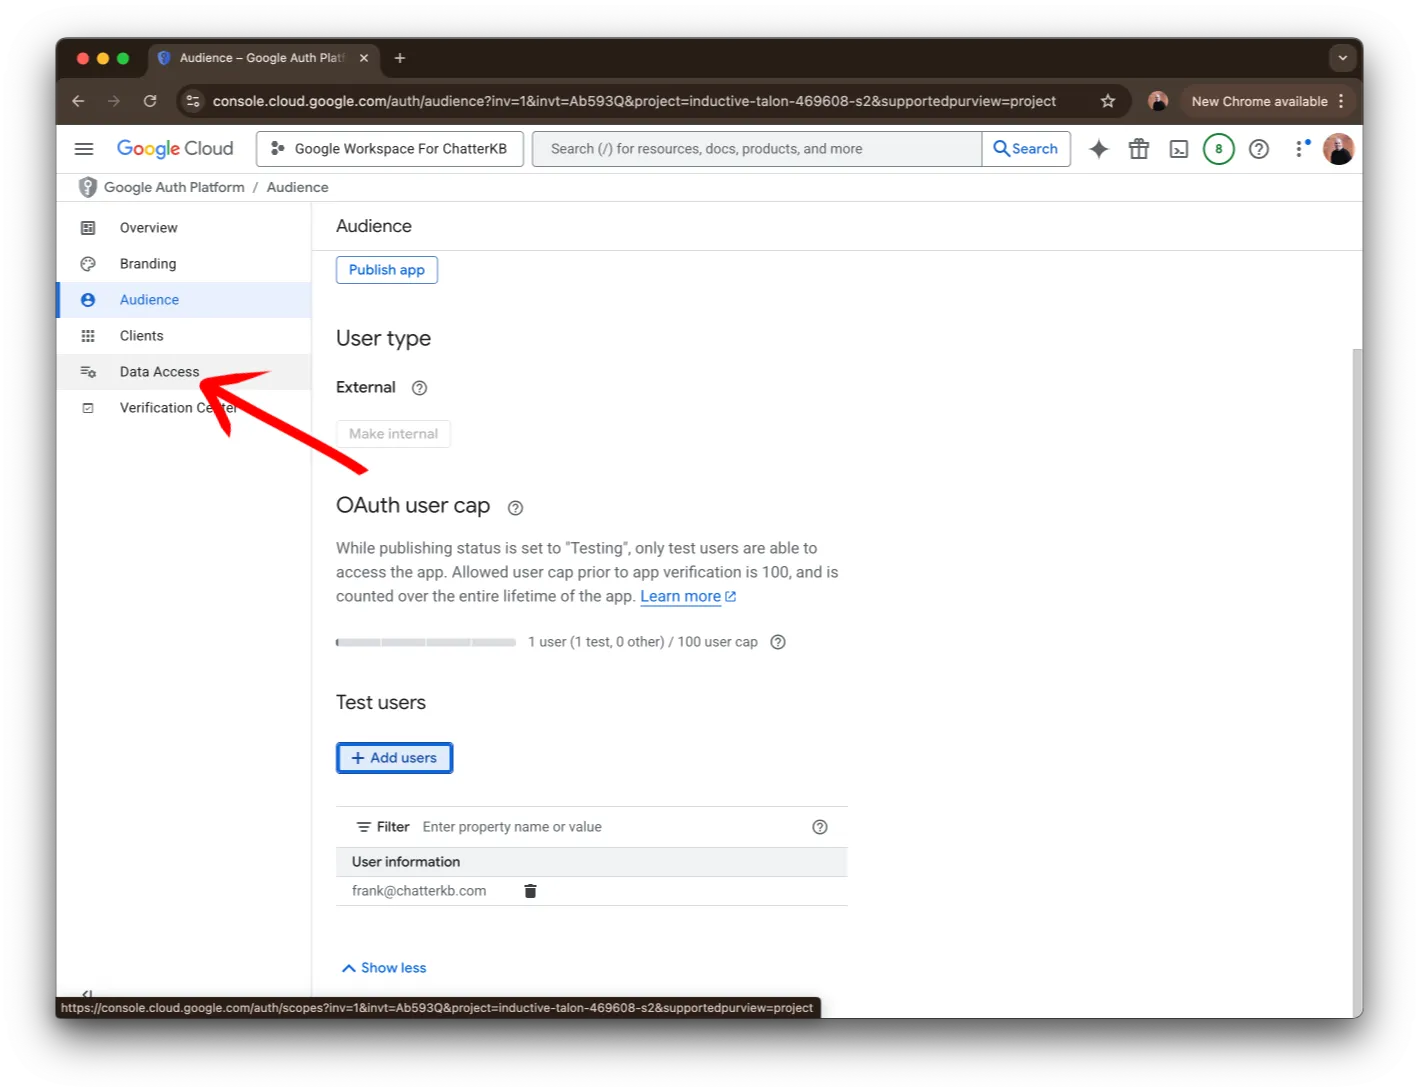
Find the Data Access item in the list on the far left and click on it.
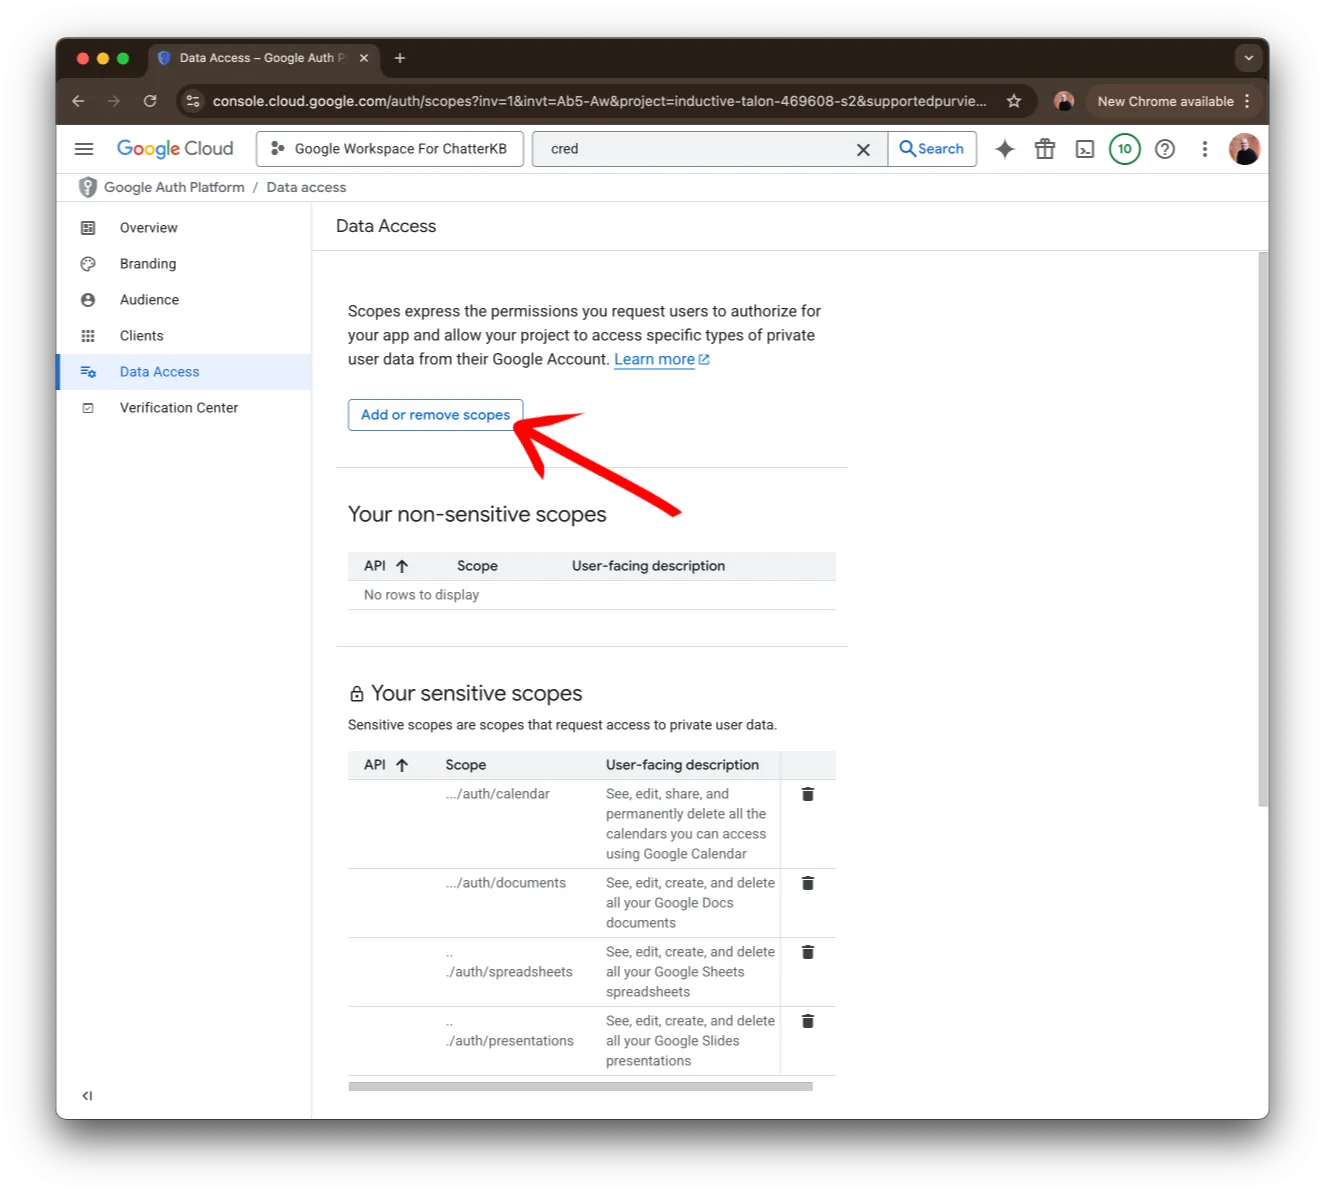
Next, click on the Add or remove scopes button. You’ll do this for each of the following services in Part 2.
Step 7: Data Access
Next, we need to tell Google what data you want to share through this app. This will be defined for each API.
Find the Data Access item in the list on the far left and click on it.
Next, click on the Add or remove scopes button. You’ll do this for each of the APIs.

Once you’ve added all of the APIs, make sure that they appear in the Data Access page and that you have clicked on the Save button.
Click on the Add or remove scopes button.
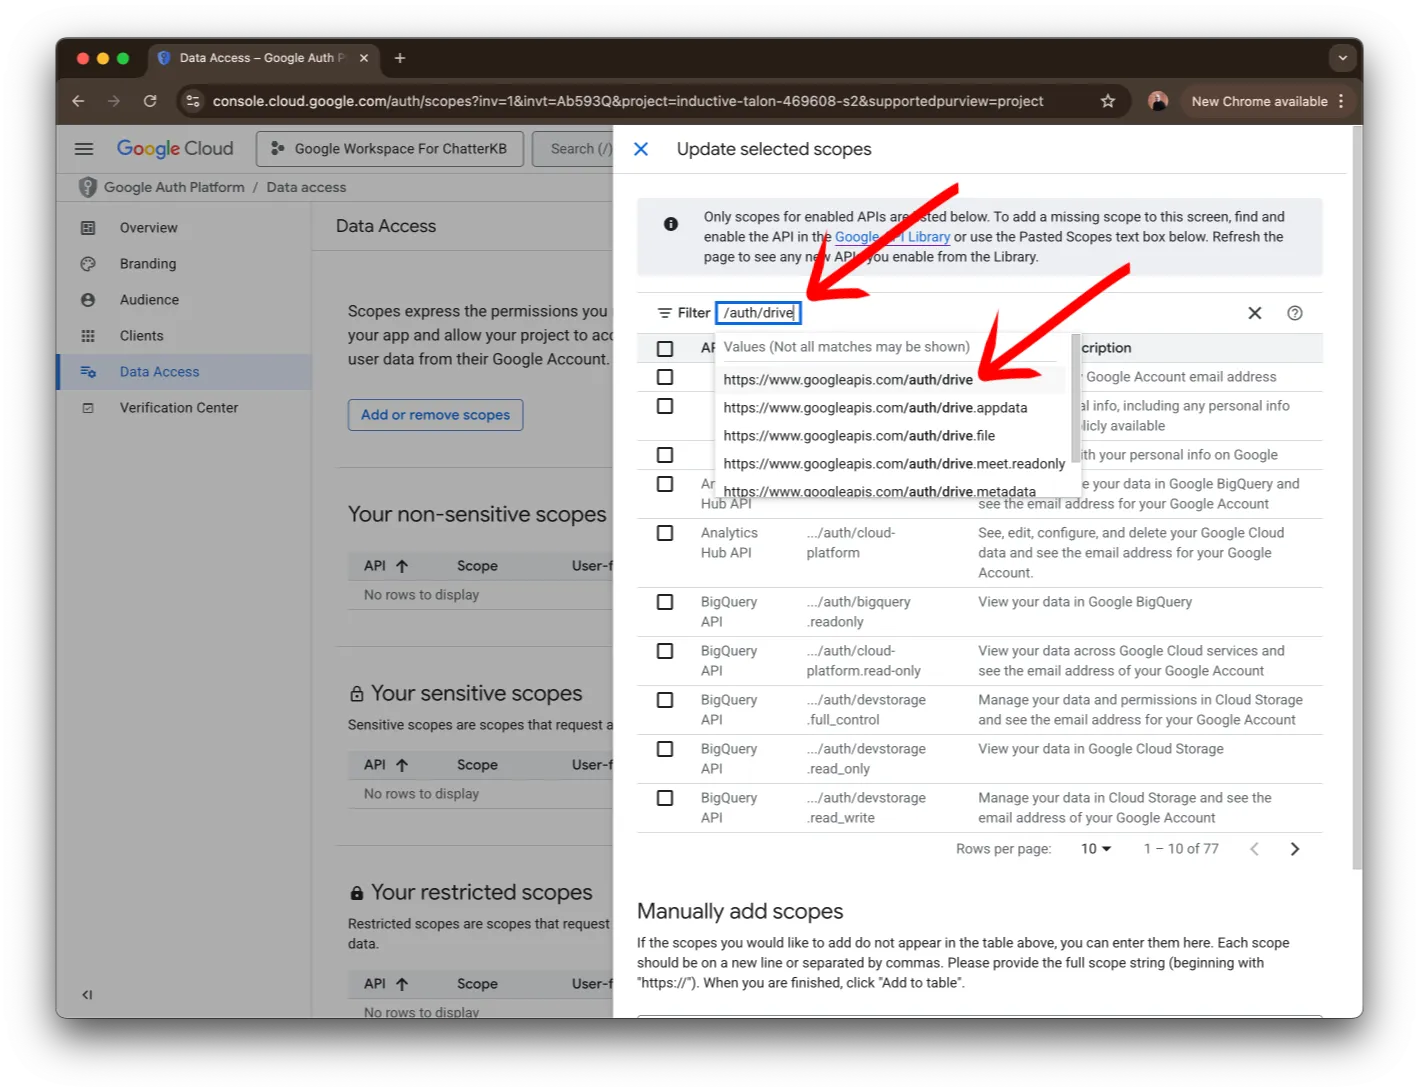
Next, search for /auth/drive. You should see https://www.googleapis.com/auth/drive in the list below the search bar. Click on it to continue.
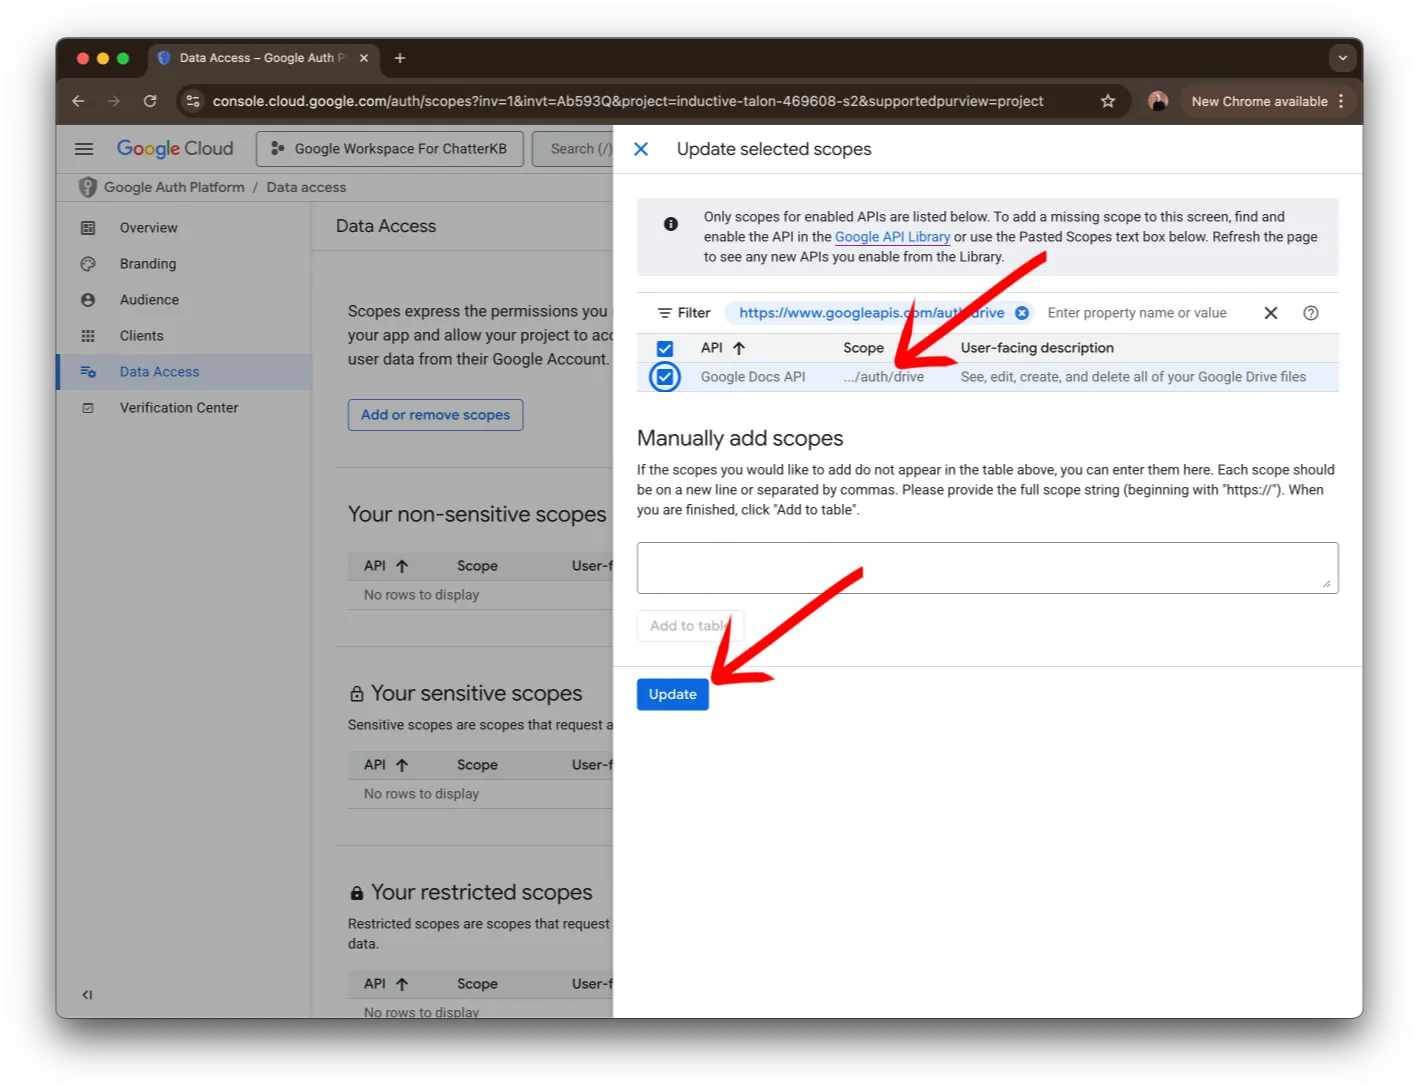
Verify the access was selected and click the Update button.
Click on the Add or remove scopes button.
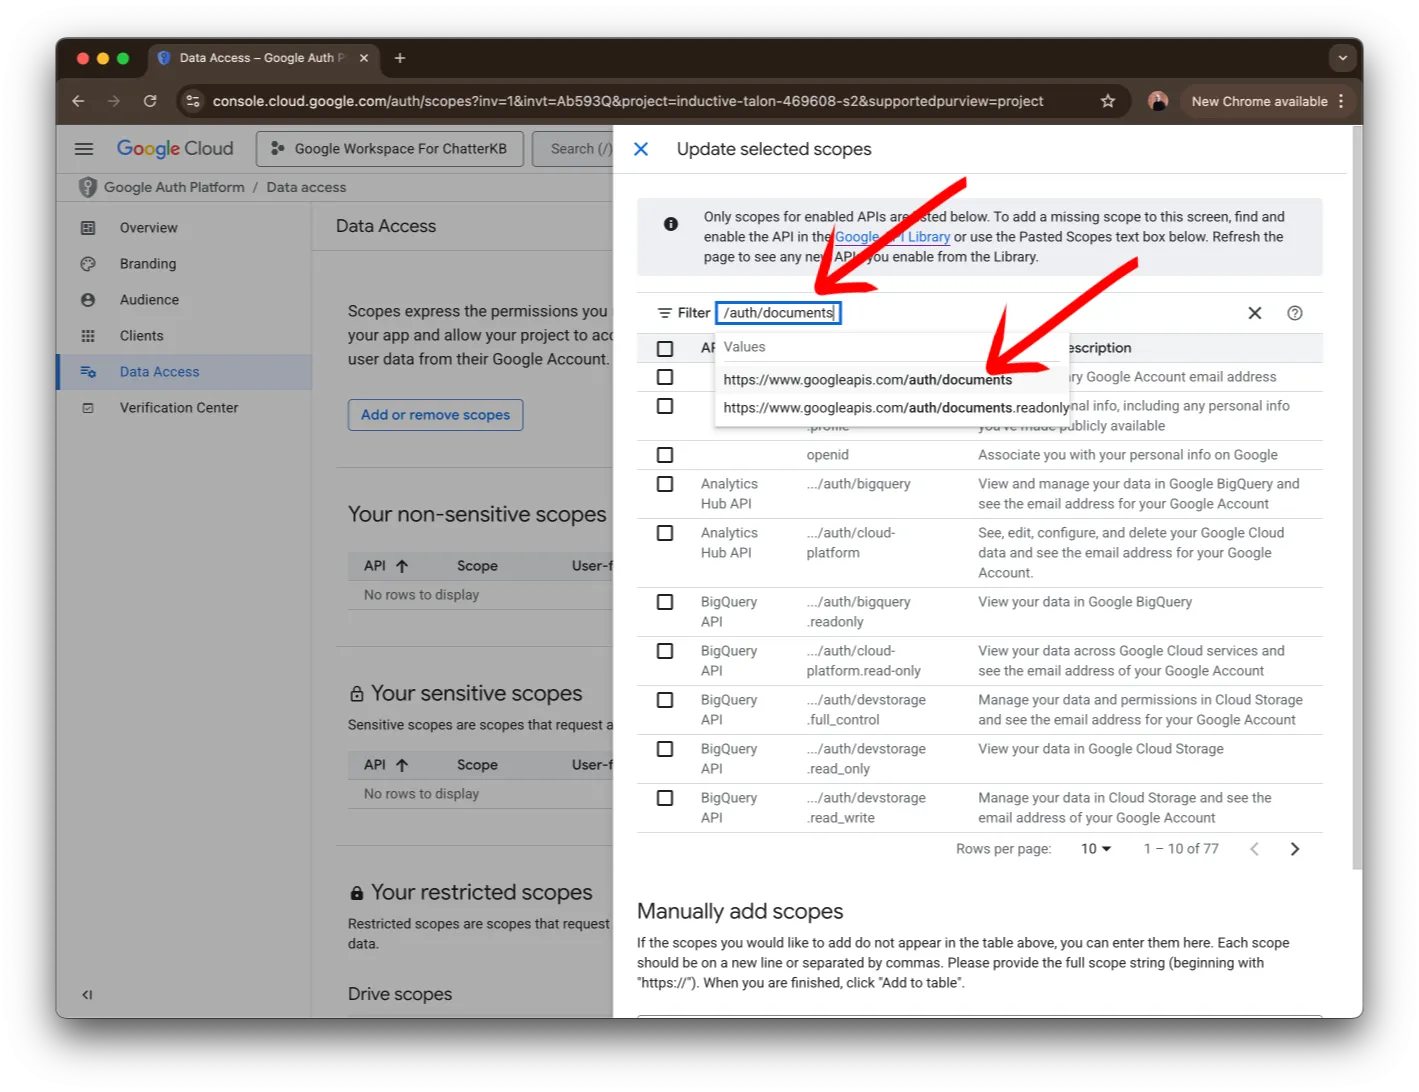
Next, search for /auth/documents. You should see https://www.googleapis.com/auth/documents in the list below the search bar. Click on it to continue.
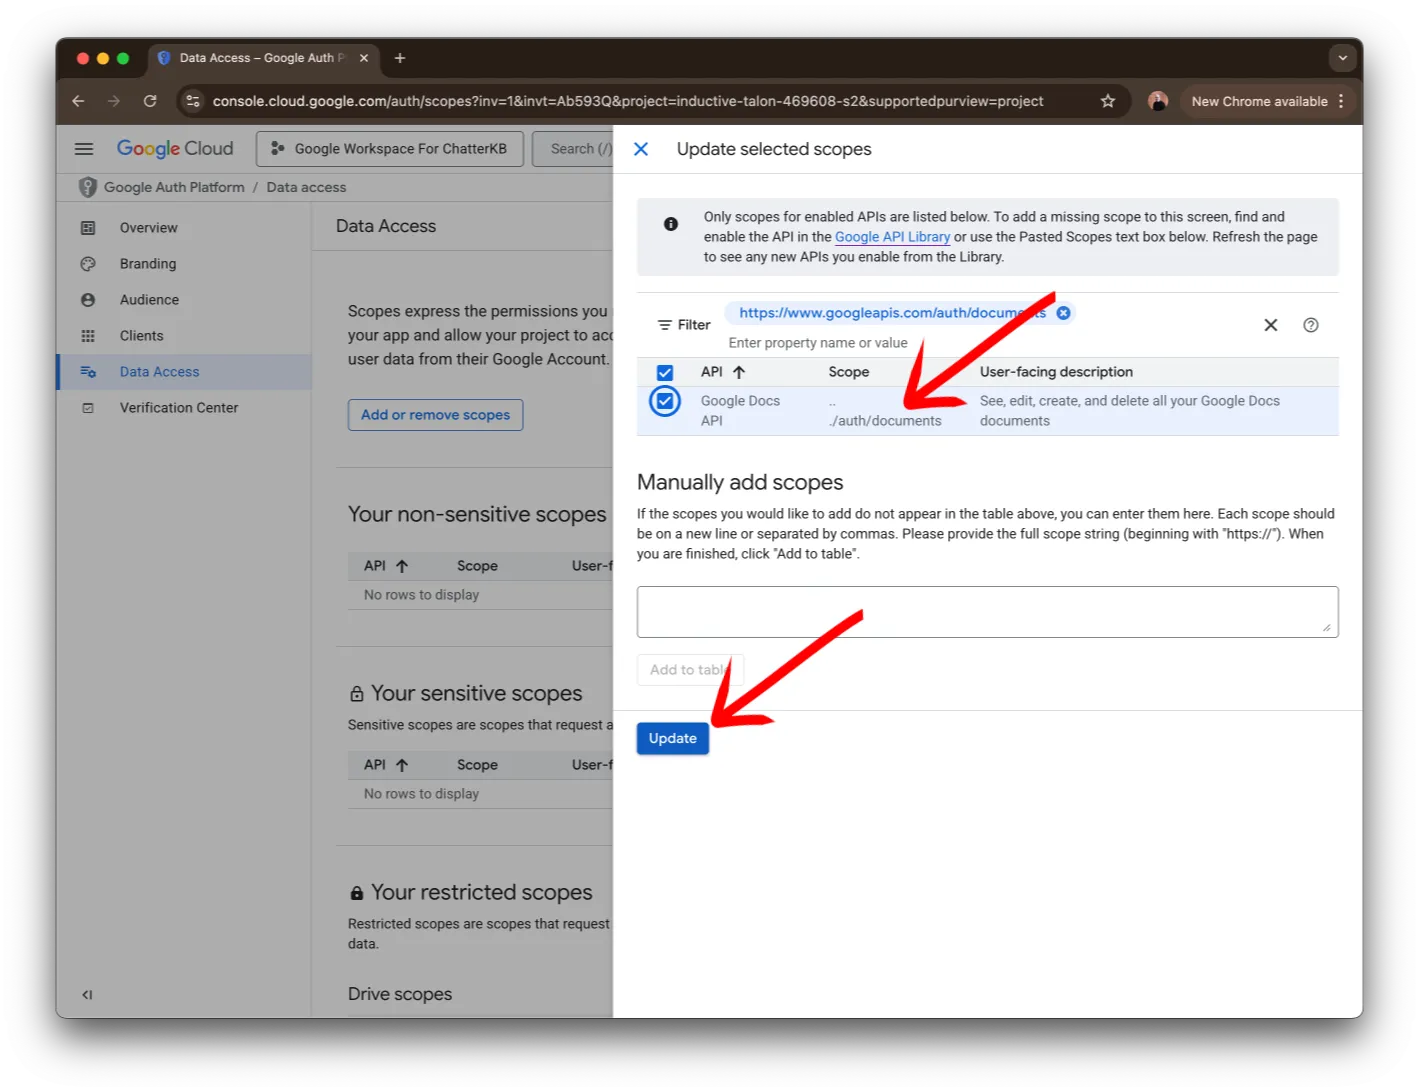
Verify the access was selected and click the Update button.
Click on the Add or remove scopes button.
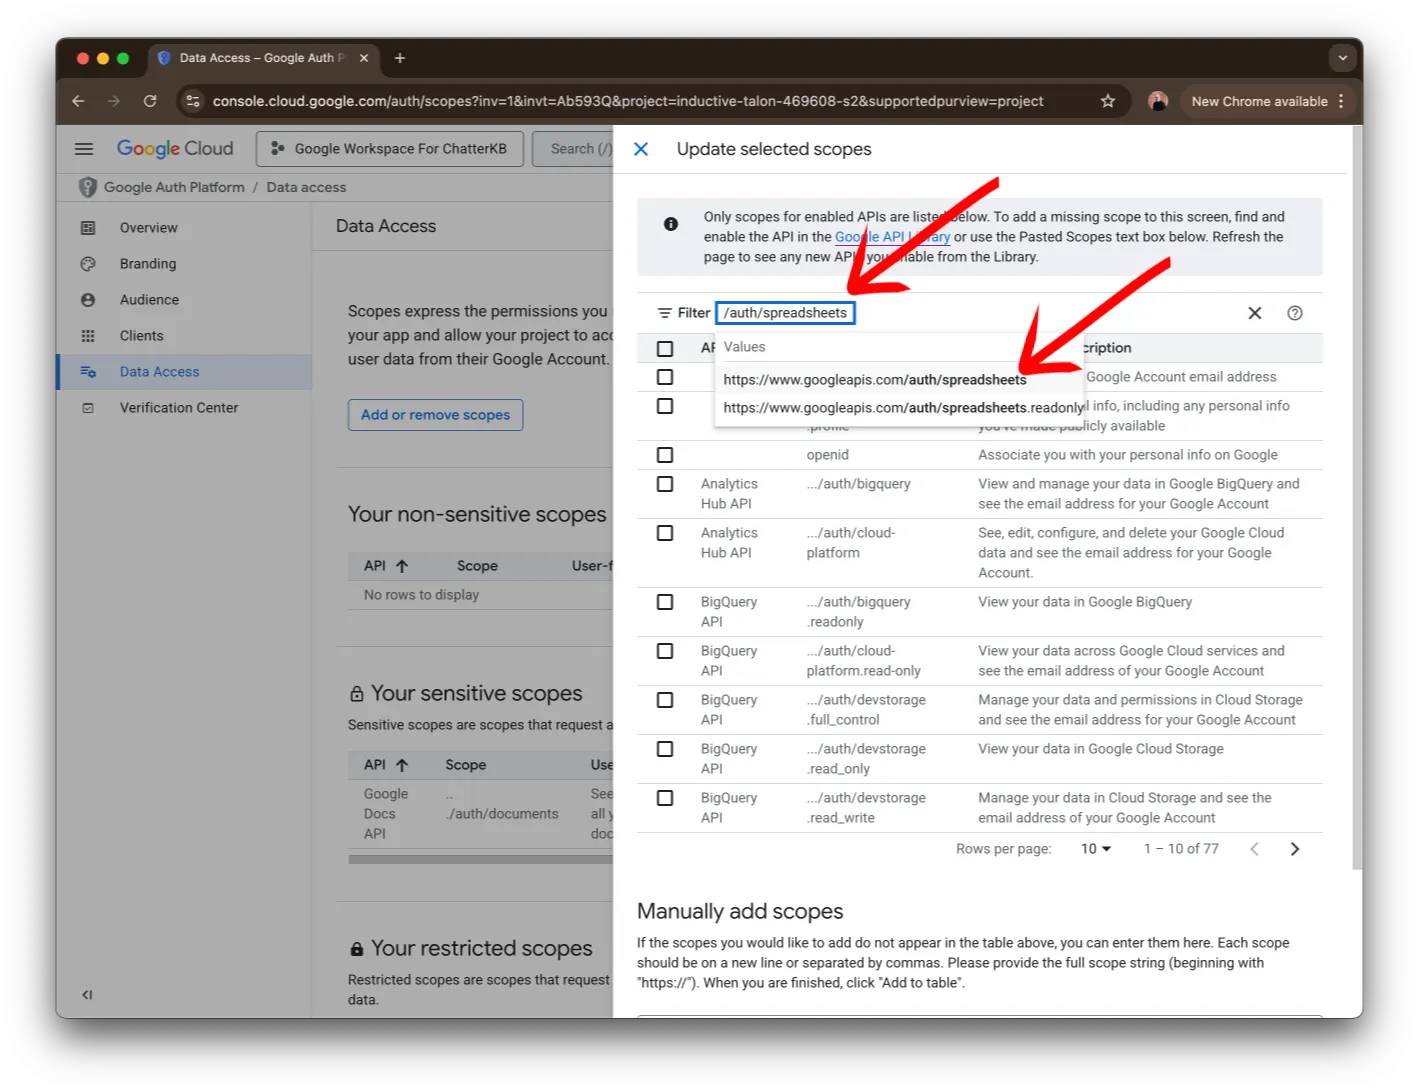
Next, search for /auth/spreadsheets. You should see https://www.googleapis.com/auth/spreadsheets in the list below the search bar. Click on it to continue.

Verify the access was selected and click the Update button.
Click on the Add or remove scopes button.

Next, search for /auth/presentations. You should see https://www.googleapis.com/auth/presentations in the list below the search bar. Click on it to continue.

Verify the access was selected and click the Update button.
Click on the Add or remove scopes button.
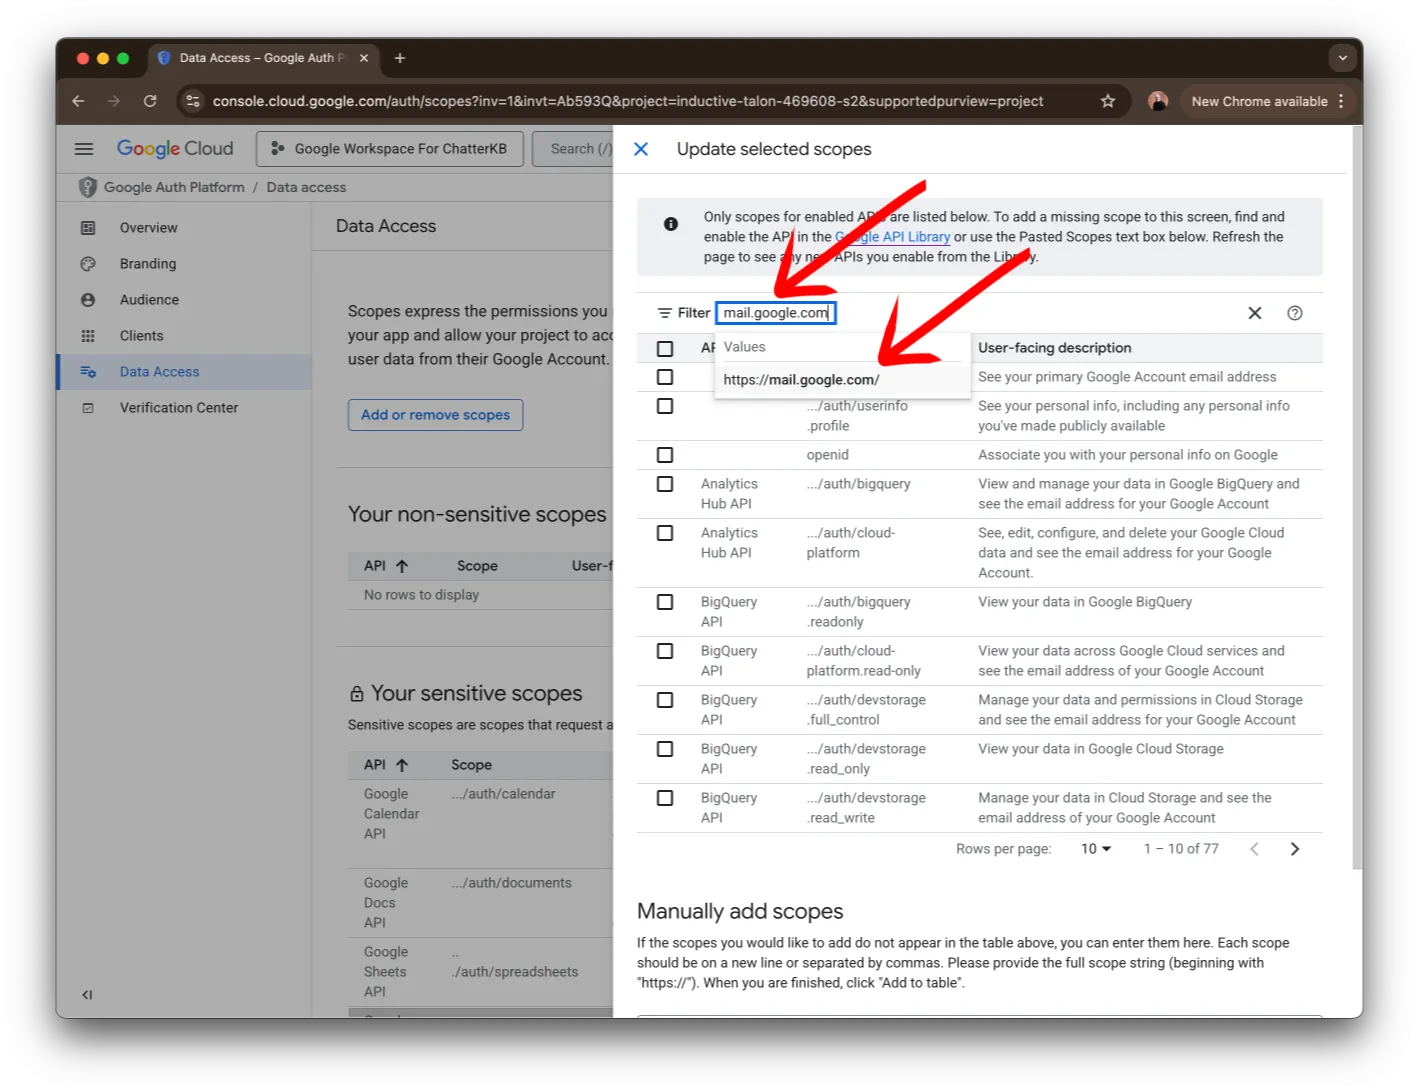
Next, search for mail.google.com. You should see https://mail.google.com/ in the list below the search bar. Click on it to continue.
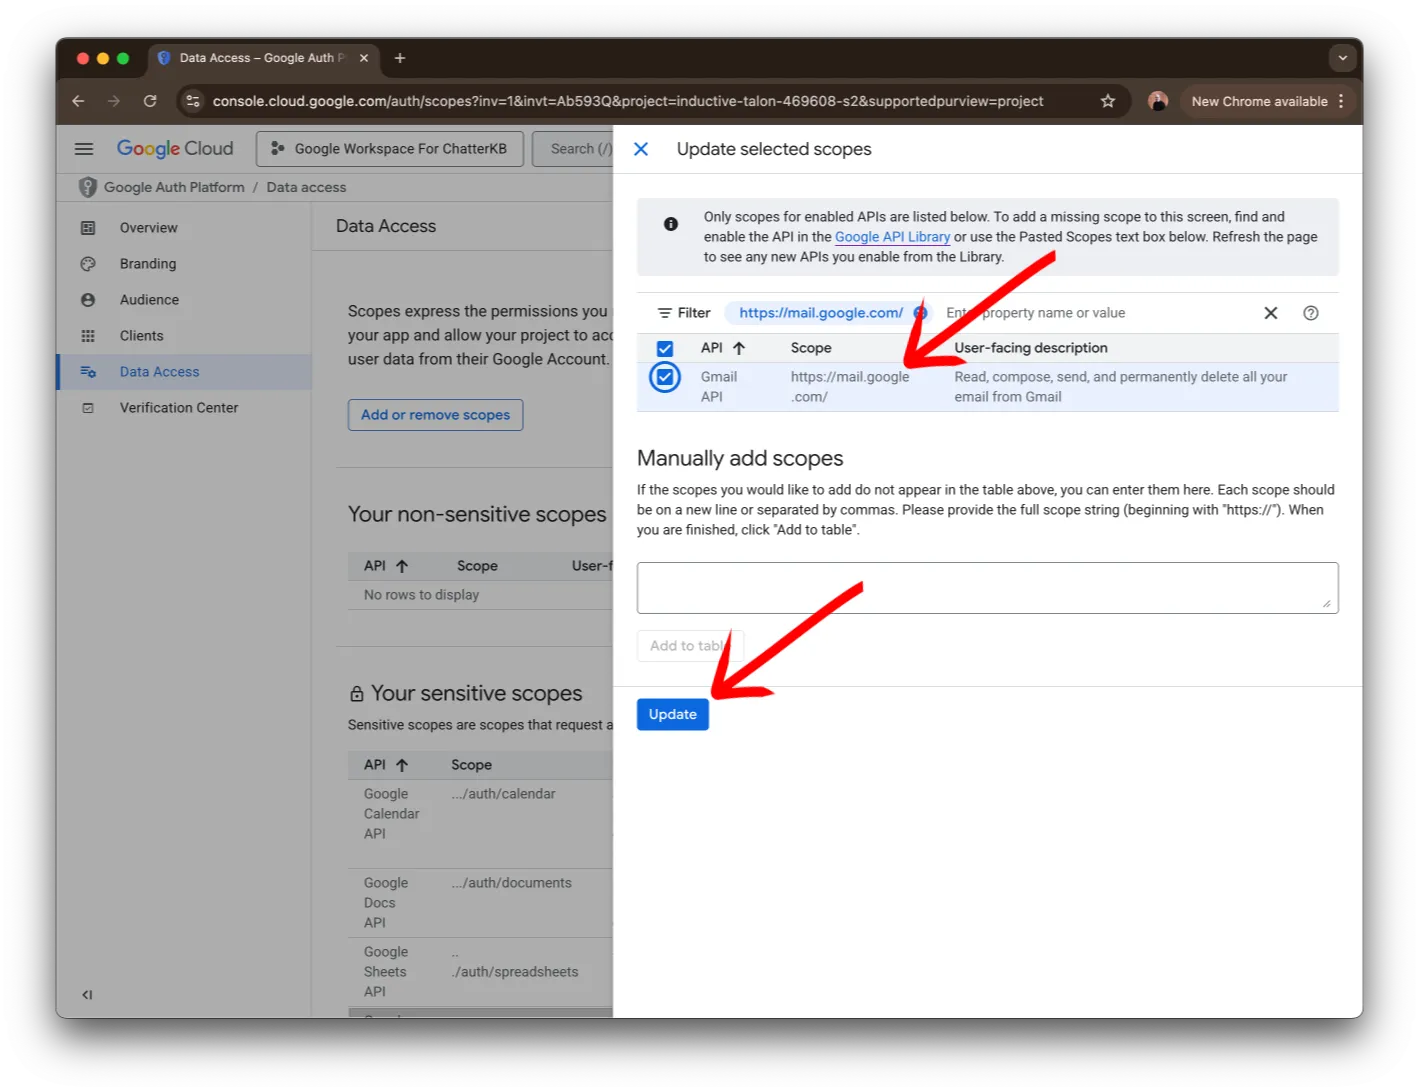
Verify the access was selected and click the Update button.
Click on the Add or remove scopes button.
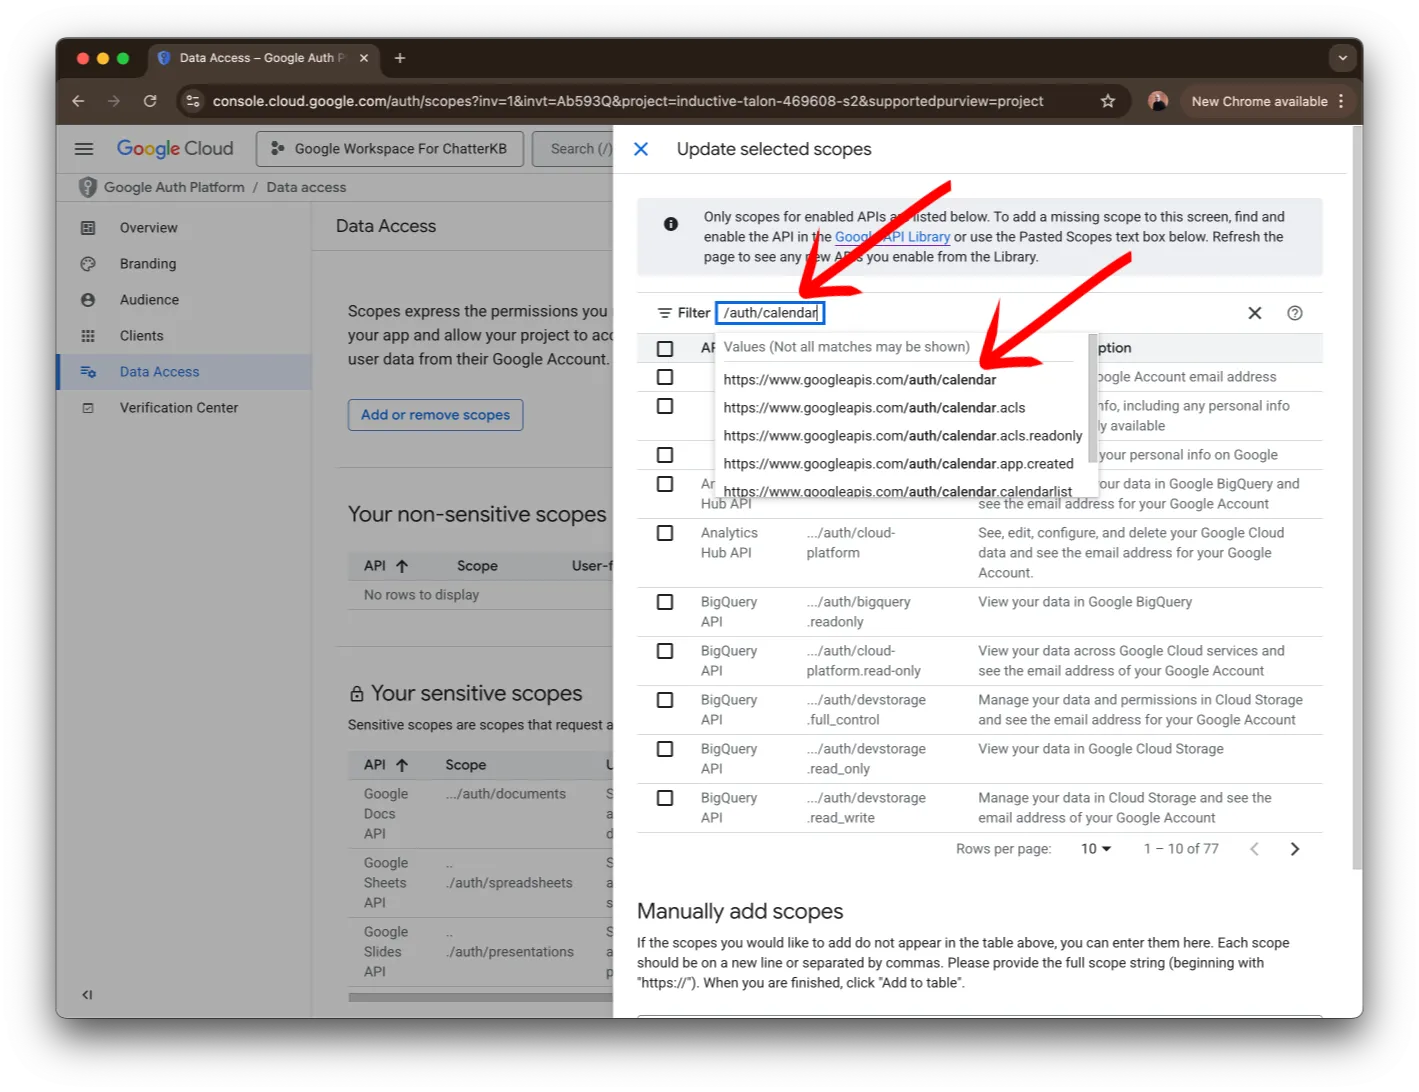
Next, search for /auth/calendar. You should see https://www.googleapis.com/auth/calendar in the list below the search bar. Click on it to continue.
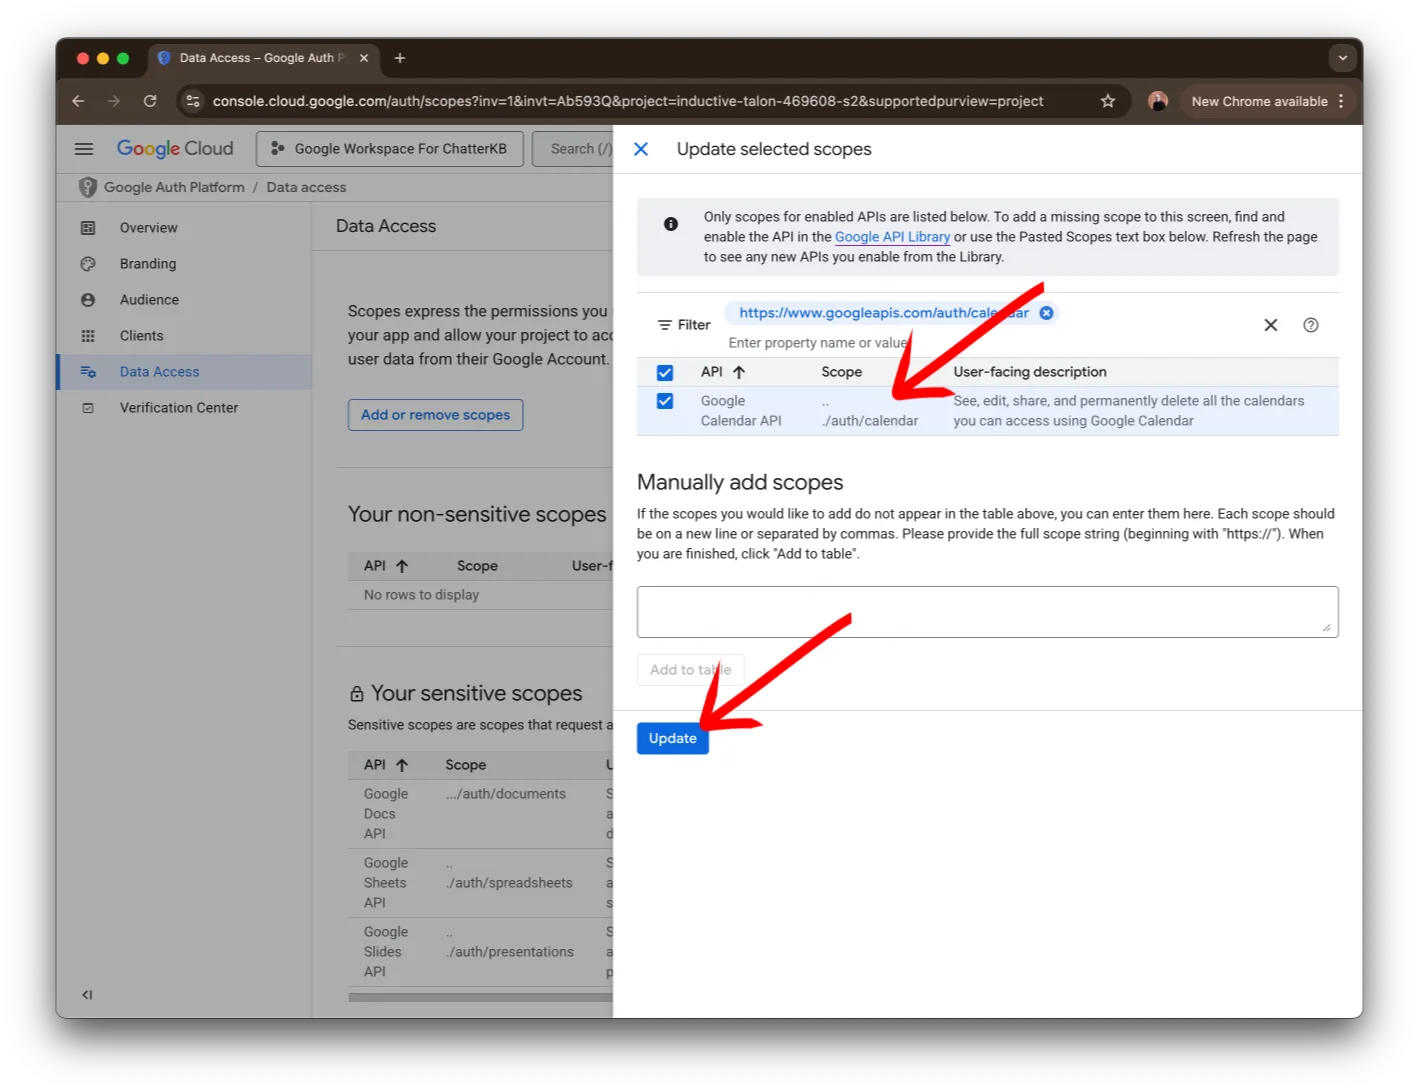
Verify the access was selected and click the Update button.
ChatterKB Integration
Now we can integrate with ChatterKB. You’ll just need a few more steps to tie everything together.
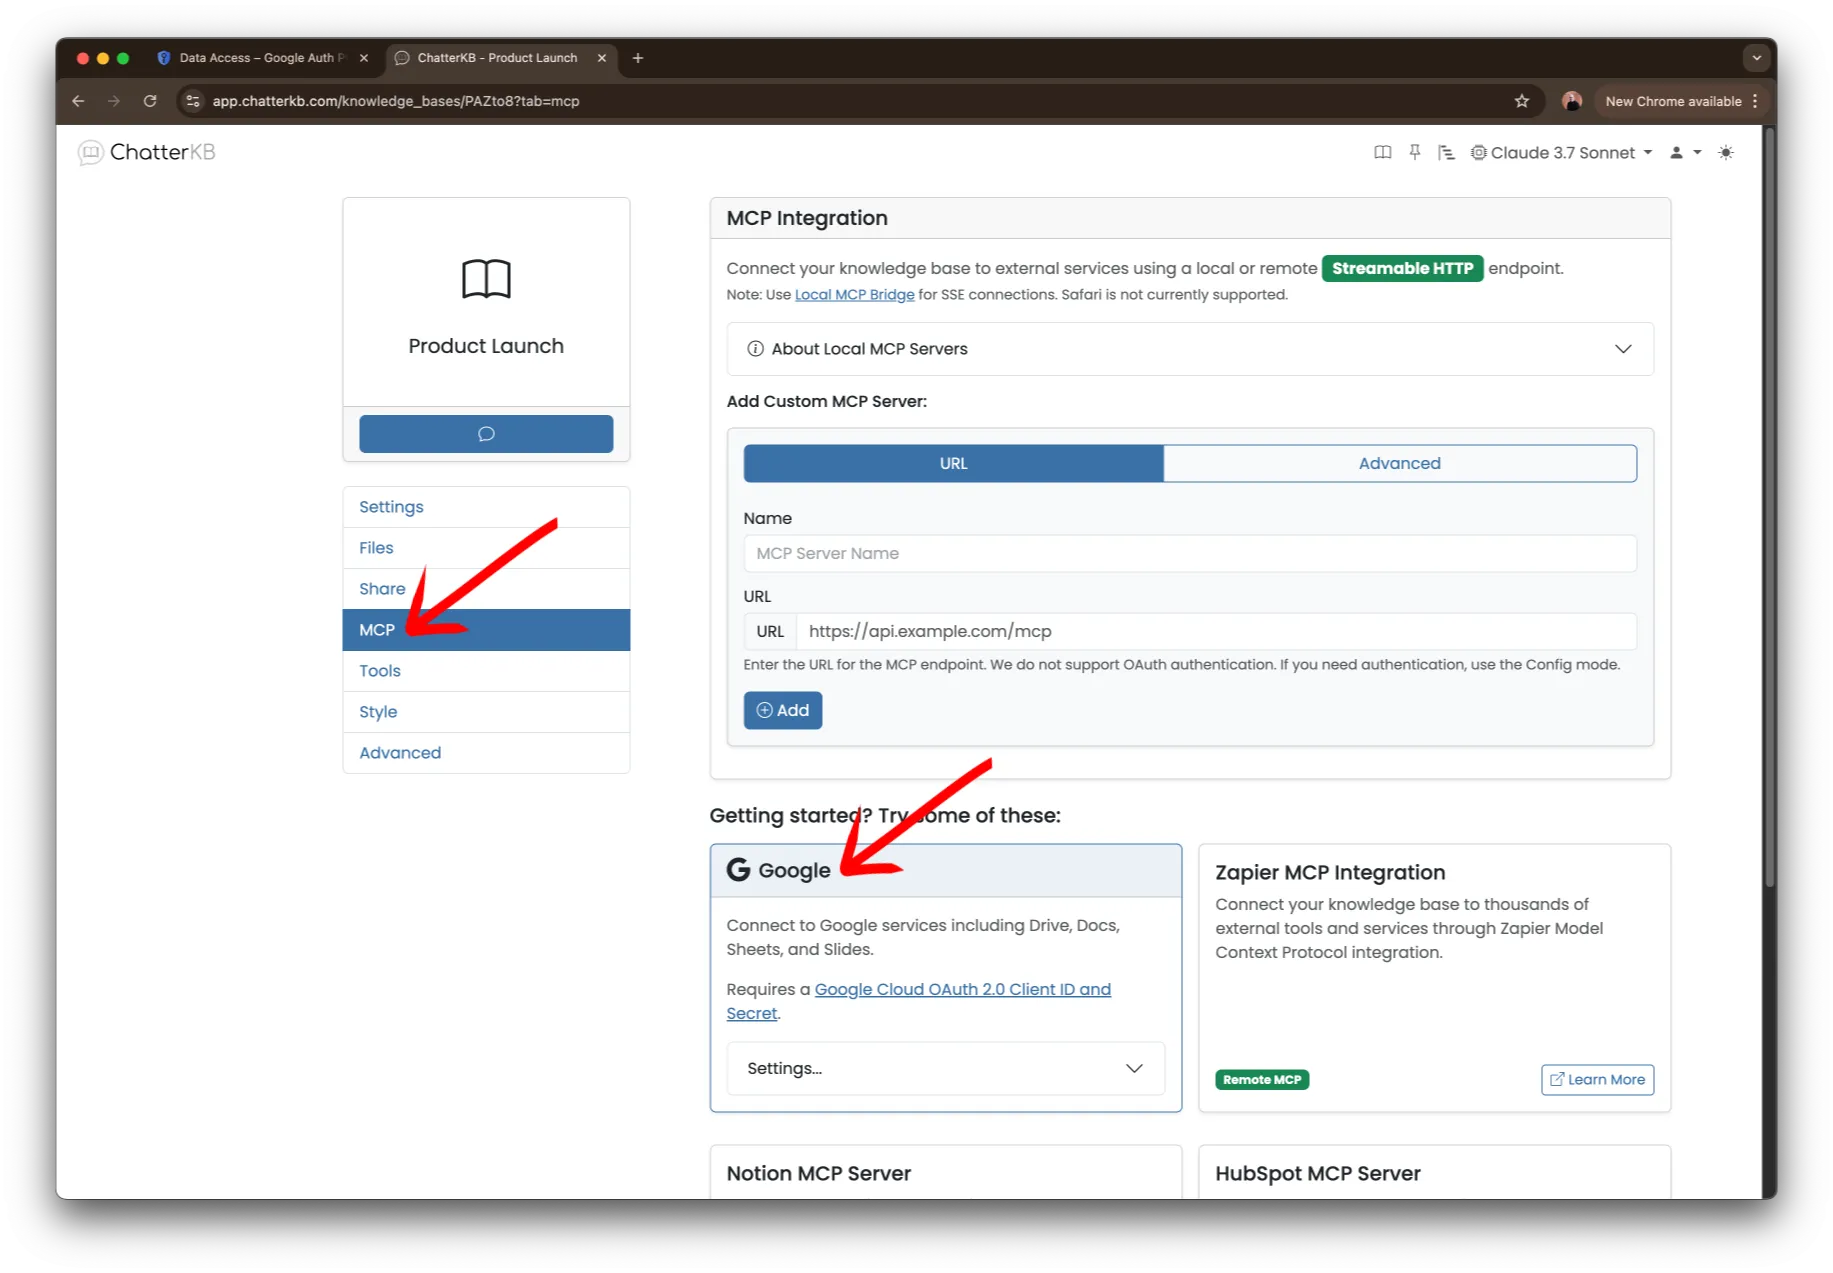
Visit the settings for your ChatterKB knowledge base and click on the MCP item on the left hand side. Then locate the Google MCP server settings.
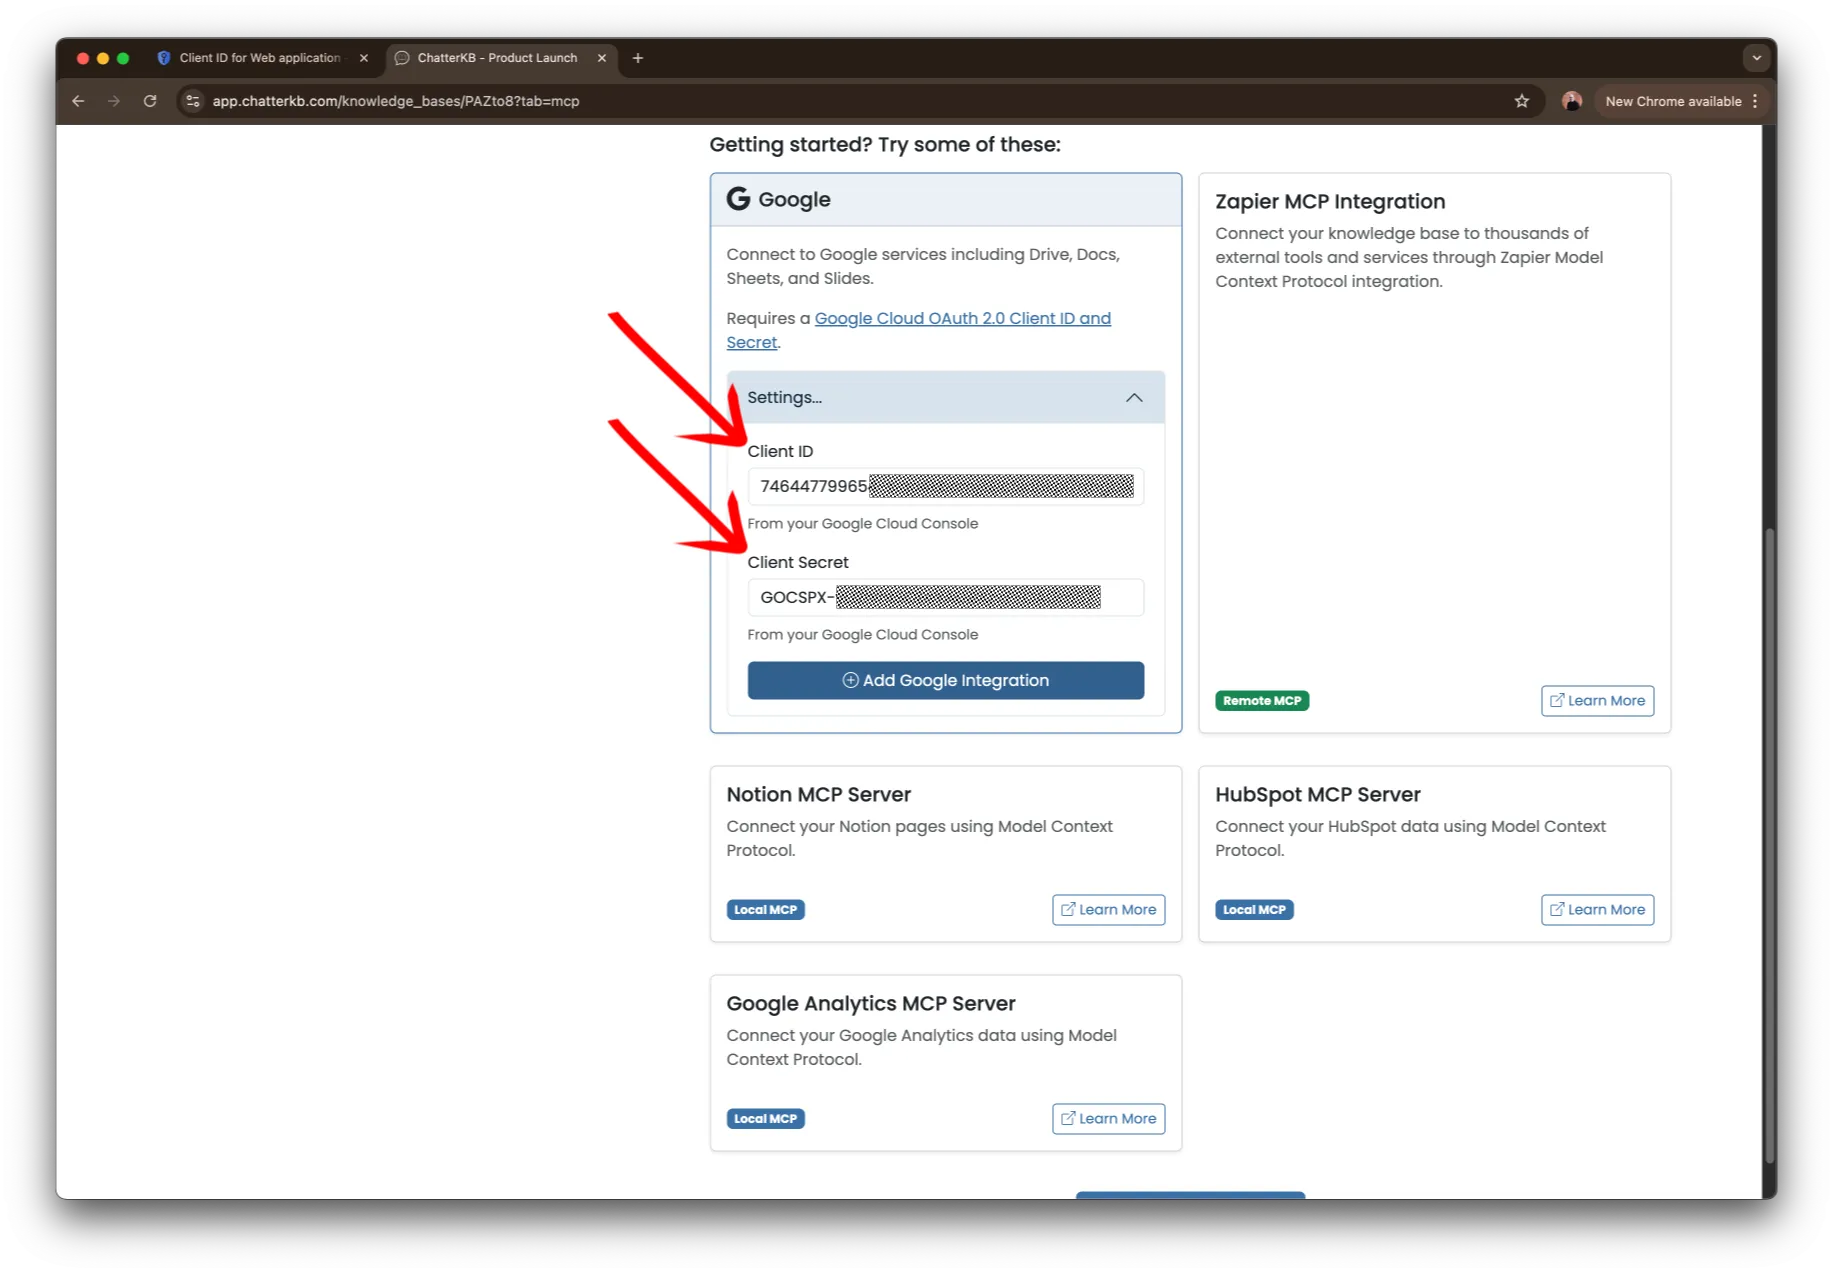
Next, expand the settings area and take the client id and client secret you saved from Step 5 and paste them into each of the fields. Click the Add Google Integration button.
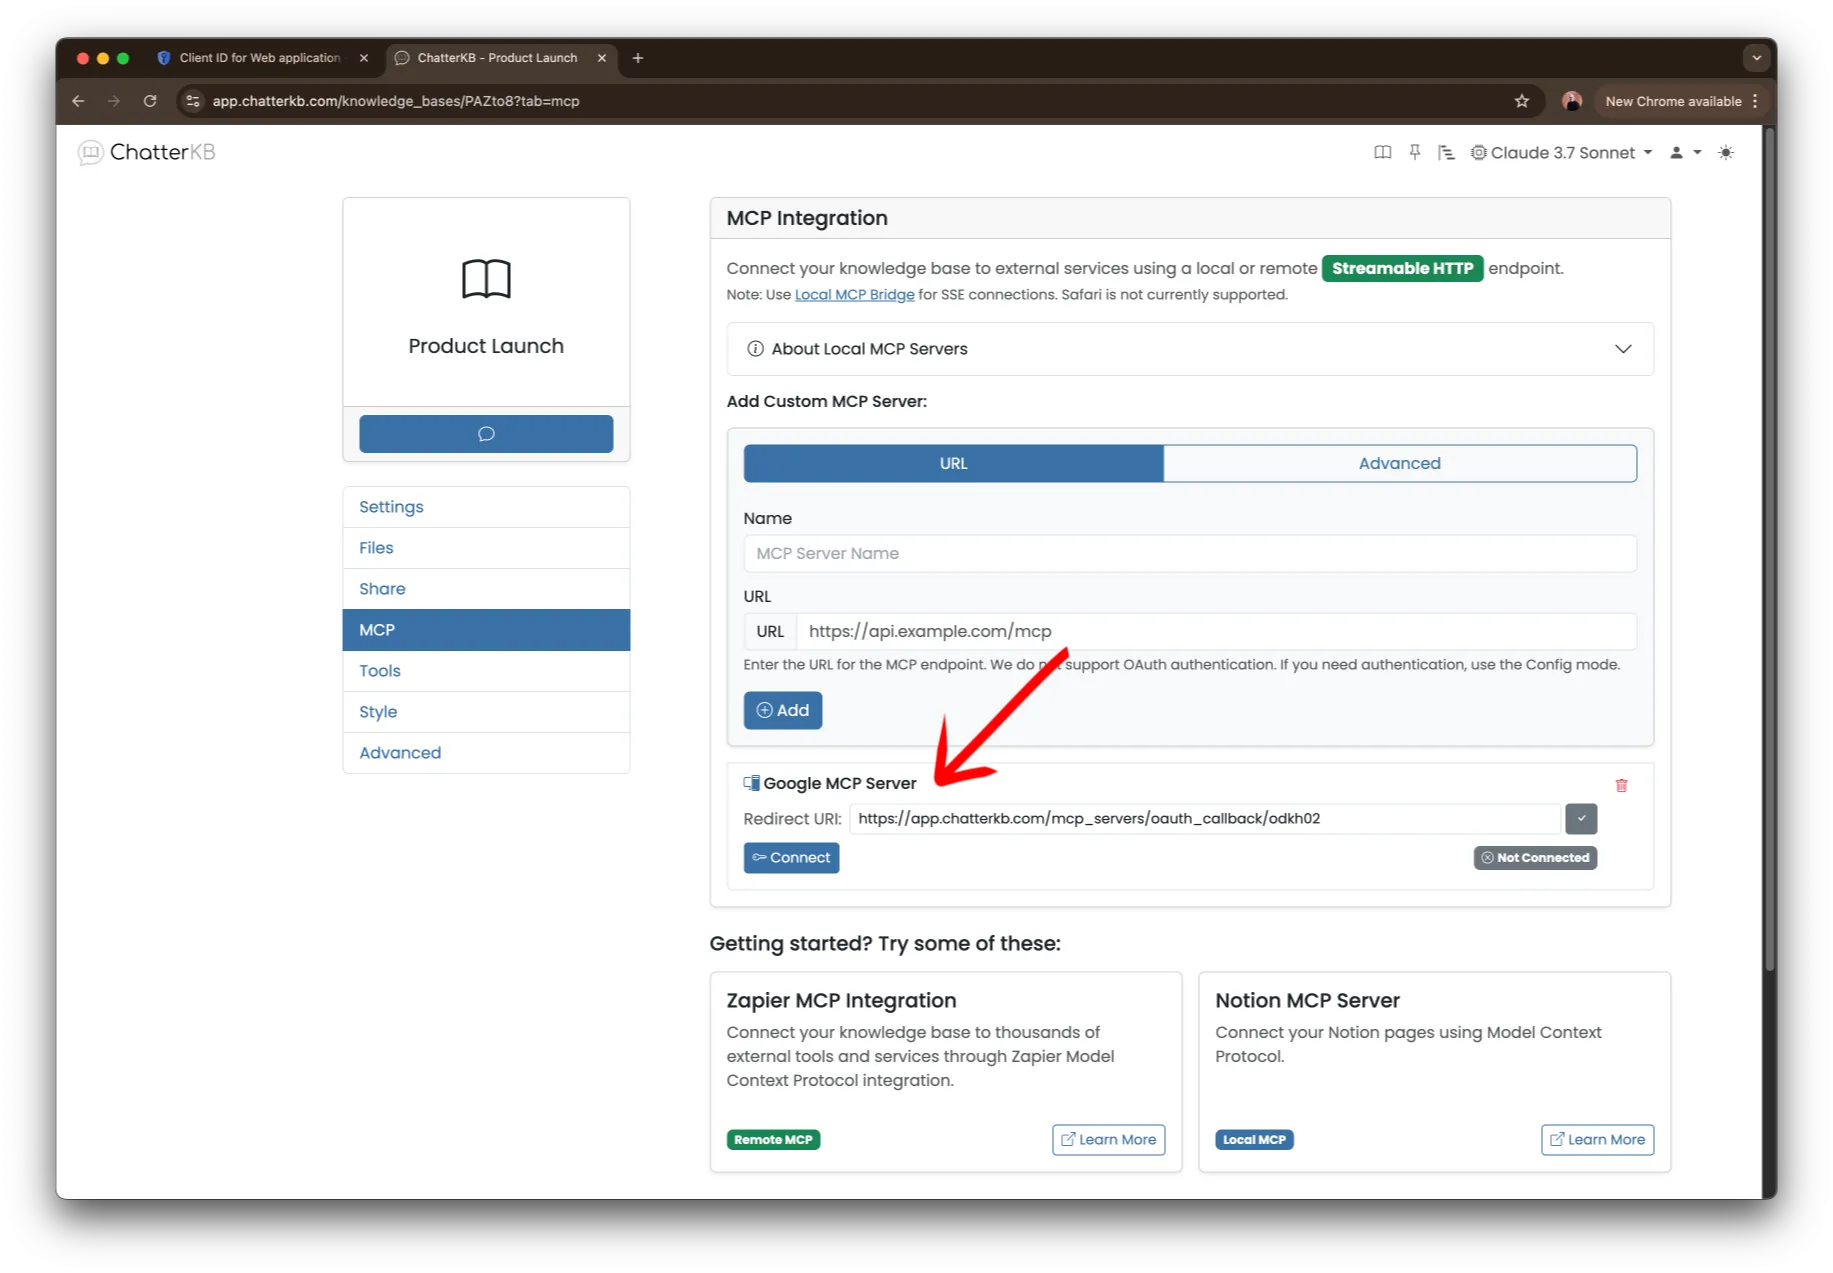
Now, you’ll see the MCP server added to your list. Before we connect, copy the Redirect URL and return to the Google Cloud Console
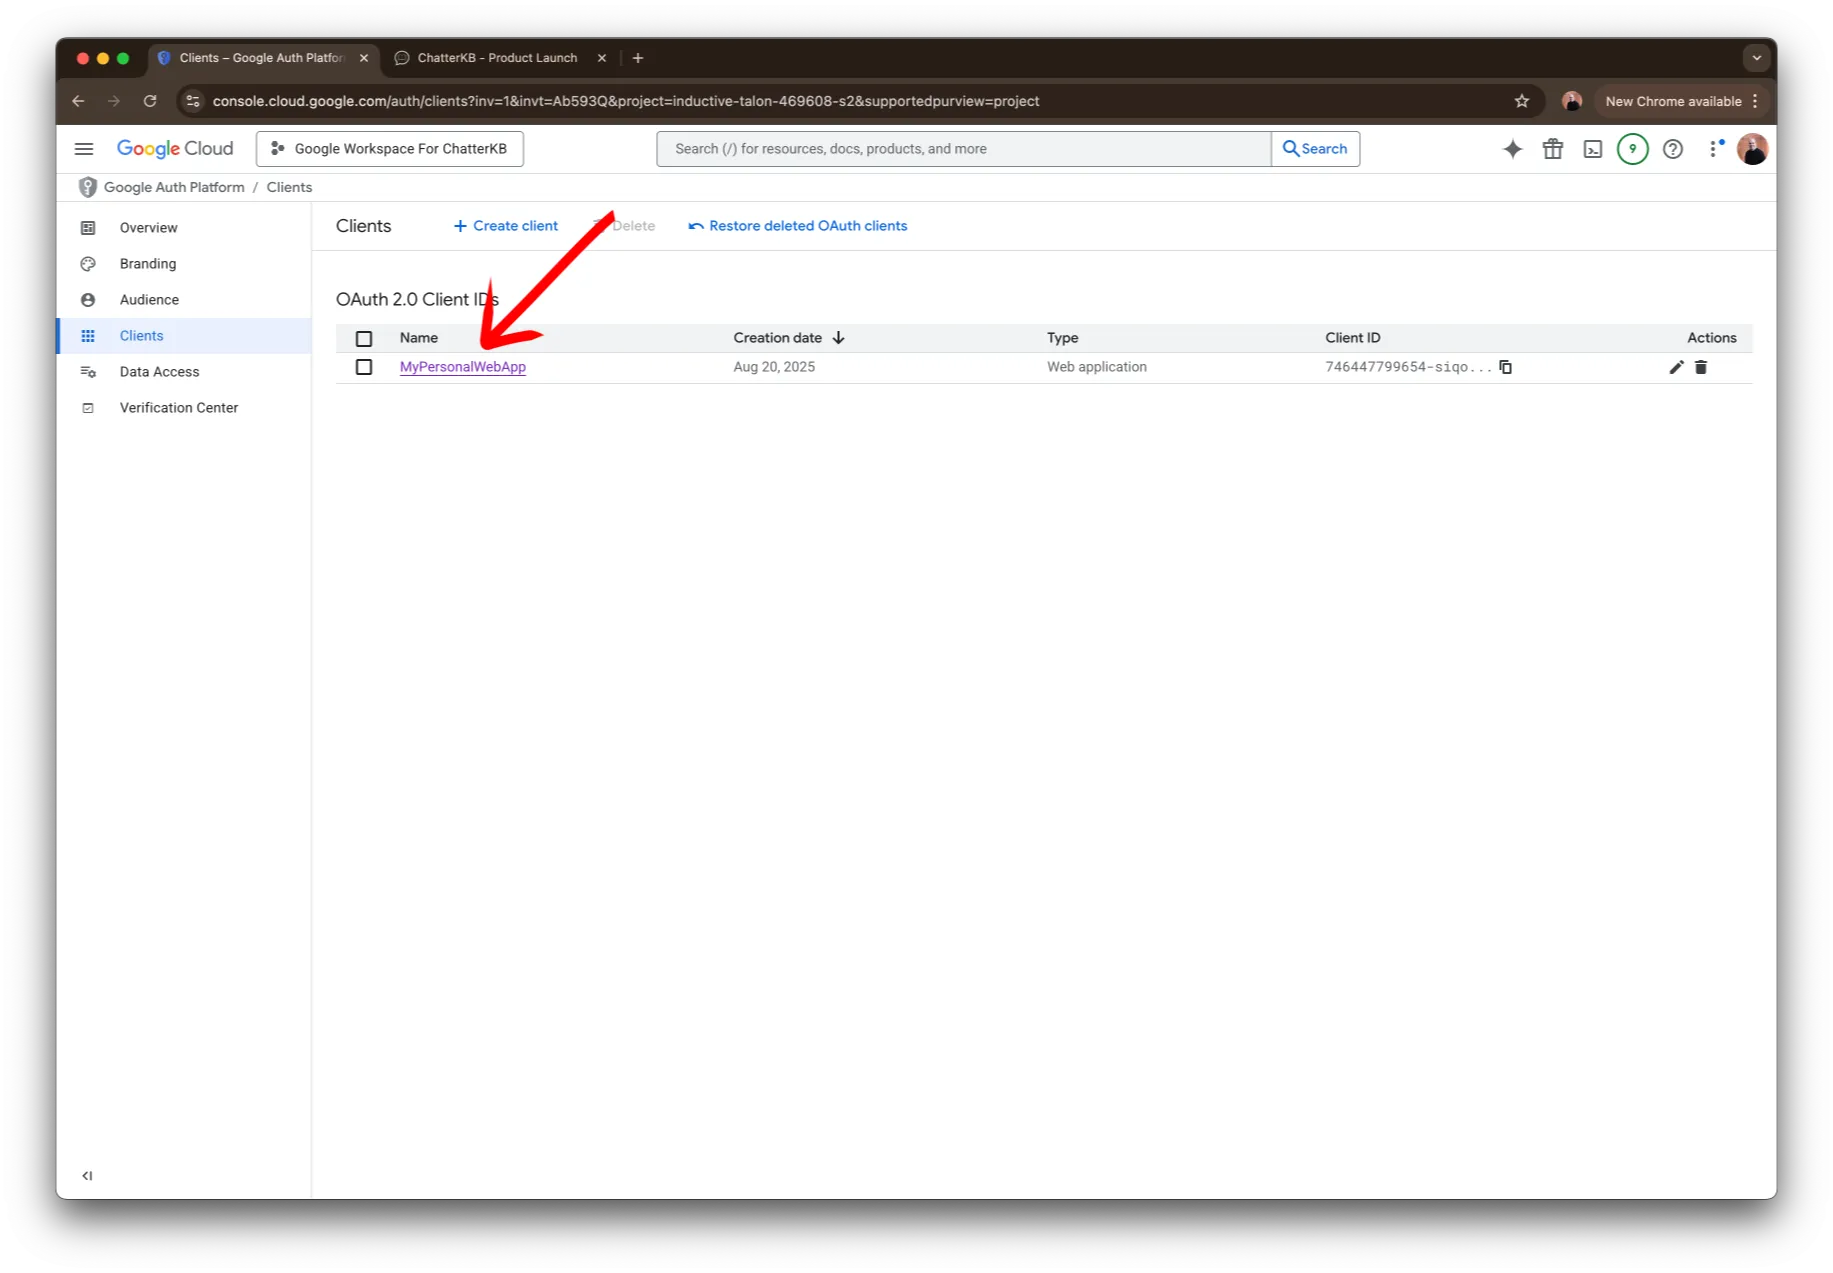
Then, find your OAuth client and click to edit its settings.
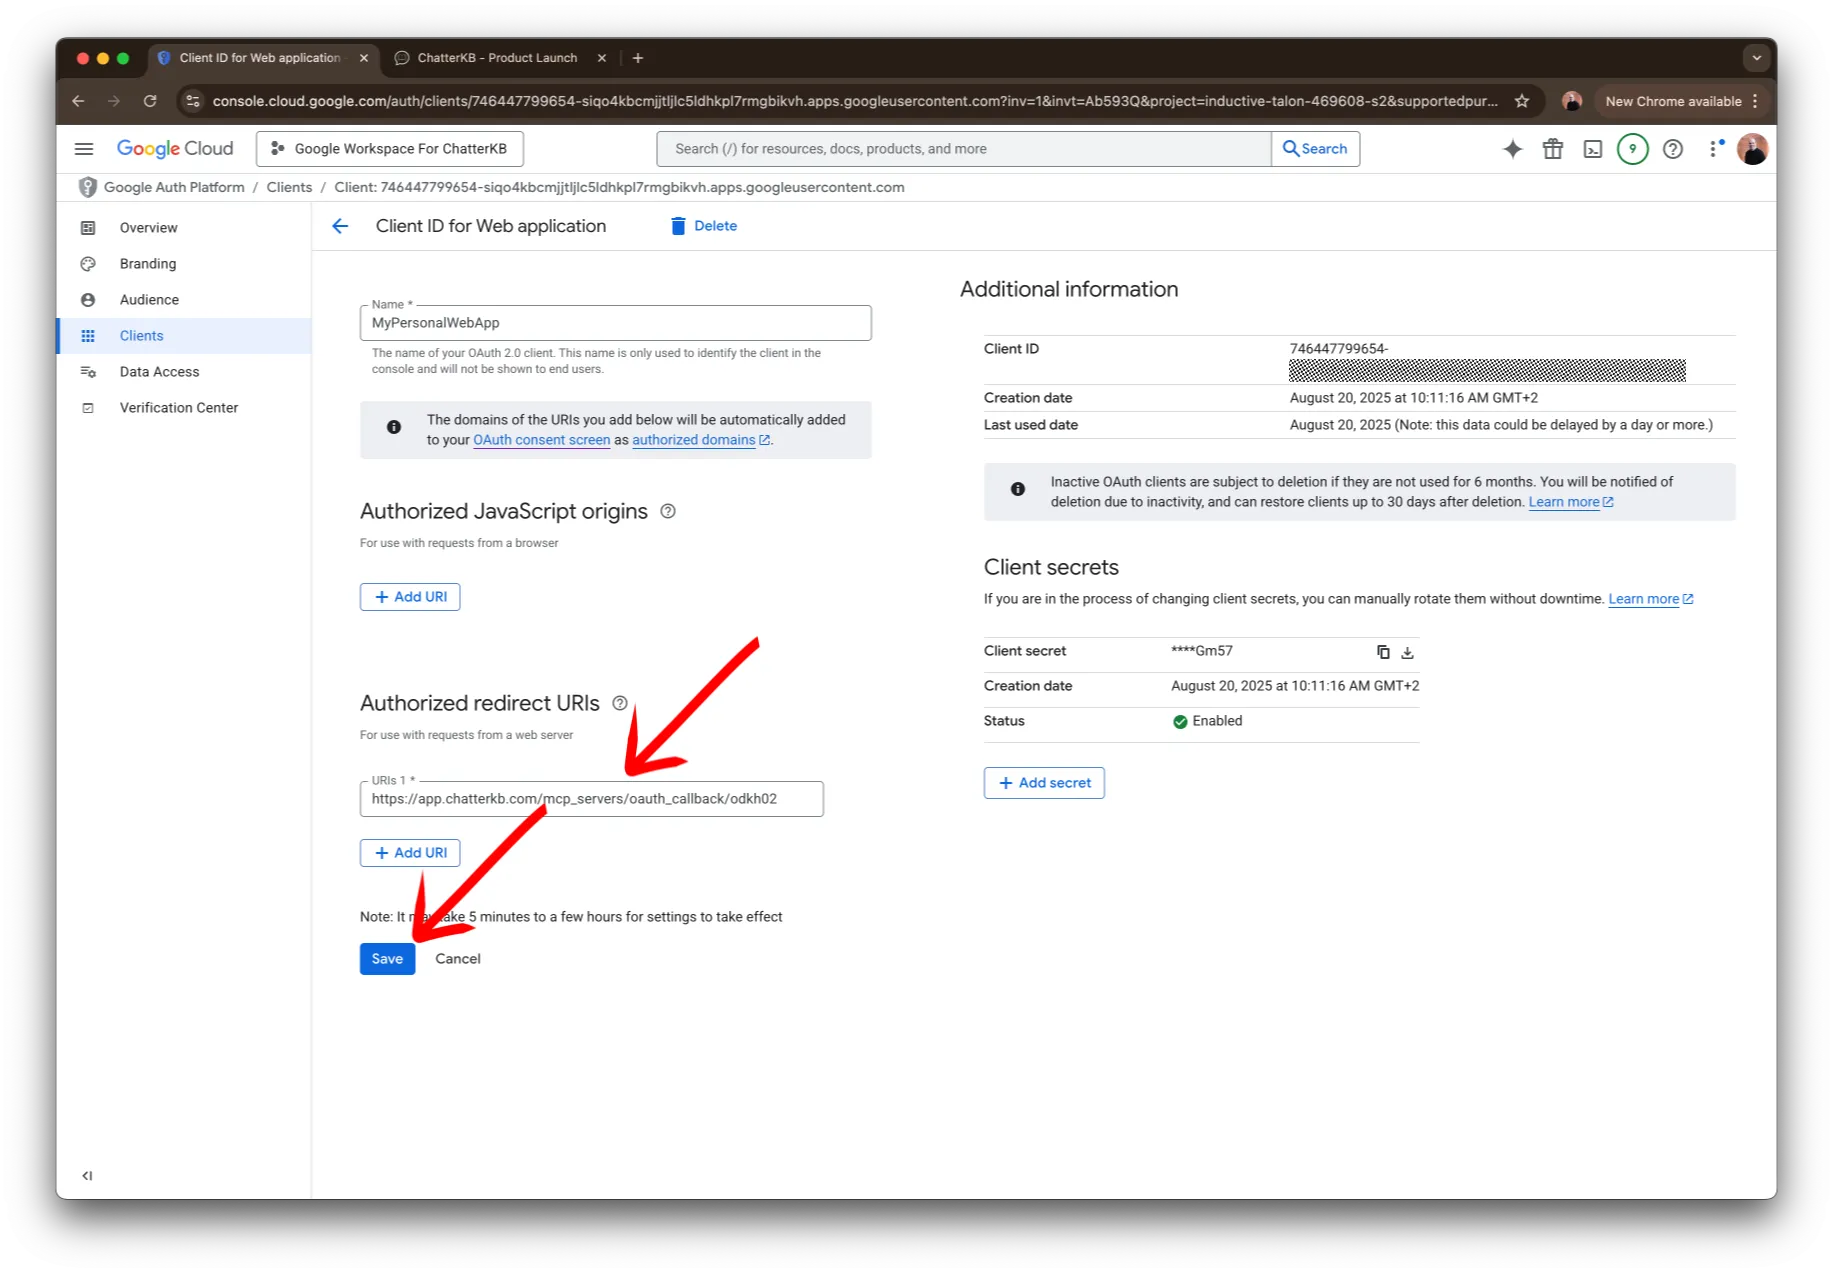
Finally, add the URL you copied to the list of Redirect URI’s. Remember to click on the Save button before you continue.
Connecting ChatterKB to Google
Now all we need to do is connect.
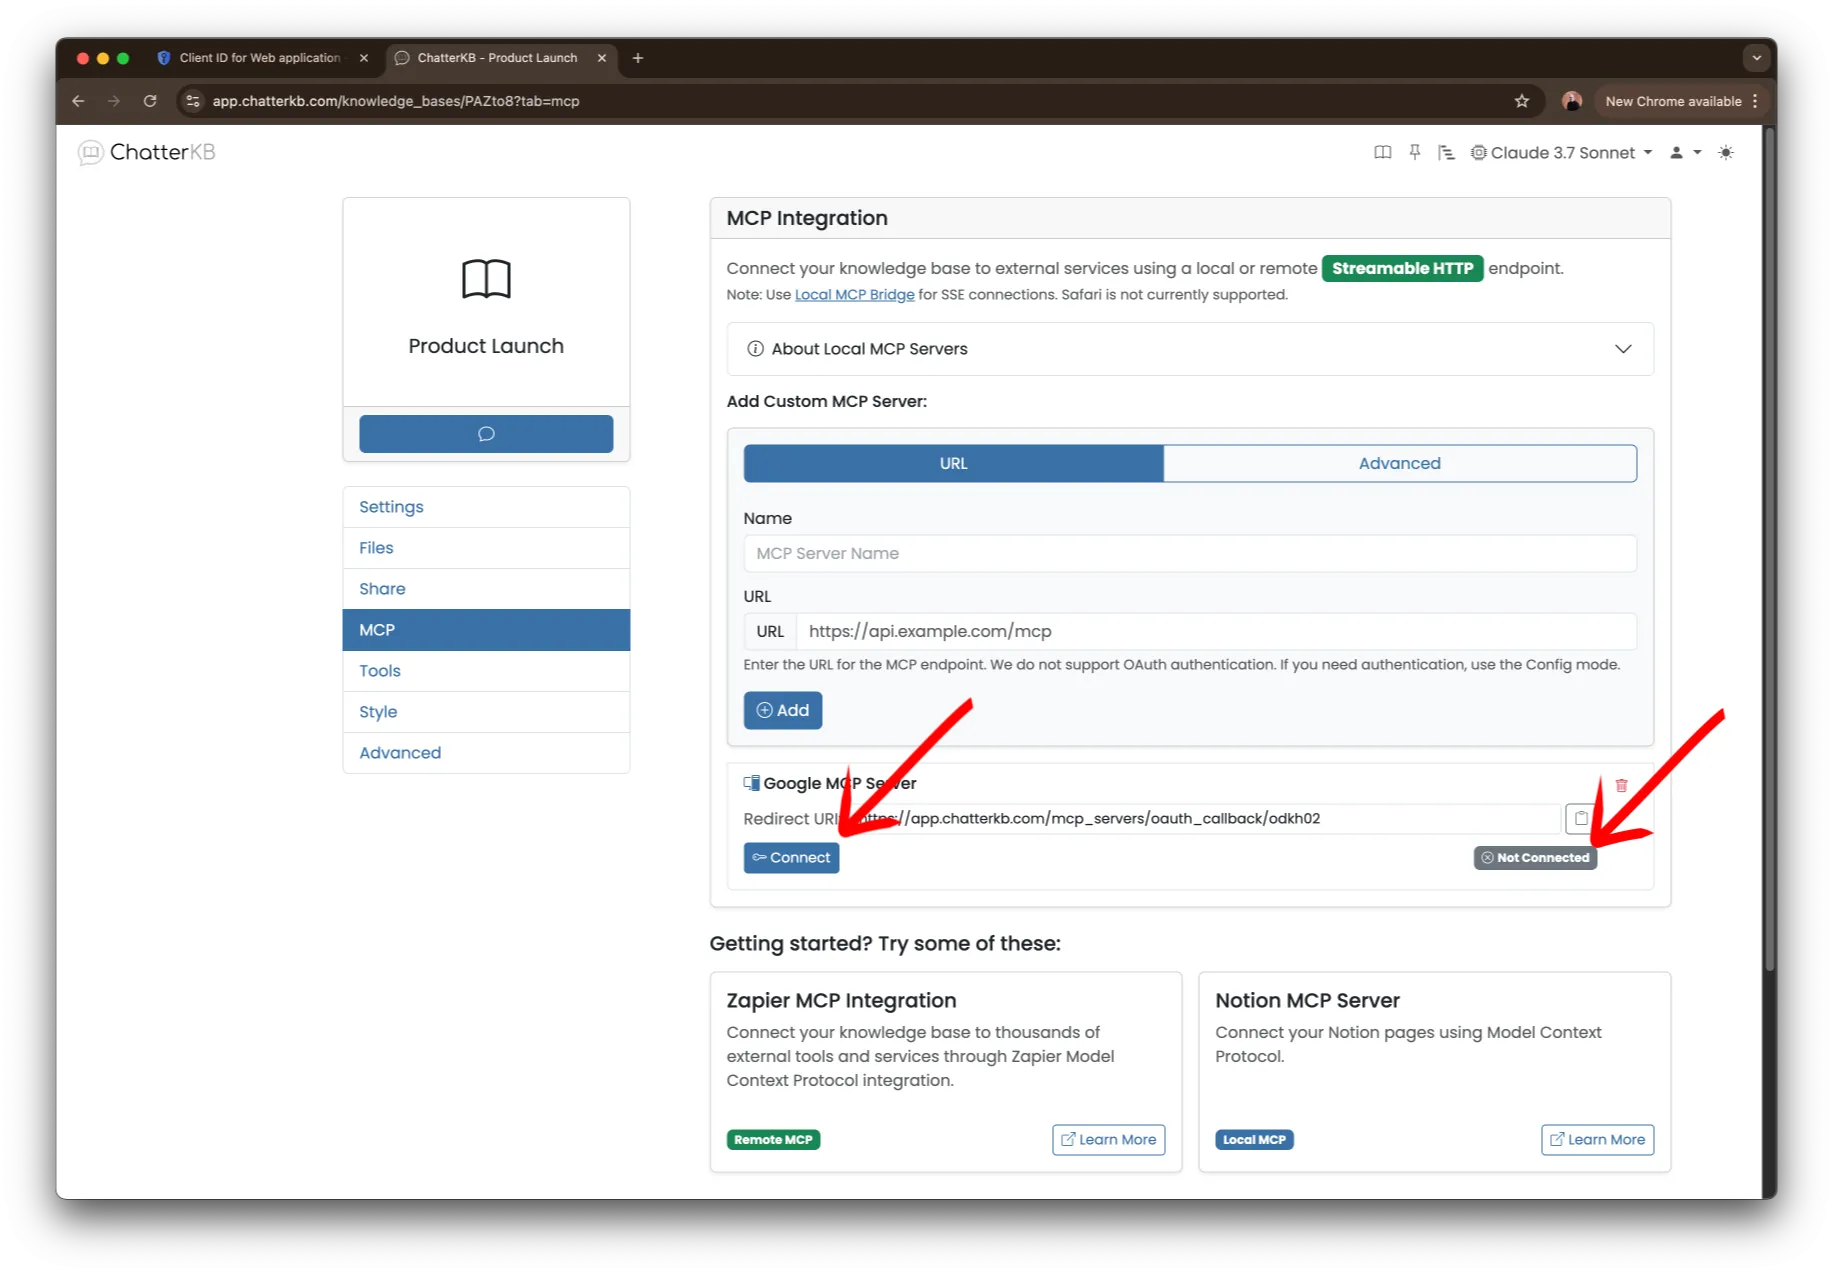
Visit the settings for your ChatterKB knowledge base and click on the MCP item on the left hand side. Then locate the Google MCP server in the list of added MCP servers. It should currently be not connected
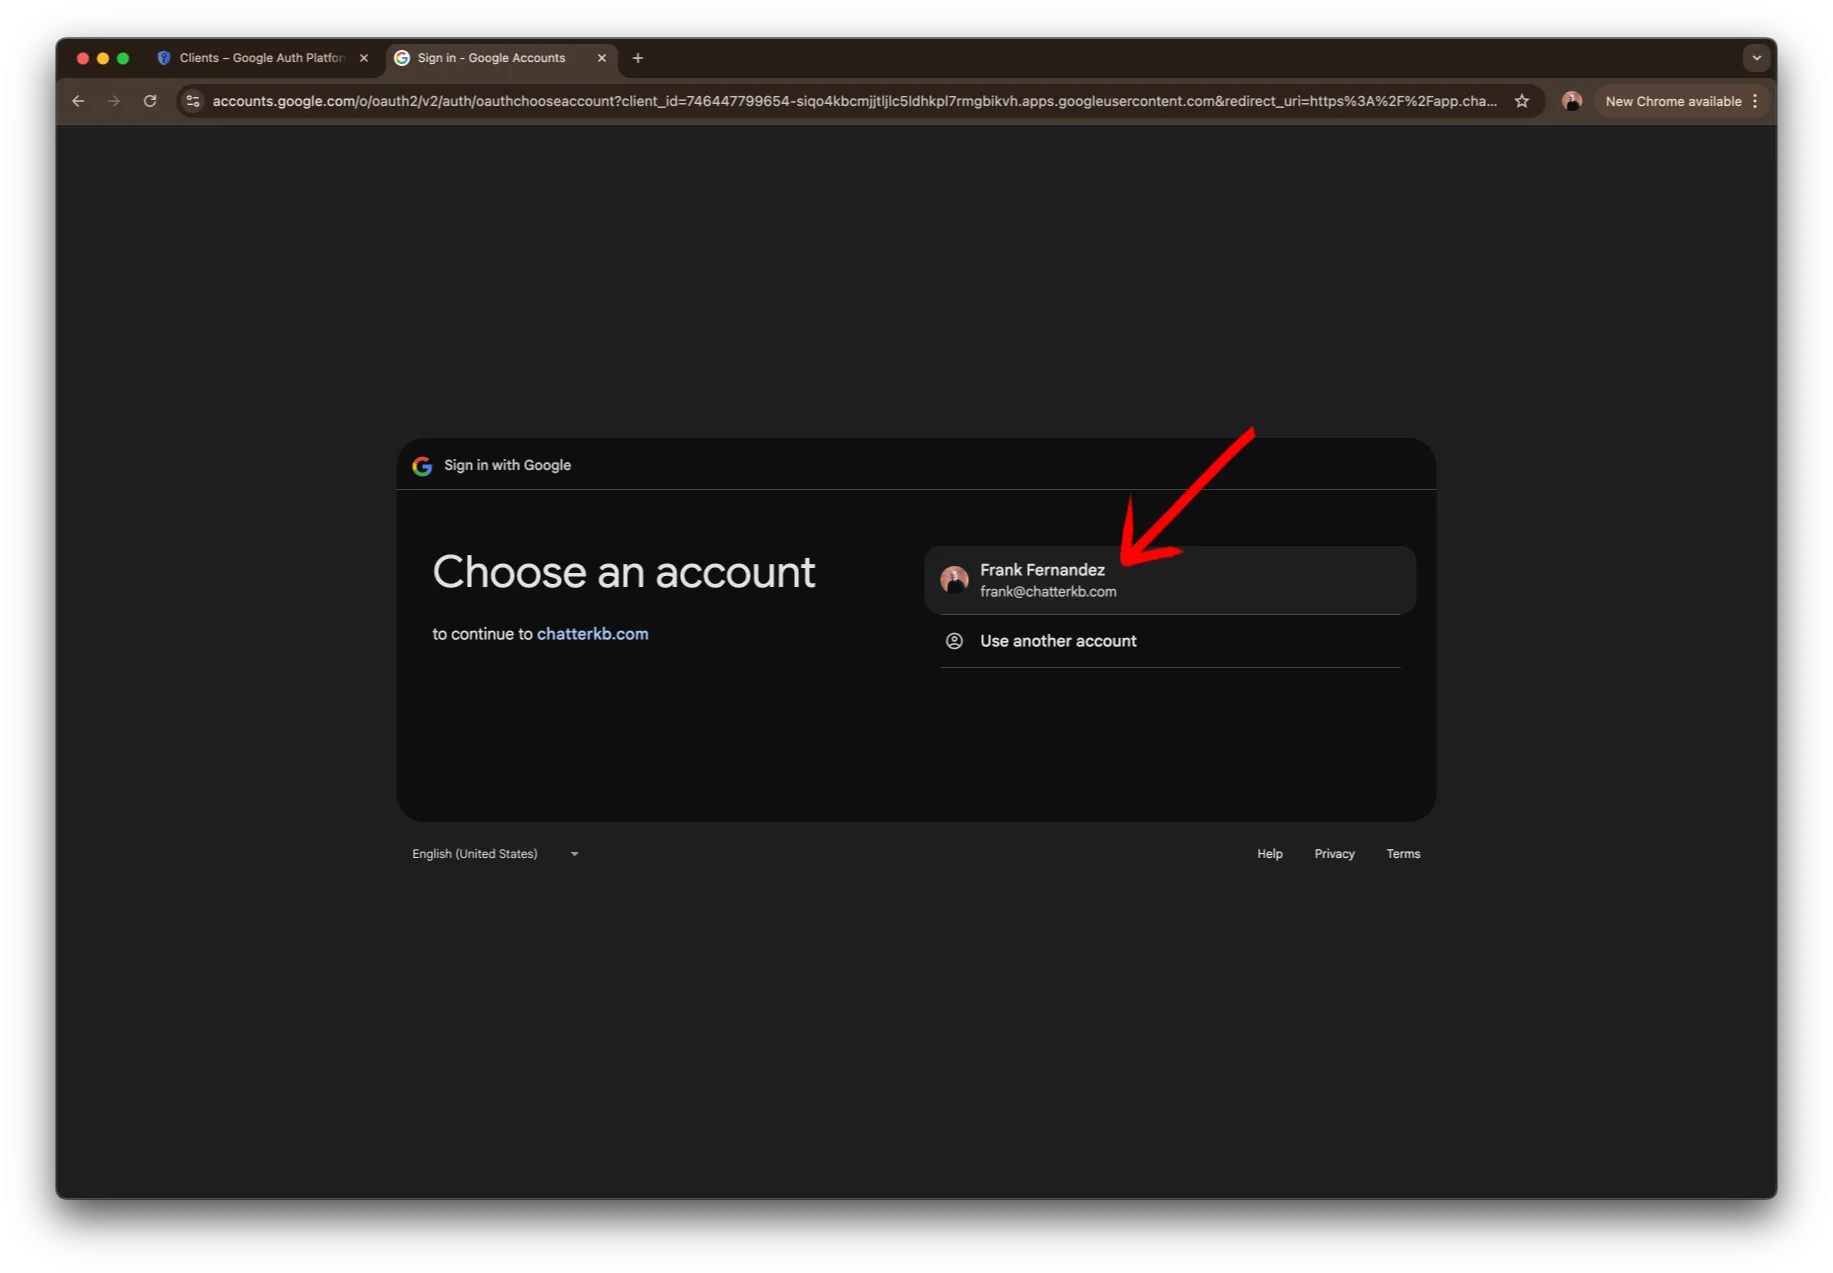
Next, choose the account that you had given your app access to.
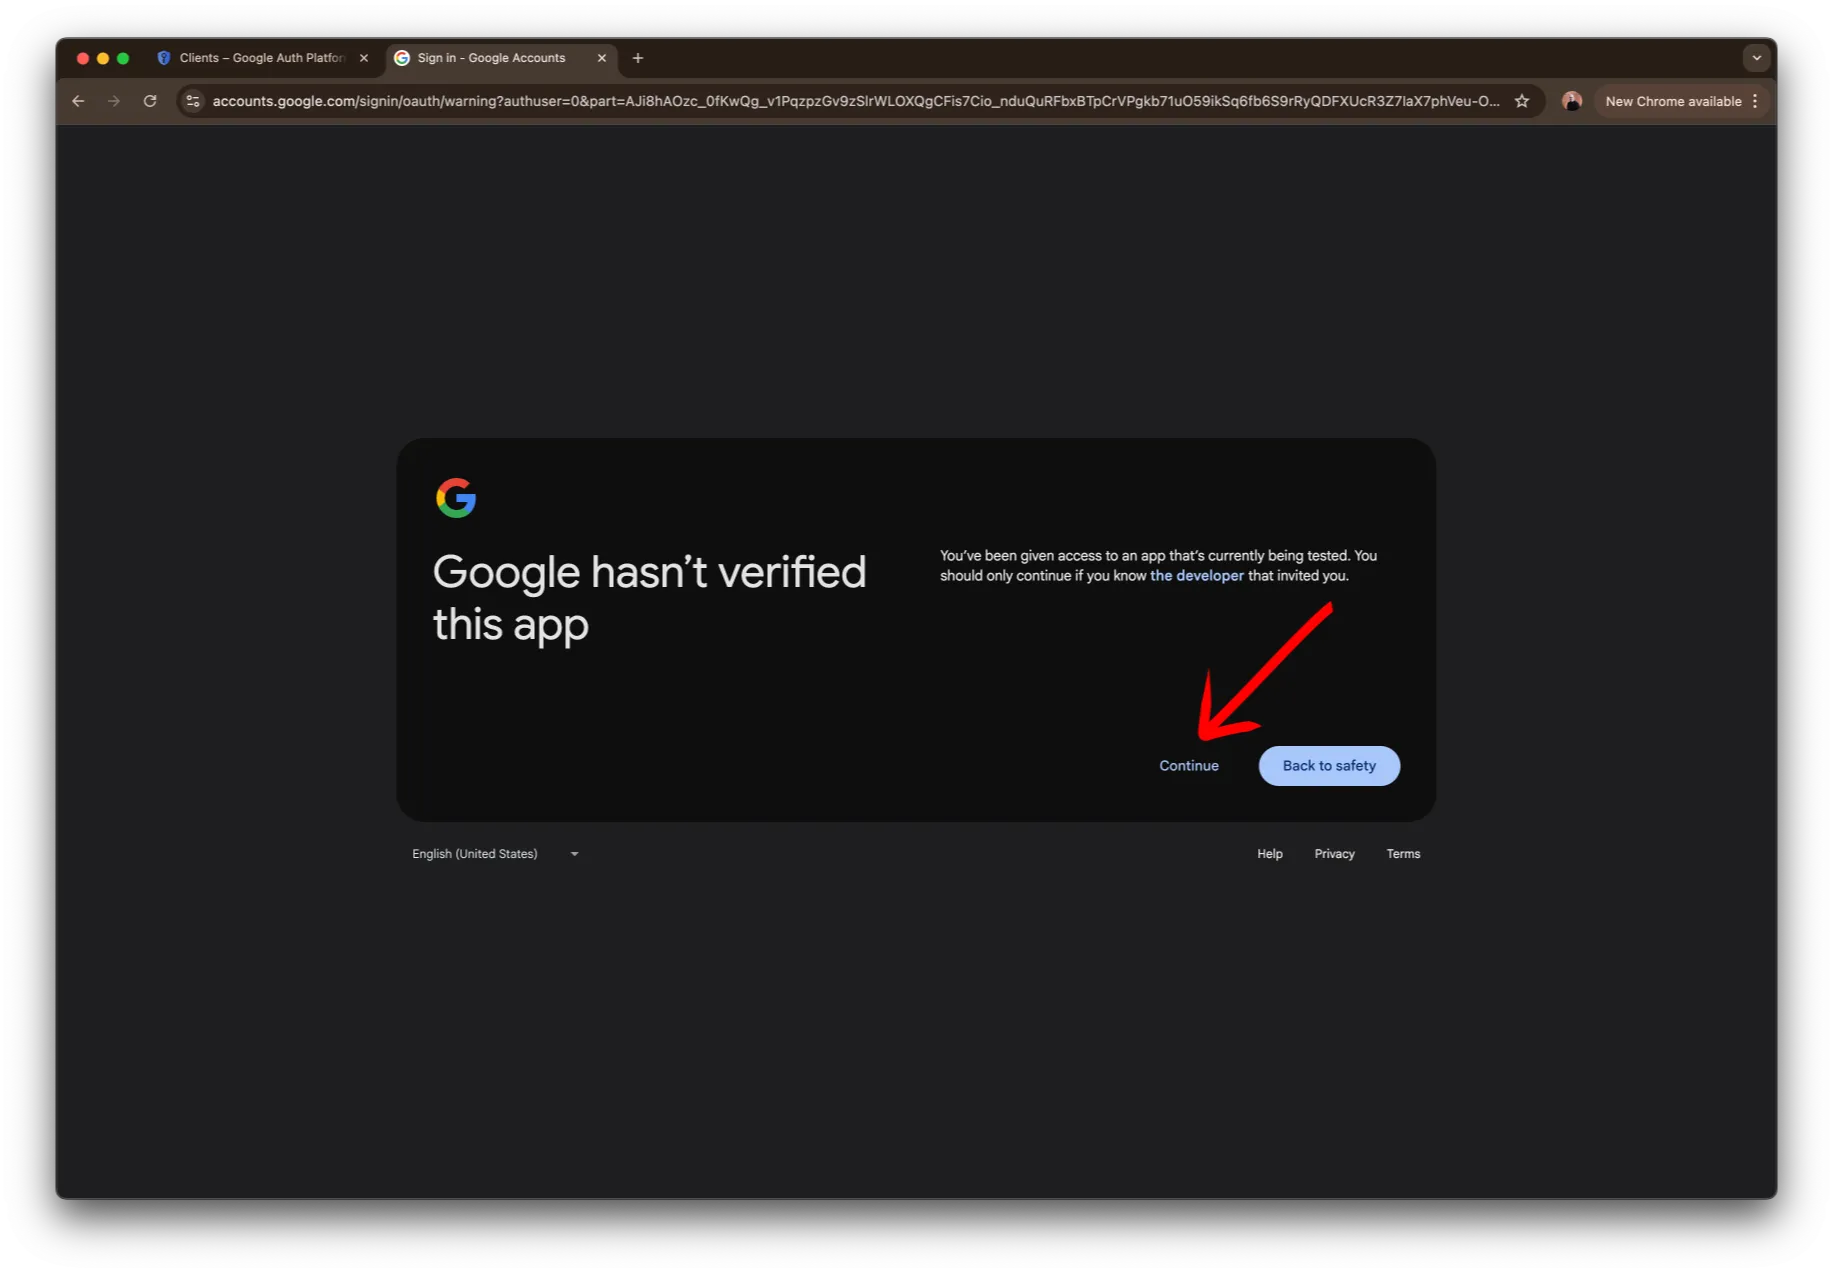
Now, you’ll see a warning that Google hasn’t verified the app. It doesn’t need to because this is your app. You control it and can turn it off whenever you want. Click continue.
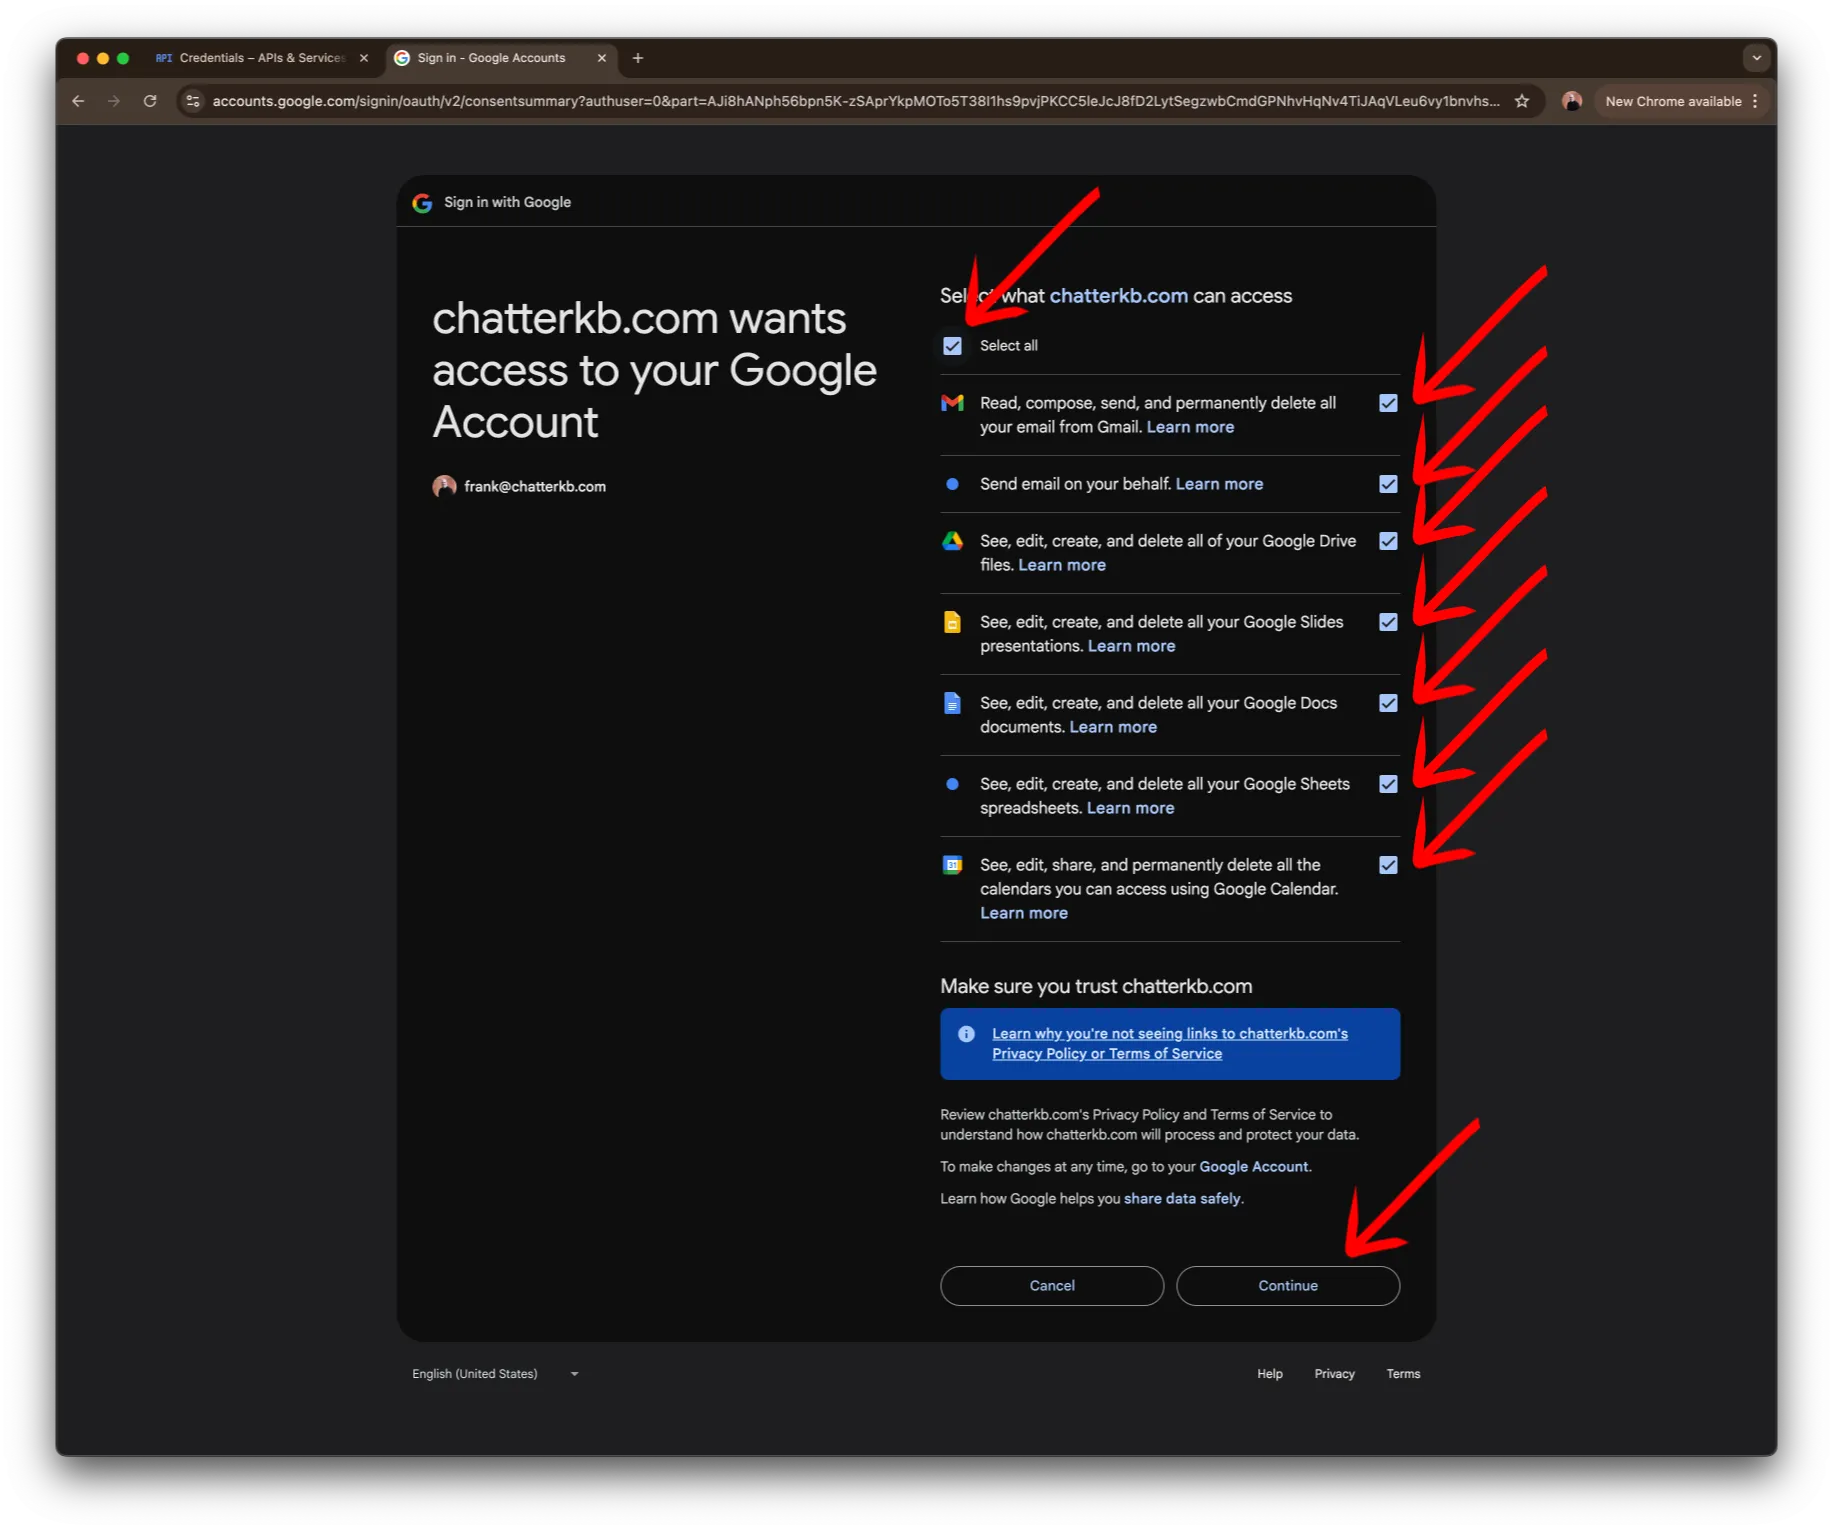
Then, select all of the data you want to let ChatterKB access.
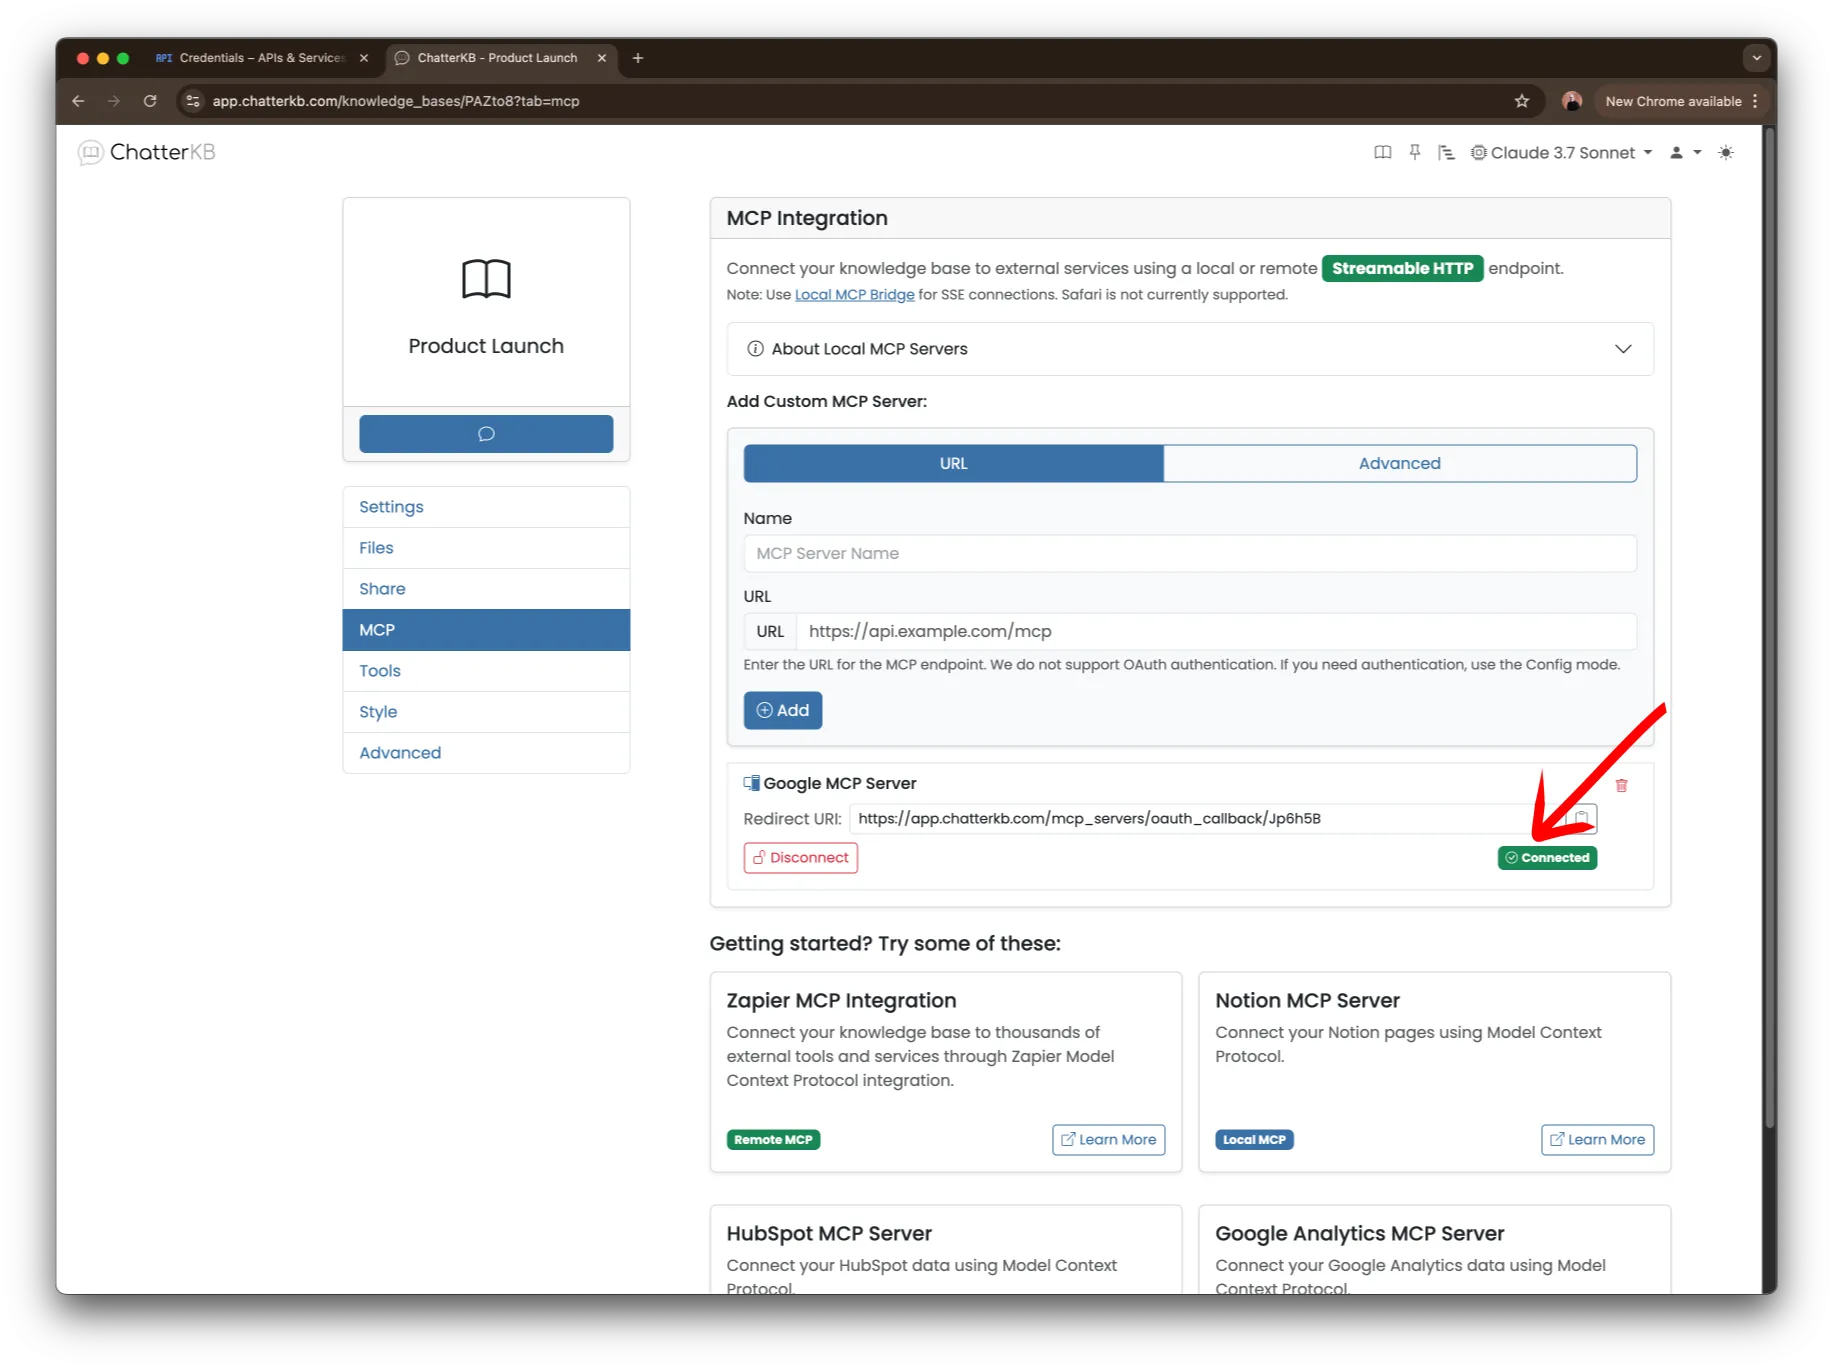
Now, Google will send you back to the MCP settings tab where you should see that the MCP server is now connected
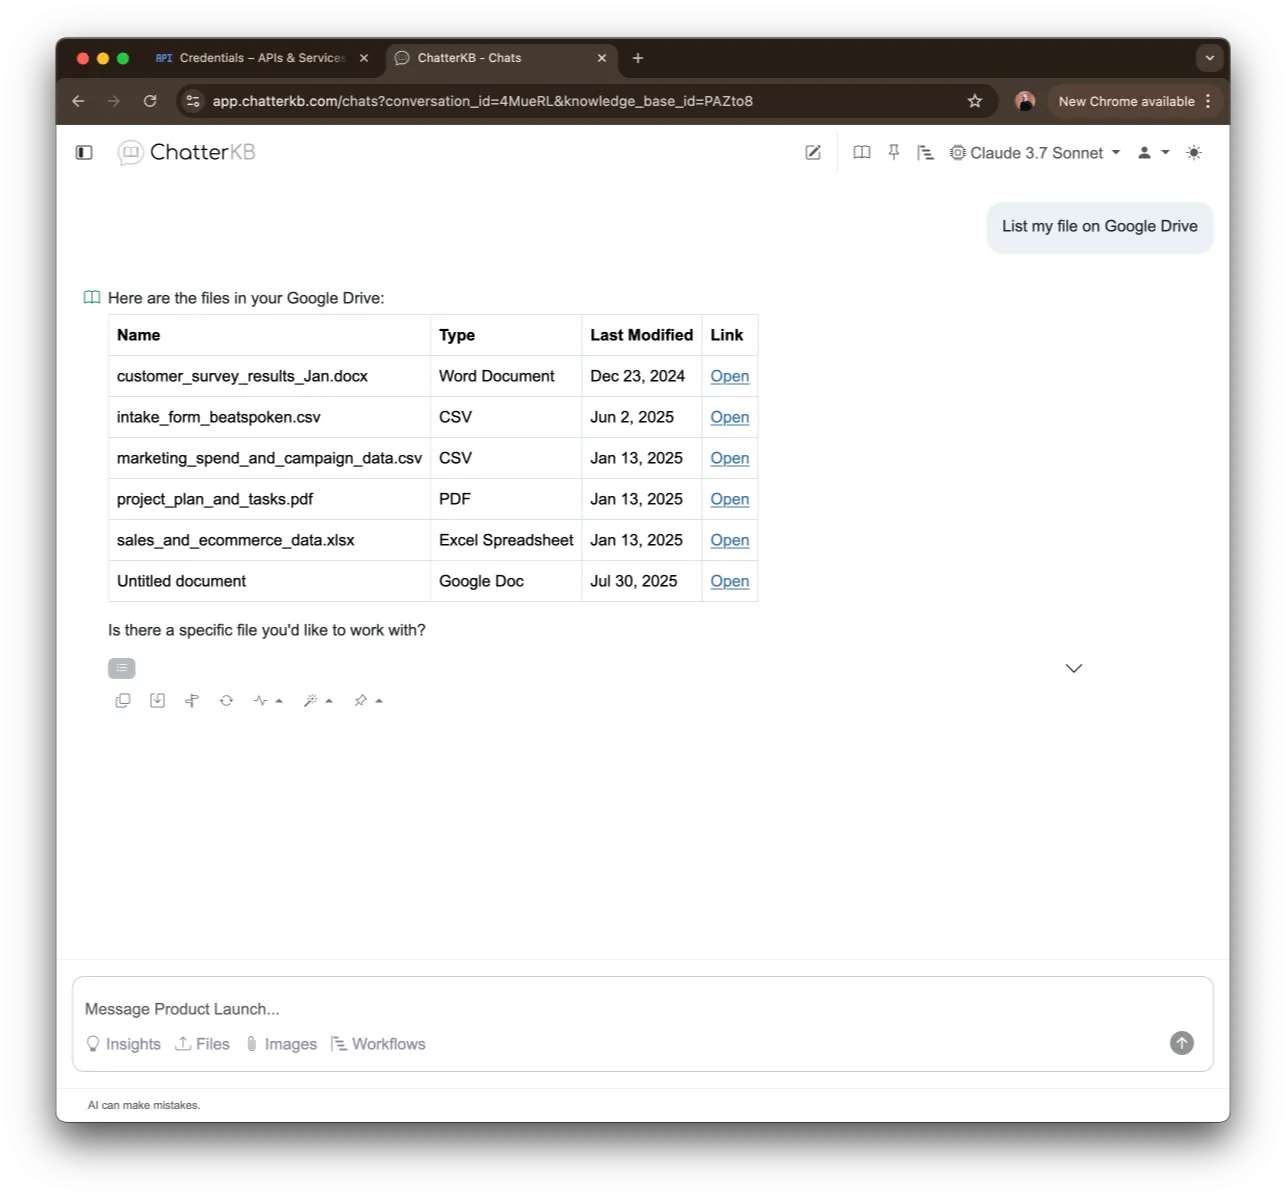
Finally, try it out for yourself. Open a chat and ask it to do something like “List all of my files on Google Drive”